Showing posts with label Along with rice. Show all posts

Tuesday, April 23, 2013

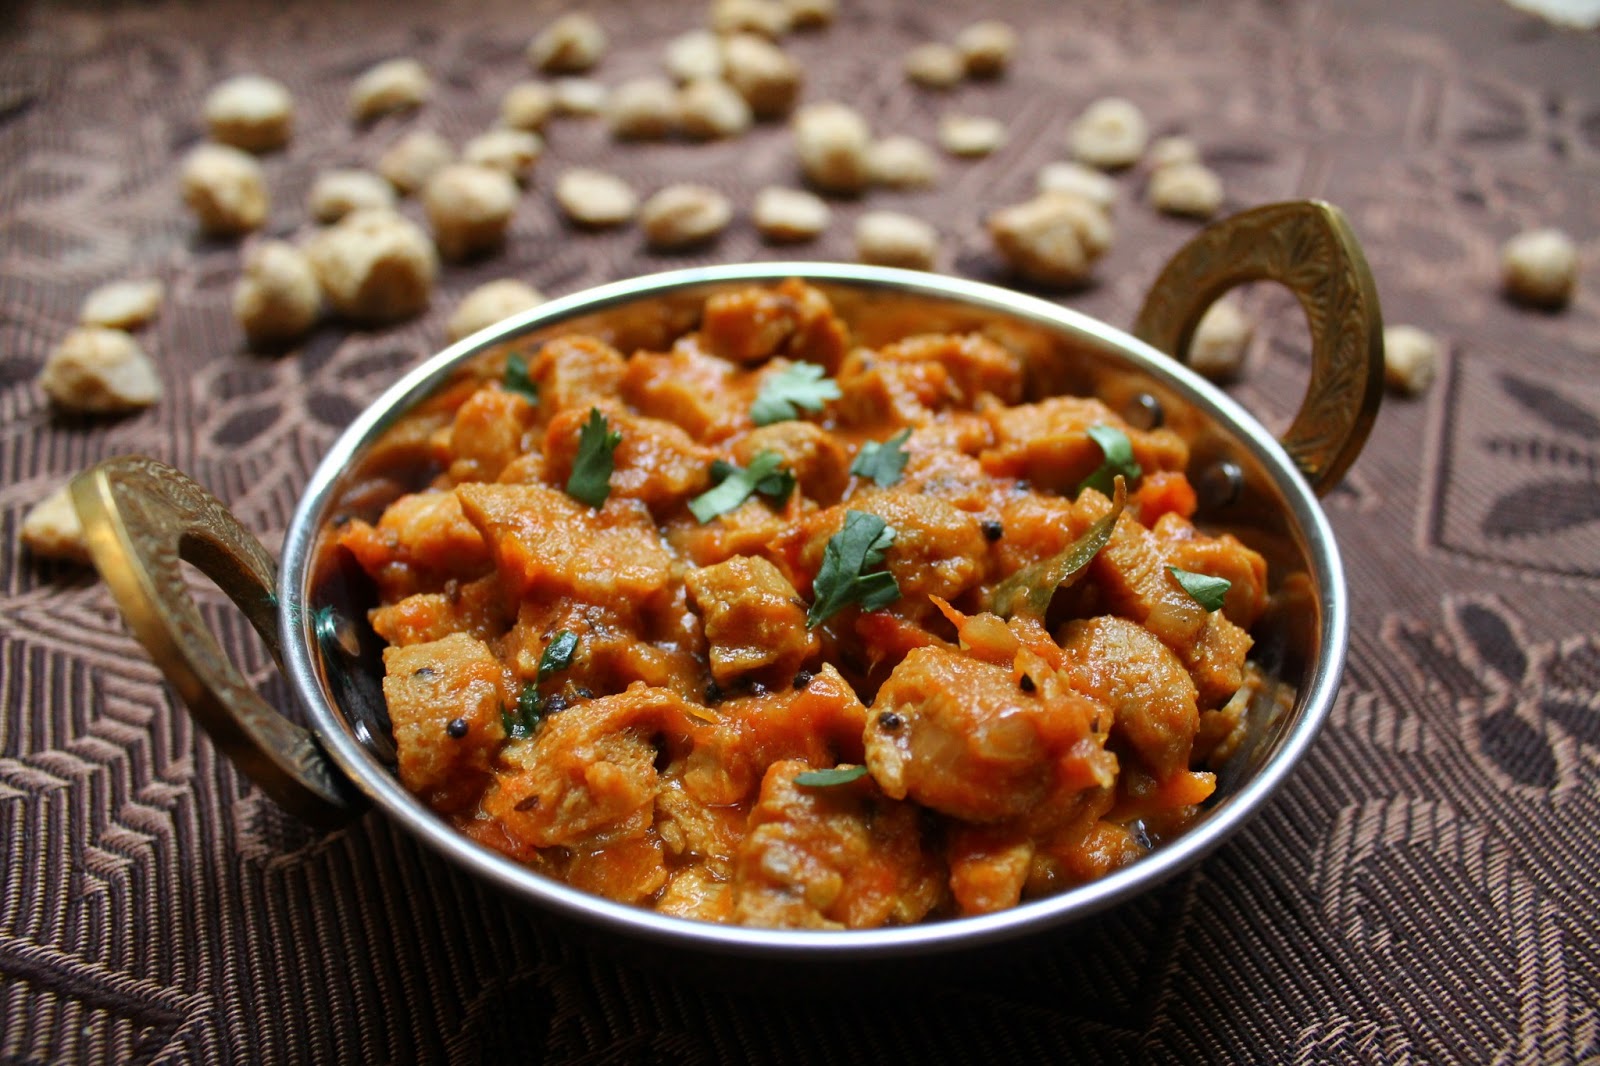
Soy Chunks Curry


If there is a vegetable source that could almost taste like meat it is soy chunks. Soy chunks is also the healthier version of meat with all the protein content and none of the fat. Tempted enough to try it? :). But I have to warn you that it takes a while to get used to the taste of this one. Being a non-vegetarian myself though not an eager one, it took me a while to get hooked on to soy chunks and now I love it. It also depends on how you cook it, you need to be careful to squeeze out all the water content from the boiled soy chunks for it to taste well and infuse in itself the flavour of the curry you put it in. If you do cook it the right way, there is a quite a strong possibility that you will like soy chunks and if you are vegetarian, soy chunks can get you all the nutrients out of the meat. So go ahead and experiment on soy chunks and try to like it because its super healthy.

Ingredients

Serves - 3
Spice Level - High
Prep Time - 20 min
Cook time - 20 min

Soy chunks - 2 cups
Onion - 1 large, chopped well
Tomatoes - 3 medium sized, chopped into medium sized pieces
Ginger-Garlic Paste - 1.5 Tsp
Curry Leaves - 1 sprig
Turmeric - a pinch
Curry Powder/Masala Powder - 3 Tsp
Salt - as per need
Hing - a generous pinch
Mustard seeds - 1 Tsp
Jeera/Cumin seeds - 1 Tsp
Oil - 1 Tbsp


How do you do it

1. Bring few cups of water to a rolling boil in a pan. Add the soy chunks pieces and boil for a couple of minutes, switch off flame. Close the pan with a lid and leave it like that for 20 min

2. After 20 min, drain off all the water, show the bowl of soy chunks under running cold water to cool and rinse. Now take few pieces of soy chunks in you palm and squeeze as much as possible to remove all the water. Repeat for all the pieces of soy chunks and keep aside. This step is important, if you don't squeeze out the water properly, they will smell differently when they are in the curry.

3. After squeezing all the water out, cut each piece in 2 or 4 pieces, the soy chunks tend to become bigger in size once they are on the curry.

4. Heat oil in a kadai. Add hing, mustard seeds, jeera seeds and let them pop. Add the onions, curry leaves and Ginger-garlic paste and cook until the onions turn translucent.

5. Now add the tomato pieces, turmeric and a pinch of salt and mix well. Close the kadai with a lid until the tomatoes cook and turn soft and mushy.

6. At this stage, add the curry powder and saute for a couple of minutes.

7. Add two cups of water to the kadai and bring to boil. Add in the soy chunk pieces, remaining salt and on medium flame let it cook with lid closed.

8. It would take about 15 minutes at this stage for all the water to be absorbed and a thick curry to be formed after which you can switch off flame.

This would be a good side dish for rasam rice, curd rice and Rotis.

Continue Reading >>

Friday, October 12, 2012

Hurry Burry Paneer Curry

Hurry Burry Paneer Curry being very loyal to its name and also rhyming at the same time, can be made in less than 15 minutes :-). Now thats a good reason for you to try this one. I wouldn't say its over the top delicious, but for something that takes no time at all, its definitely a tasty one to keep in my drafts.And talking about rhyming reminds me of the poems - if it can be called that, that I had attempted when I was 7-8 years old with the only rule that it has to rhyme. Now you can go ahead and have a hearty laugh at my expense by reading one such poem that I can recall. There are so many more that I had written like this, but will spare you from all of them ;).

"Birds can fly
Far into the sky,
The grass is green,
But the Ants are mean"

So on that light note, lets move on :-)


Ingredients

Adapted from Easycooking

Serves - 3
Spice Level - Mild
Prep Time - 2 min
Cook time - 15 min

Paneer - 150 gm , cubed
Salt - as per need
Chilli powder - 1 Tbsp
Turmeric - a pinch
Kasoori methi - 1 Tsp , crushed
Oil - 1 Tbsp + 1 Tsp

To Grind into a paste

Onion - 2 , chopped roughly
Tomato - 2, chopped roughly
Carrot - 1 small
Green chilli - 1
Cashews - 5
Cloves - 2
Cinnamon, cardamom - 1 piece each
Milk - 1/3 cup

How do you do it

1. In a mixer jar, put all the contents under "to grind" and blend into a smooth paste. The milk should be enough to grind everything together. Keep aside.

2. Spread 1 Tsp oil on a heated dosa pan and place the paneer cubes and toast them on both sides until they turn a light shade of brown. Remove and keep aside.

3. Heat 1 Tbsp oil in a kadai. Add the blended paste and close with a lid. Let it boil in medium flame for 10 minutes so that the paste gets cooked completely. Remember to close with a lid, once the paste gets heated it tends to splutter. Adjust consistency of curry by adding water if necessary. Add the chilli powder, salt and boil for another 2-3 minutes. Add the crushed kasoori methi and toasted paneer pieces and mix well. Boil for a minute more. Remove from flame.

Serve with  Jeera Rice  for a delicious lunch


Print this Post

Continue Reading >>

Monday, October 8, 2012

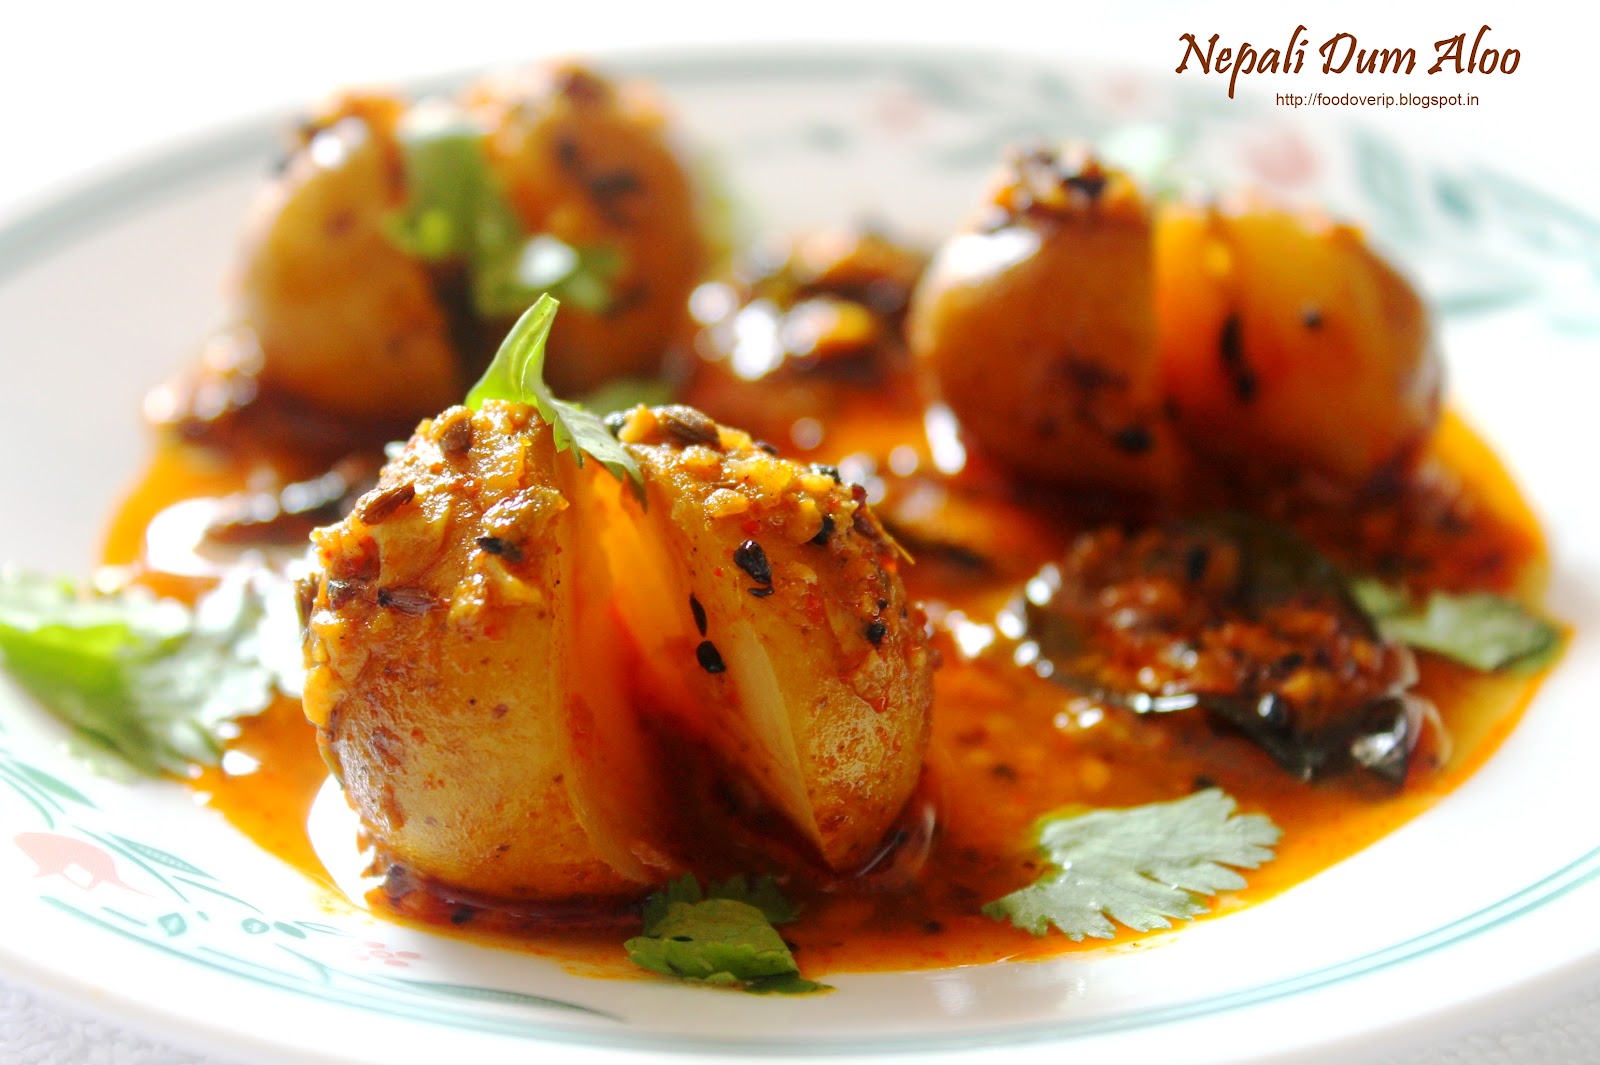
Nepalese Dum Aloo | Baby Potatoes simmered in garlic-chile sauce | 660 curries


I have never waited so eagerly for a cook-book to arrive, leave alone that this is probably the most expensive book I have ordered by far. Raghavan Iyer 660 curries is a modern take on Indian curries written so elaborately that enhances your understanding of Indian flavours/spices. The recipes just entice you. The book is so full of flavorful spice blends, pastes, and 660 curries not just from all over India but also from Nepal/Pakistan/SriLanka . I have spent only 4-5 days with the book and I have already fallen in love with it. If you love "Indian food" this is one must-have Indian cook-book. I will do a detailed review once I am post the honey-moon period with 660 Curries ;)

I had a bag of baby potatoes and as I was flipping through the potato recipe pages, my eyes flirted with the line "Baby potatoes with garlic-chile sauce", I was sold on the idea immediately. Garlic and chili are my two favorite ingredients and it had to be the first recipe I would try from the book. I was blown away with the end dish, the flavors were bursting in my mouth at every bite and it was nothing similar to what I had eaten/cooked before. The sauce was super-addictive and at the end of the meal I was left wishing I had more sauce to lick away :).

I was extremely pleased with my plating for this dish, thanks to Master chef Australia - I have picked up quite a few things from the show. For once I spent more than my usual time visualizing how i wanted to plate it , the idea of running a slit through the potatoes and pouring the sauce over it and garnishing with some leaves worked very well. And S did a splendid job of capturing what I visualized. After-all we eat first with our eyes and nose! :)


Ingredients

Recipe Source - Raghavan Iyer 660 curries

Serves - 2
Spice Level - Spicy and very flavorful
Prep Time - 20 min
Cook time - 20 min


Baby Potatoes - 300 gm [ do not peel, wash and scrub them well]
5 medium sized garlic cloves
2 green chilli
1 Tbsp oil
1/2 tsp cumin seeds
1/2 tsp fennel seeds
1/2 tsp nigella seeds
1/2 Tsp bishops weed or 1/4 tsp dried thyme mixed with 1/4 tsp fresh ground black pepper [I used thyme with pepper]
1 bay leaf
Salt - as needed
1/2 Tsp kashmiri chilli powder
1/4 Tsp turmeric
1 Sprig curry leaves

How do you do it

1. Bring a sauce pan with water to boil and drop the baby potatoes in and let them cook with its lid covered until they are tender but firm looking - 15 minutes

2. While the potatoes are cooking mince the garlic and green chillies together and keep aside.

3. Drain the potatoes, reserve 2 cups of cooking water.

4. Heat oil in a kadai, sprinkle cumin/fennel/thyme-black pepper mix and bay-leaf. Let them roast to give a good aroma - 30 sec. Add the garlic-chile blend and stir fry until garlic is light brown and you get the pungent smell from the chile - 1-2 minutes. Remove the kadai from flame now, add in salt, turmeric powder, kashmiri chilli powder and curry leaves, and mix well. The heat from oil will be enough to cook this.

5. Return the kadai to the flame and add the baby potatoes with the 2 cups reserved water, mix well and bring to boil. Cook in low-medium flame, simmering/stirring now and then until the potatoes are fall-apart tender and the sauce is thickened.

This was a good combination with pulkas. I am sure it would be go well with a bowl of dal and steamed rice.


Print this Post

Continue Reading >>

Monday, October 1, 2012

Murungakai Puzhi Kuzhambu

I love tangy curries and kara/Puzhi kuzhambu tops the list. Veggies like drumstick, ladies finger, radish are best suited to make this kind of kuzhambu. The tanginess and spice is imparted to the vegetable and they taste awesome. Puzhi Kuzhmabu, a poriyal and some papad - makes for an awesome lunch on a cold day.


Ingredients

Serves - 2
Spice Level - High
Prep Time - 20 min
Cook time - 20- 30 min

Drumstick - 1 , cut into medium sized pieces , half cooked in a cup of water [ microwave for 3-4 minutes on high]
Shallots/Small onion - 15 peeled
Garlic pods - 10 peeled
Tomato - 1 , chopped
Curry Leaves - 2 sprigs
Tamarind - size of a lemon
Water - 3 cups
Kuzhambu powder - 4 Tbsp
Coriander powder - 1 Tsp
Salt - as per need
Turmeric - a pinch
Oil - 3 Tbsp
Mustard - 1 Tsp
Hing - 1/2 Tsp
Fenugreek - 1/2 Tsp

How do you do it

1. Make a thick tamarind extract by using 1/4 cup water and the lemon sized tamarind piece. Mix 3 cups of water to it, add the coriander powder, kuzhambu powder mix well. Keep aside.

2. Heat oil in a kadai. Add hing, mustard , fenugreek , curry leaves to temper. Add the shallots and garlic pods and saute well until the shallots turn translucent. Add the tomatoes now, some salt and turmeric and cook till they become soft and mushy.

3. Add the drumstick pieces along with the water used to cook it in and boil for a minute.

4. Add the tamarind extract prepared in step one now, remaining salt, simmer flame and close the lid of kadai.

5. Cook until the curry is reduced in half/thickened or until oil floats on top.

Serve with appalam and steamed rice.


Print this Post

Continue Reading >>

Tuesday, September 25, 2012

Chettinadu Egg Curry

I have been thinking about making this egg curry for almost a month. The thought planted itself on my mind and wouldn't get out until I made it. This happens often with me , I would plan on making a curry the next day, and some how for what ever reason that wouldn't happen. I will spend the next few days visualizing the dish and start craving for it and it would tease me until I got around to do it. This was one such curry. So one fine Sunday afternoon for lunch, we had egg curry with peas pulao.

This chettinadu egg curry is from the book "Authentic chettinadu" which was given to me as a wedding gift. :). I haven't cooked much from it, usually Amma is my source for all the chettinadu stuff, but she doesn't make egg curry that often at home and I liked the version in the book. Its a spicy dish that should pair up quite well with dosai , idli, plain rice as well as any variety rice.


Chettinadu Egg Curry


Ingredients

Recipe Source - Authentic Chettinadu curries book

Serves - 2
Spice Level - High
Prep Time - 20 min
Cook time - 15 min


Egg - 4 [hard boiled, and peel the skin]
Shallots - 10, chopped well
Tomato - 1 Large - chopped finely
Masala/Curry powder - 1 Tsp
Coriander Leaves - few tbsp chopped finely
Oil - 1 Tbsp
Jeera - 1 Tsp
Curry Leaves - 2 Sprigs
Hing - a pinch
Salt - as per need
Turmeric - a pinch

To grind to a paste

Shredded coconut - 5 Tbsp
Dry Red chilli - 2
Pepper - 1 Tbsp
Garlic cloves (small) - 5
Ginger - 1 inch piece
Cumin -1 Tsp
Fennel - 1 Tsp
Coriander seeds - 2 Tsp
Cashews - 4
Curry Leaves - 2 sprigs
Water - few tbsp to grind with

How do you make it.

1. Dry roast the ingredients under "to grind to a paste" on low flame except cashews and curry leaves until it slightly starts to brown and you get a good aroma. Cool and blend including the curry leaves and cashews with few tbsp of water into a fine paste.

2. Make slits in the boiled egg so the curry can get in. Just make light slits, not too deep, we dont want the egg to break when its added into the curry.

3. Heat oil in a kadai. Add jeera, hing and curry leaves. Let it roast. Add shallots and saute until they are translucent. Add the tomato pieces , little salt and turmeric and cook until they are soft and mushy and let out juice.Add the masala powder and cook for a minute. Now add in the paste and saute for a few seconds. Add 3/4 cup water and remaining salt and let the curry boil. Adjust consistency of the curry according to your needs here - add more water if you need a loose curry or let it boil to thicken if you want a thicker consistency.

4. Once the curry reaches the correct consistency and the paste has cooked well, add the egg pieces and coriander leaves and wrap gently. Switch off flame.

Allow the gravy some resting time before serving.

Print this Post

Continue Reading >>

Saturday, September 8, 2012

Chettinadu Mandi

This is a signature Chettinadu side dish and always takes an important place in our Vazhai-elai saapadu [banana-leaf lunch]. I am huge fan of this side dish and so is S. I could get away without making anything else for lunch when we have mandi. Curd rice, mandi and appalam is an awesome combination for a very satisfying lunch.

You would be surprised at what forms the base of this dish. Mandi/Arisi Mandi is the water collected when you wash idli rice. You could collect this water while making idli batter or dosai batter and refrigerate it for later use. This arisi mandi water is what makes the dish very tasty and quite unique. I would highly recommend you to try this dish , its a guaranteed hit. :-)

Mandi


Ingredients

Serves - 2
Spice Level - Moderately Spicy
Prep Time - 20 min
Cook time - 15 min

Arisi Mandi - 3 cups
Shallots/sambar onion - 15 , peeled and chopped lengthwise.
Garlic - 15 , peeled , don't chop it.
Green chilli - 4, slit lengthwise and cut in half
Potato - 1, chopped into medium sized pieces
Radish - 1 , sliced into thin pieces
Beans - 5 , cut into medium sized pieces
Drumstick - 1 , cut into medium sized pieces
Ladies finger - 5, cut into medium sized pieces
Tamarind - size of a small lemon, extract juice from this and keep aside.
Oil - 2 Tbsp
Mustard - 1 Tsp
Fennel - 1 Tsp
Curry Leaves - 2 sprigs

When you make idli batter or dosai batter, before soaking idli rice, wash 3 cups of this rice once very lightly and drain. Add 3 cups water to this rice and soak for 10 minutes. Now what you need to do is dip your hand into the bowl and wash the rice well so you get a foggy water. Try to wash as much as possible to get a thick arisi mandi. Now collect this water and refrigerate and use while making mandi. This water would stay good for about 2 days.

Its not necessary to use all the above veggies, you could use 3-4 from the list. Other vegetables like mochai, avarkai , keerai can be included. No English veggies like carrot/cauliflower/cabbage etc should be used.

How do you do it

Firstly mix bhindi/ladies finger with 1 tsp oil , 1/4 tsp salt and microwave on high for 4-5 minutes. Keep aside. This is to make sure the bhindi gets cooked easily without being slimy later.

Take 1 cup of Arisi Mandi and mix with the tamarind juice and keep aside.

Heat oil in a kadai. Add mustard, let it splutter. Add fennel,curry leaves now. Then add in the onions, garlic. Saute for a couple of minutes. Add green chilli , saute till onions are translucent.Add in the bhindi now and make sure they are cooked well , it should not be gooey. Now add in all the other veggies except for potato and saute for 2 minutes. Add the 2 cups of arisi mandi now. When the mandi starts to boil, add in the potato pieces too. When the potatoes are half cooked, add the tamarind water mixed with mandi , salt and cook on medium-low flame until all veggies are cooked well. Let the curry boil at the end for about 2-3 more minutes before switching off flame. The consistency of the mandi is such that its neither too thick nor too watery. So if its too thick, add water , boil for few more minutes, if its too watery, continue simmering until curry thickens.

Serve with curd rice and appalam. 

Print this Post

Continue Reading >>

Friday, September 7, 2012

Gobi Manchurian

I have been sleeping so much this week and here I am awake at 2.30 am browsing TV channels and there is nothing interesting to watch, also Divya requested this post soon so she could try it over the weekend :). So I thought I might as well compose this post and put it up.

Gobi Manchurian needs no introduction, atleast in India it doesn't ;). I wonder why this dish is so popular here and nobody gets bored of this dish. Have you seen that map picture where they mark the china area as "Gobi Manchurian" ? These days Gobi Manchurian reminds me of that map picture and  I go he-he!.

A favorite restaurant starter order for many, but its quite easy to make it at home as well. If you make Indo-Chinese at home often, you must already be having all the ingredients for the sauce. So make Gobi 65 and the sauce, dunk the Gobi 65 in the sauce and your Manchurian is ready.

Gobi Manchurian


Ingredients

Serves - 2
Spice Level - Moderately spicy
Prep Time - 20 min
Cook time - 20 min


Make Gobi 65 for a medium sized cauliflower.

For the sauce

Spring Onion white part [bulbs] - 5 , sliced thinly
Spring Onion green part - 3-4 Tbsp
Garlic cloves - 5 chopped finely
Capsicum - 1/2 , chopped thinly 1 inch pieces
Green Chilli - 2 , chopped finely
Soya sauce - 1 Tsp
Tomato Ketchup/Sauce - 2 Tbsp
Green Chilli sauce - 1 Tsp
Red Chilli Sauce - 1 Tsp
Corn flour - 1 Tsp mixed with 2 Tbsp water
Salt - as per need
Oil - 3 Tbsp


How do you do it

Make Gobi 65 as done here and keep aside

Heat oil in a kadai. Add the chopped garlic and saute on medium heat for a minute. Add the spring onion white part , chopped green chilli and saute for 3-4 minutes until it starts to sweat. Add the capsicum pieces and saute for a couple of more minutes. Now add the soya sauce,tomato ketchup, green chilli sauce,red chilli sauce, salt and mix well. Let it heat for a minute. Add the corn flour paste now and mix well. Add the gobi 65 and spring onion green part now and wrap well. Saute for a minute more and switch off flame.

Garnish with spring onion greens and serve with any variety rice of your choice or with roti/naan.


Print this Post

Continue Reading >>

Tuesday, September 4, 2012

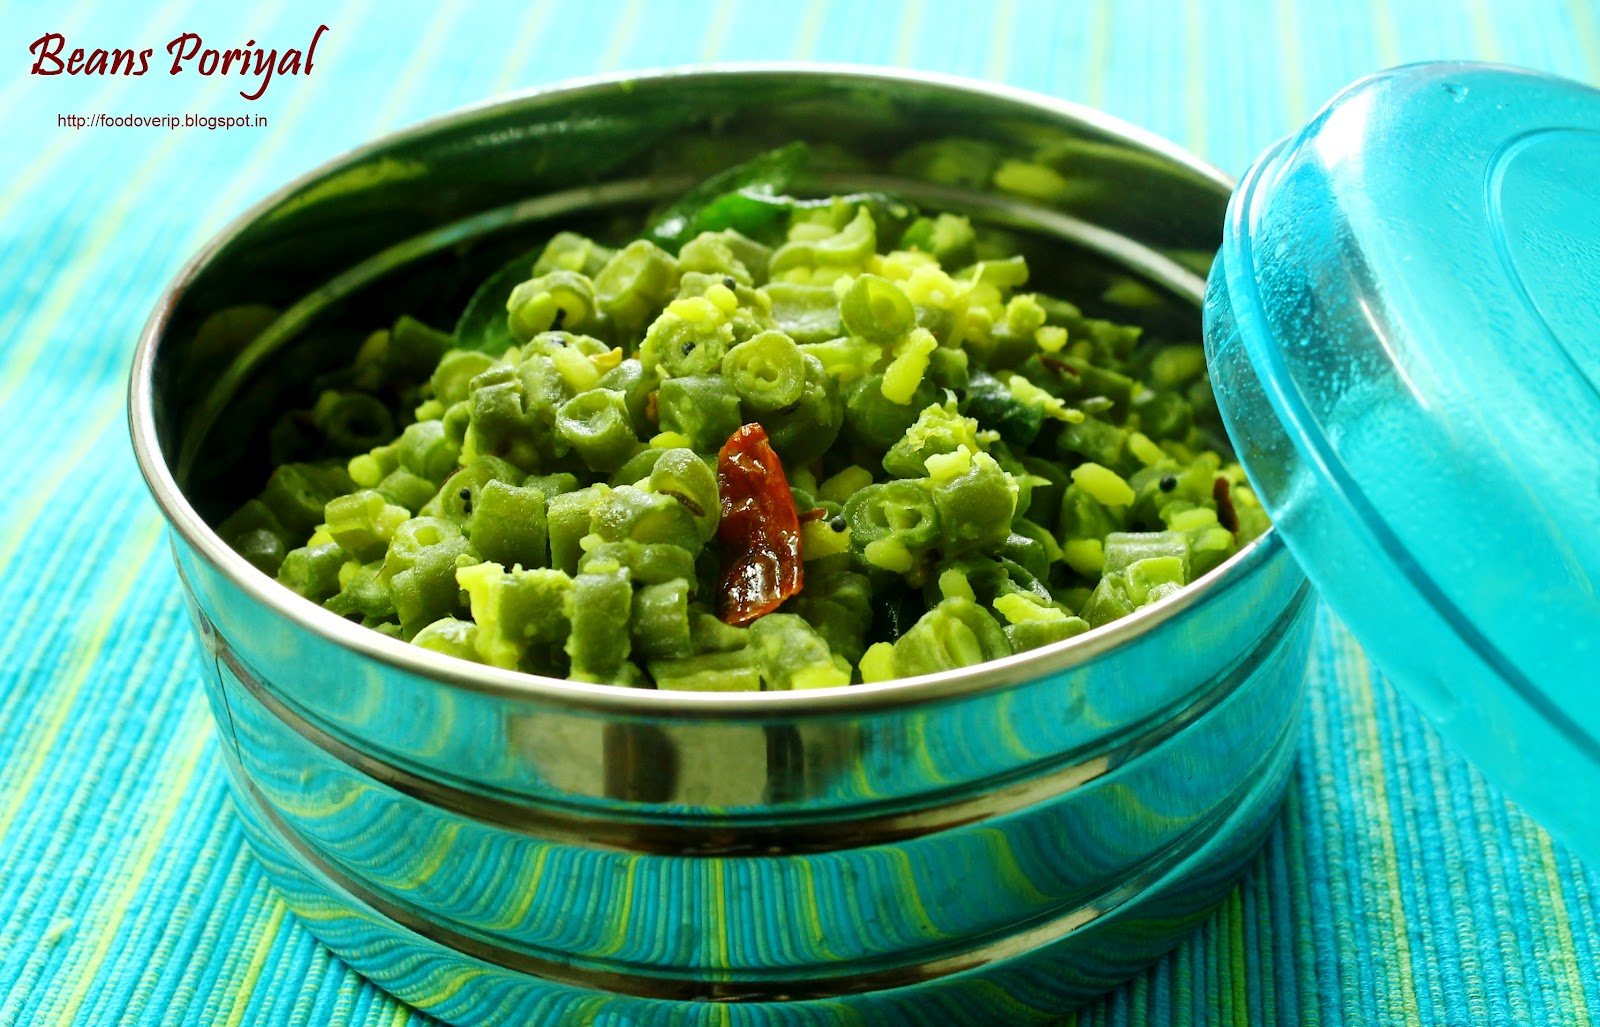
Bean Paruppu Poriyal | Beans-Moong dal stir fry

Combine beans and moong dal for a poriyal dish and its the tastiest poriyal ever. I don't prefer making poriyals with grated coconut, I would like a dal to be used instead and this does get many folks to like the poriyal rather than considering them to be quite boring. Try this poriyal and it would become a favorite, trust me!.

Beans Poriyal


Ingredients

Serves - 2
Spice Level - Moderately Spicy
Prep Time - 20 min
Cook time - 10 min


Moon dal - 1/4 cup , pressure cooked with a pinch of turmeric such that its tender but doesn't get mashed when added later
Beans - 250 gm , chopped into small pieces and steamed until tender
Oil - 1 tbsp
Mustard - 1 Tsp
Urad dal - 1 Tsp
Jeera/Cumin  - 1 Tsp
Dry Red chilli - 1
Curry leaves - 1 sprig

How do you do it

Heat oil in a kadai. Add mustard, urad dal, jeera and let it roast. Break the red chilli and add along with curry leaves. Add the boiled beans, half the amount of salt and saute for a 3-4 minutes. Add the boiled moong dal and mix well. Add remaining salt and saute for a couple of more minutes. Remove from flame.

Serve with rice and some spicy gravy/kuzhambu

Notes

I prefer the moong dal being tender but firm such that it doesn't get mashed when added to the beans. But amma boils the moong dal quite well, so that it gets mashed when added later. You may do it either way.


Print this Post

Continue Reading >>

Sunday, August 19, 2012

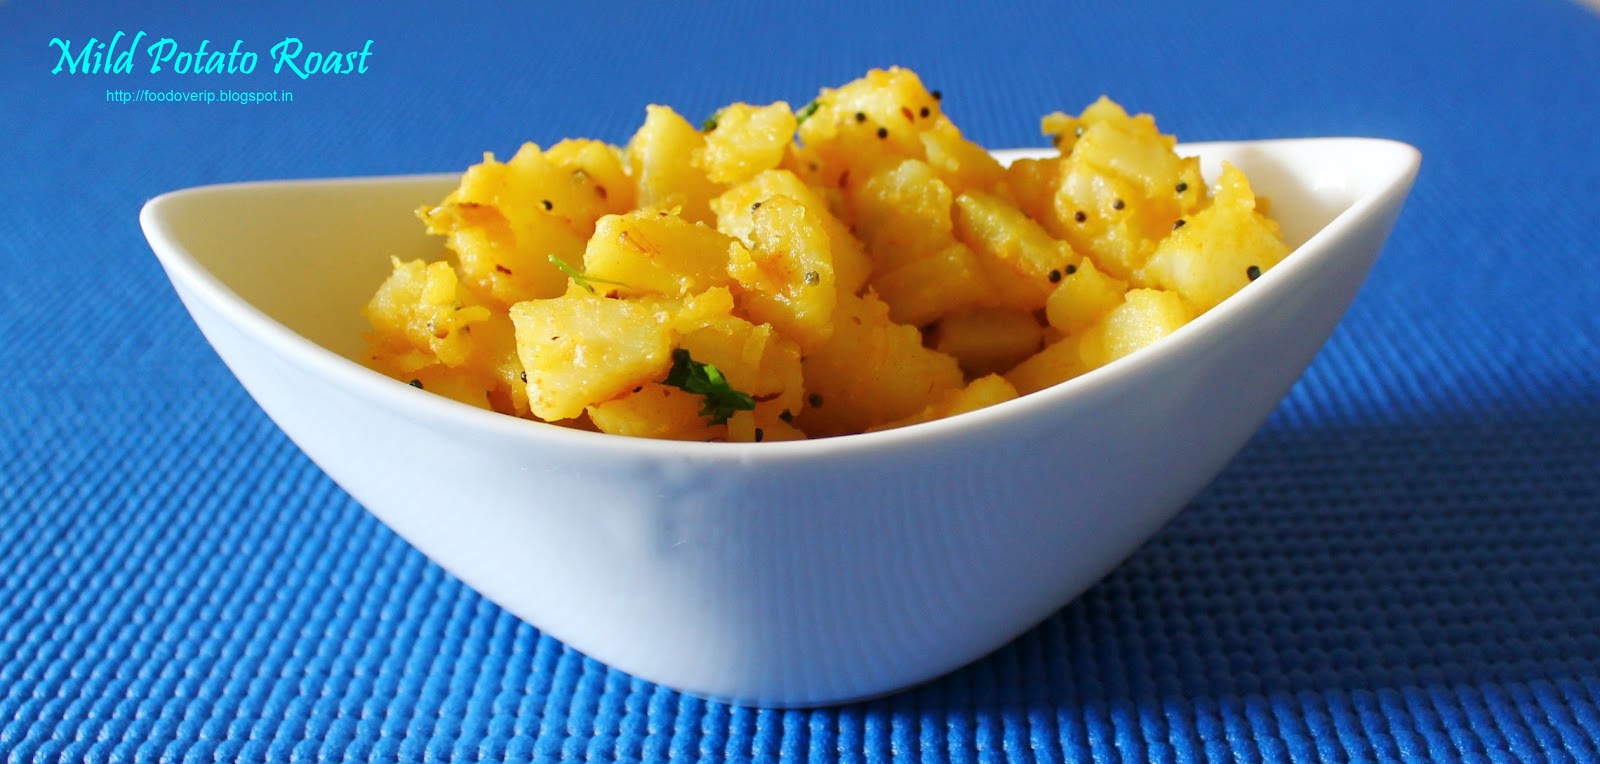
Mildly Spiced Potato stir-fry

Great timing for this post, but not so great for me :|. I have not been keeping well the last couple of days , so its been comfort food all the while and not the usual special cooking on weekends. Whenever me or S is down with throat infection/cold/cough we end up making pepper-garlic-jeera rasam with mildly spiced potato stir fry, its a quick lunch that can be made under 30 minutes and it really comforts you when your sick.

I must definitely add this here, S has been very nice and sweet and has taken over all the household chores for the last two days, and all I have been doing is eating and sleeping. And guess who has been helping him with the recipes - foodoverip :).

Mildly spiced Potato stir fry


Ingredients

Serves - 2
Spice level - Mild
Prep Time - 10 min
Cook time - 5 min


Potato - 5  , peeled and chopped into medium sized pieces and boiled correctly , it needs to be on the softer side [I microwaved it for 4 minutes]
Oil - 1 Tbsp
Mustard - 1 Tsp
Jeera - 1 Tsp
Dry Red chilli - 1
Turmeric - a pinch
Curry leaves - 1 sprig
Hing - a pinch
Salt - as per need

How do you do it

Heat oil in a kadai. Add hing, add mustard and let it splutter. Add jeera and break the dry red chilli and toss it  in too along with curry leaves. Now add in the potato pieces, a pinch of turmeric and salt and wrap well with the tempering. Saute for a couple of minutes. Switch off flame. That simple!

Serve with hot rasam and rice. 


Print this Post

Continue Reading >>

Saturday, July 21, 2012

Spicy Brinjal Roast | Brinjal Curry

Once in a while its okay to indulge and have roast type dishes that are cooked for a really long time and is slightly greasy but absolutely salivating and spicy. This brinjal roast made its appearance in my mom's kitchen a very long time back. We loved it, but it never showed up again because it took a lot of time, a considerable amount of oil and dint really belong in the healthy section.

All of a sudden I was reminded of this dish and wanted to make it. My mom vaguely remembered how it was done, so got the recipe over the phone and it was a winner - why wouldn't it be? spicy and roasted - those are two words i absolutely love when it comes to cooking. :) . So me and the Spicy roasted brinjal were re-united after a decade! ;).

Spicy Brinjal Roast 


Ingredients

Serves - 3
Spice Level - Quite Spicy
Prep Time - 15 min
Cook time - 45 min


Brinjal - 500 gm, chopped lengthwise in medium sized pieces
Onion - 2  Large chopped well
Tomato - 2  Large pureed
Curry/Masala powder - 5 Tbsp
Turmeric powder - 1/2 Tsp
Ginger Garlic paste - 1 Tbsp
Cumin/Jeera - 1 Tbsp
Hing - 1/2 Tsp
Oil - 5 Tbsp
Salt - as per need


How do you make it

Heat oil in a kadai. Add hing and jeera - let it roast. Add the onions, ginger garlic paste and saute until the onions are done. Add the tomato puree now , little salt and turmeric, wait until the puree is cooked well. Add the curry powder now and saute until the raw smell of the curry powder vanishes. Now add the brinjal pieces and wrap well with the masala. Bring the flame to low. Close the kadai with a lid. Every few minutes , keep an eye on it and stir it well. The brinjals need to sit on low-medium flame for about 30-40 minutes, until you see the skin of the brinjal start to shrink, and you get a nice semi-dry gravy texture as seen in pic. In between the 30-40 min time frame, add the remaining salt too. Make sure to stir every now and then, to prevent the curry from burning. If it gets too dry in between, add a spoon or two of oil and wrap well and continue till the brinjals are completely roasted.

Serve along with curd rice or rotis. :) 


Print this Post

Continue Reading >>

Wednesday, July 18, 2012

Kovakai Kootu | Mildy spiced Ivy Gourd with lentils

Kovakai/Ivy gourd is not a favorite among many, S is no different. Its a very healthy veggie to take in and the only way I could hide its taste was to make a kootu :). If you belong to same category , try this kootu!. Its a very simple , healthy preparation and a really quick one. Me - I can eat this subji in many other preparations as well :).

Kovakai Kootu


Ingredients

Recipe Source - My Mom  ** She is great in tricking you into eating veggies you don't like :) **

Serves - 2
Spice Level - Not spicy
Prep Time - 10 min
Cook time  - 20 min


Ivy Gourd/Kovakai - 300 gm [ chopped into small pieces]
Moon dal - 1/4 cup
Small/Sambar Onion/Shallots - 3
Garlic cloves - 2
Curry leaves - 1 Sprig
Turmeric - 1/2 Tsp
Kuzhambu/Sambar powder - 1/2 Tsp
Jeera - 1 Tsp
Water - 2 cups

To Temper


Oil - 1 Tsp
Mustard - 1 Tsp
Hing - a pinch
Urad dal - 1/2 Tsp

Salt - as per need

How do you make it

Take a pressure cooker, dump all ingredients [except the "To Temper" and salt] and pressure cook for 15-20 minutes. Keep on high flame until the first whistle and then lower flame for the remaining time. Let the cooker cool down. Meanwhile heat 1 Tsp oil in a kadai. Add hing, mustard and urad dal and let them roast. Now open the pressure cooker. Heat the cooker again at low flame , add required salt and let the kootu come to a boil . Adjust consistency of kootu now. Add more water if needed, or if its still in a loose state, let it thicken. When you have the desired consistency, switch off flame and pour in the tempering and mix well.

Serve with rice and some spicy potato curry.

Notes

You can use the same recipe with snake gourd [Podalangai] too, it will be equally yum! :)


Print this Post

Continue Reading >>

Thursday, July 12, 2012

Beetroot Paruppu Usili/Beetroot-lentil crumbs stir fry

I have already blogged about the traditional beans usili here and I always stuck to using either beans or cabbage for paruppu usili. I am not very fond of beetroot due to its inherent sweetness , but Amma keeps reminding me to use it at least weekly once due to its high nutrition content. Over the past few months she has been asking me to use beetroot for this dish and I kept postponing it and wasn't very impressed about the idea - I was worried it might be a little sweet. So when she was in Mumbai , she made it for lunch one day and I must admit I was wrong, I enjoyed the dish thoroughly. It was an instant hit. The beetroot is grated finely and it gets blended well with the spiced lentil crumbs that the sweetness disappears and it tastes quite well.We added a carrot too along with beetroot :)

So Amma's target achieved - Giving me a  beetroot dish that I might be fond of. Ah, the things that Ammas' do for their kids however old they might be. :)

Beetroot Paruppu Usili


So follow the same recipe as the cabbage-beans-paruppu usili, but just use finely grated beetroot and grated carrot [1 Large beetroot + 1 carrot ] instead of the beans and cabbage.When you add the carrot and beetroot to the lentil crumbs in the kadai, saute well to make sure the rawness of the beetroot and carrot vanishes and they are cooked completely before switching off flame.

Serve with Rice and Rasam.


Print this Post

Continue Reading >>

Monday, July 9, 2012

Lobia [Black eyed Peas] Curry for Roti/Rice

I have been traveling often these past few months and that means returning home to an empty vegetable section in the refrigerator :). So these pulses are a blessing during those times.Lobia or Black eyed peas is a very healthy legume.One of the staple legumes used for making a curry as a side dish for roti in most north Indian households i believe.This is my first time cooking lobia and it was quite nice.

Lobia Curry


Ingredients

Adapted from Tarla Dalal

Serves - 4
Spice Level - Moderately Spicy
Prep time - 2 hours
Cook time - 15 min


Lobia/Black eyed beans - 1 cup
Onion - 1 sliced thinly
Green chilli -  3 slit length wise and cut in half
Ginger - 1 inch piece sliced thinly
Tomato - 1 cut into medium pieces
Cinnamon - 1 small stick
Cumin - 1 Tsp
Turmeric - 1 tsp
hing - a pinch
Mustard - 1/4 Tsp
Coriander powder - 1 Tbsp
Amchur powder  1 Tsp
Salt - as per taste
Oil - 2 Tbsp
Coriander leaves - 1/3 cup


How do you make it

Soak Lobia overnight or for 2-3 hours, pressure cook for 2-3 whistles. Make sure not to overcook the lobia.If you are soaking it overnight , maybe 1-2 whistles should be OK.

Heat oil in a kadai Add hing, mustard and cumin seeds,cinnamon stick, let them roast. Add chopped onion, ginger and green chili ,and saute well. Now add in turmeric powder,amchur and coriander powder and saute well till the raw smell of the masala powder vanishes. Now toss in the cooked lobia along with the water used to cook it in and the chopped tomato pieces and coriander leaves.Add more water if you need a loose curry. Let it boil at low flame for 5-10 minutes until all the flavors are blended well.


Serve with roti or have it with a bowl of steamed rice.


Print this Post

Continue Reading >>

Thursday, July 5, 2012

Green Gram Sambar/ Pasi Payar Kuzhambu

Pasi Payar kuzhambu comes to my rescue when I run out of vegetables in my fridge :). This kuzhambu is very easy to make, healthy and tasty. Rice, Payar kuzhmabu and some potato chips make a quick and delicious lunch combination.

Pasi Payar Kuzhambu


Ingredients

 Serves - 4
 Spice Level - Moderately Spicy
 Prep time - 20 minutes
 Cook time - 15 minutes

Green Gram/Pasi Payar - 1 cup
Onion - 1 Large , chopped well
Tomato - 1 Large , chopped
Garlic cloves - 3
Kuzhambu powder/Sambar powder - 3 Tbsp
Turmeric - a pinch
Salt as per taste
Tamarind extract - extract from a lemon sized tamarind
Oil - 1 Tbsp
Mustard - 1 Tsp
Jeera - 1 tsp
Hing - a pinch
Curry leaves - 1 sprig


Method

Wash the green gram well.Heat a kadai and add the washed green gram and dry roast it until you get the aroma of the green gram. Should take 2-3 minutes.Remove from flame and pressure cook for 15-20 minutes. Take care not to over cook the green gram.

Heat oil in a kadai. Add hing, mustard and jeera. Let them splutter.Add chopped onion, garlic and curry leaves. Saute till the onions are done. Add in the tomato,turmeric and half the quantity of salt. Saute till the tomatoes are soft and are mashed well.Now add in the sambar powder and saute till the raw smell of the powder vanishes. Add in the cooked green gram, stir well. Add 3 cups water, tamarind extract, remaining salt and let the kuzhmabu come to a boil. Simmer flame and let it get cooked for 10 more minutes until you get a thick kuzhmabu and all flavors come together.

Serve with rice and any chips of your choice for a great lunch.

Notes

1. While adding tamarind extract, be careful. I usually add half the quantity of tamarind , taste and add more if necessary. So adjust tamarind extract quantity accordingly.


Print this Post

Continue Reading >>

Friday, June 22, 2012

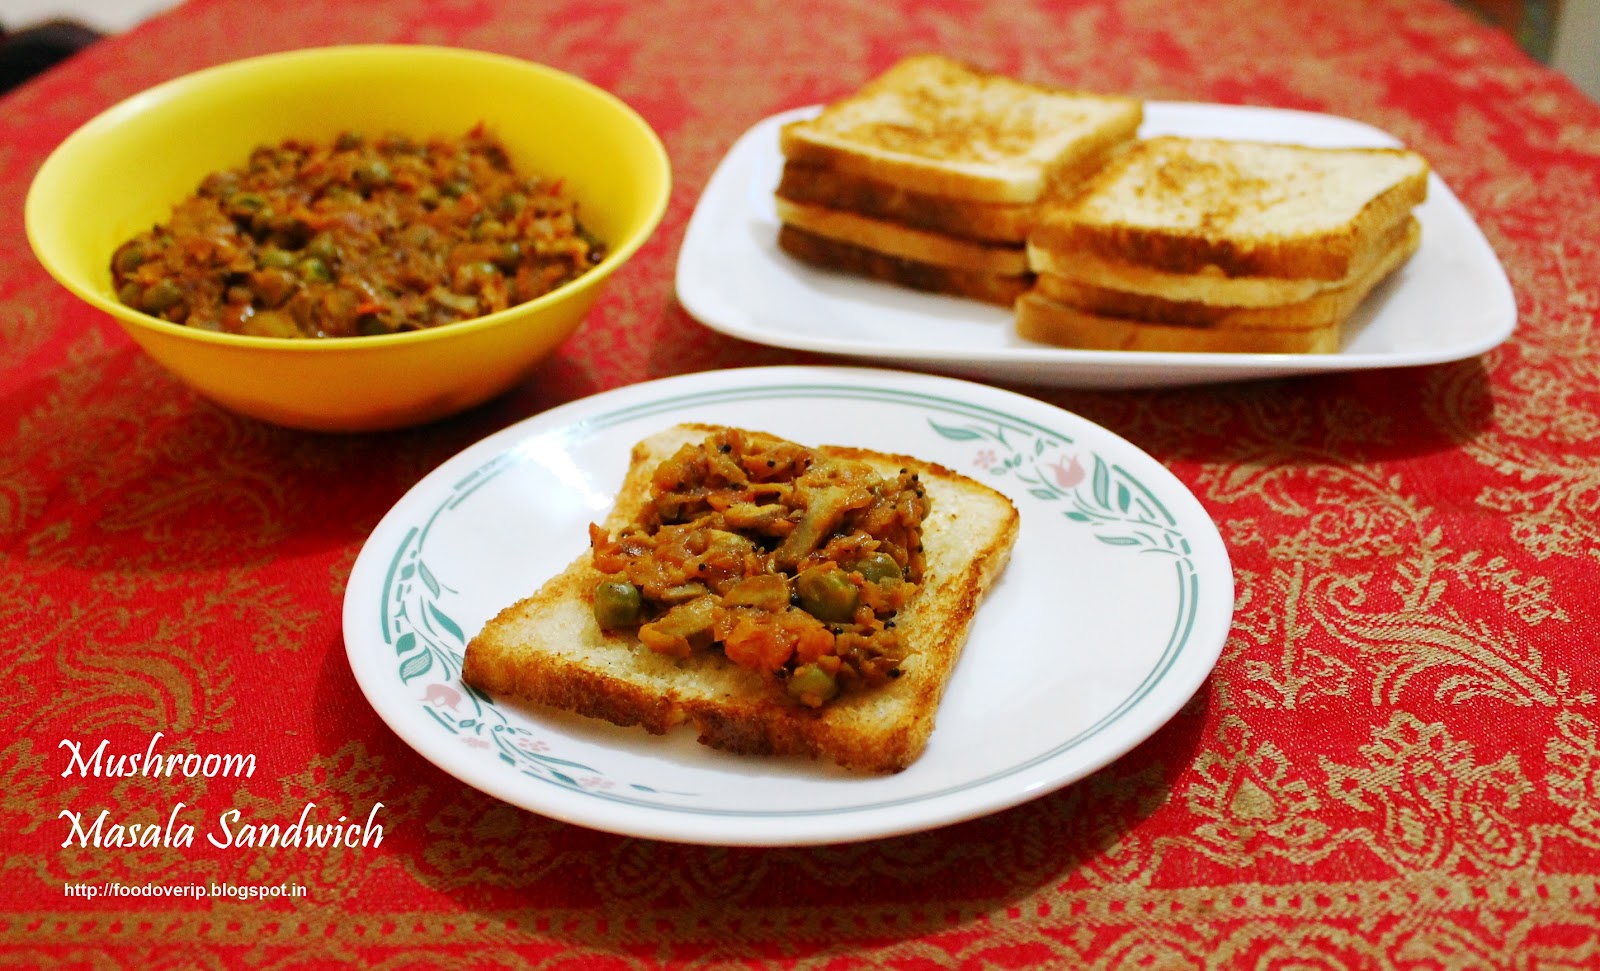
Mushroom Peas Masala

Making somebody like a veggie that they are not fond of  is easy, just cook it in a tasty manner. :). S used to strictly avoid eating mushroom/spinach/adai/beans/ before our wedding.I had to persuade him the first time to try all of these at least once and later decide for himself if he wanted a second serving or not. And good for me, he likes all of these veggies now. :)

I clearly remember the first time I made this dish, way back in 2009,one month into my wedding. Nice spicy mushroom masala served with ghee toasted bread for breakfast. It was so yummy, we ended up packing the same for lunch. Since then , this dish has been a hit at my home. :). One small change in 2012 - we stopped using ghee for toasting bread, you know why!  ;)

Mushroom Peas Masala


Ingredients

Serves - 4
Spice Level - Quite Spicy
Prep Time - 20 Min
Cook time - 20 Min


Mushroom - 200 gms, cleaned and chopped well
Frozen peas - 1/2 cup.
Onion - 1 Large, chopped well
Tomato - 2 and half large ones, chopped
Ginger-garlic paste - 1 Tbspn
Turmeric powder - 1/2 Tsp
Chilli/Curry/Masala Powder - 2 Tbspn
Salt - as per taste.
Oil - 2 Tbspn
Jeera - 1 tbspn
Hing - a pinch

Method

Boil a cup of water, simmer flame and add the frozen peas to it. Let the peas get cooked for about 5 minutes.Switch off flame once peas is cooked. Drain the water and keep the peas aside  If using fresh peas, cook it as you would usually do.

Heat oil in a kadai. Add hing. Add jeera, and let it roast, giving a nice aroma.Add onions, ginger garlic paste and saute well until the onions are cooked well. Add tomatoes, half the quantity of salt needed, turmeric powder, and saute well. Cover the kadai with a lid for few minutes. Let the tomato get mashed well, it should let out the juice and be soft. At this stage add the masala powder and saute for a minute. Wait for the raw smell of the masala to vanish. Add the chopped mushrooms now, and wrap well with the masala. Add 1/2 cup water. Simmer the flame and close the lid. Wait for the mushrooms to get cooked. This would take about 15 minutes. Mid-way, when the mushrooms are half done, add in the cooked peas and combine well. Stir once, add remaining salt and cook in open flame. Wait for most of the water content to evaporate and a nice thick gravy is formed.Switch off flame.

Serve as a side dish for toast, or with roti's, or with rice. Goes well with just about anything. :)


Print this Post

Continue Reading >>

Tuesday, June 19, 2012

Green Peas Stir Fry/Pattani Poriyal

Again one of the very easy and quick stir fry dish if you have frozen peas sitting in your refrigerator. Rasam rice and Peas poriyal is like comfort food for us. The dish is simple and tasty and will keep you wanting for more. Easy lunch box side dish for rice.

Green Peas Poriyal/Pattani Poriyal


Ingredients

Serves - 4
Spice Level - Moderately Spicy
Prep Time - 5 minutes
Cook time - 10 minutes

Frozen/Fresh Peas - 2 Cups
Onion - 1 Large , chopped well
Dry Red chilli - 4-5
Hing - 1.2 Tsp
Jeera/Cumin - 1 Tbsp
Mustard - 1 Tsp
Urad dal - 1 Tsp
Salt - as per taste
Oil - 1 Tbsp


Method

Boil a cup of water, simmer flame and add the frozen peas to it. Let the peas get cooked for about 5 minutes.Switch off flame once peas is cooked. Drain the water and keep the peas aside  If using fresh peas, cook it as you would usually do.

Heat oil in a kadai. Add hing. Add mustard, wait for it to crackle, add urad dal and jeera and let them roast to a light brown. Break the red chillies and add them in too, saute for a few seconds. Toss in the chopped onion now and saute till translucent. Add the peas and salt at this stage and saute well for 5 minutes. Keep stirring in between.Taste to see the salt level, add more if needed now.Saute till you feel the rawness of the peas disappear and it is mixed well with the tempered ingredients.Switch off flame.

Serve with steamed rice and rasam.


Print this Post

Continue Reading >>

Friday, June 8, 2012

Bhindi masala for Roti/Pulka

This bhindi masala goes quite well with pulkas or rotis or even with rice. I usually make bhindi in a very simple manner with mild spices in a poriyal/vadakal kind of a way more suited along with rice. I wanted to replicate the bhindi masala served in tandoori restaurants as a side dish for rotis. This is my version and it turned out to be a super hit

Bhindi Masala


Ingredients

Serves - 2
Spice Level - Moderately Spicy
Prep time - 20 minutes
Cooking time - 20 Minutes


Bhindi/Ladies Finger - 1/2 kg [Cut into half and slit lengthwise]
Green Chilli - 3 ,slit lengthwise
Onion  -1  Large, chopped lengthwise into medium pieces
Turmeric - 1/2 Tspn
Curry/chilli/Masala Powder - 1 Tbspn + 1 Tspn
Cumin/Jeera - 1 Tbsp
Mustard - 1 tspn
Hing - 1/4 Tspn
Oil - 4 Tbspn + 2 tBspn
Salt - as per taste

Method

Gather the chopped bhindi in a microwave bowl. Add 2 Tbspn oil, 1 tspn salt,1 tspn chilli powder to the bhindi and stir well. Microwave on high for 7-9 minutes, stirring once or twice in between. Keep aside. this will make the bhindi less gooey when cooking later.

Heat 4 Tbspn oil in a kadai. Add hing,mustard,jeera. Let it roast. Add in the onions and green chilli and turmeric powder. Saute well till the onions are cooked well.Now add in the bhindi, remaining chilli powder and salt and on low flame, keep stirring now and then till the bhindi is done well.It would take around 20 minutes for the bhindi to be cooked well. When it starts to get slightly crispy, the dish is done.Switch off flame.

Serve with pulka/roti or with sambar and rice.


Print this Post

Continue Reading >>

Sunday, June 3, 2012

Green Peas Masala

Green Peas masala serves as a good spread on a bread toast or as a side dish for rotis , chapathis or with curd/rasam rice. Its a very simple dish , which can be made quite quickly if you have frozen peas sitting in the freezer. Its my savior on those days when i get up late and have to pack a quick lunch for work, and don't have time to spend on chopping veggies.

Green Peas Masala


Ingredients

Serves - 3
Spice Level - Moderately Spicy
Prep time - 10 min
Cooking time - 20 minutes

Fresh/Frozen green Peas - 1 1/2 cups
Onion - 1 Large, chopped well
Tomato - 2 Large , 1 chopped well and 1 pureed.
Chilli/Curry powder - 2.5 Tbsp
Turmeric - 1/2 Tsp
Salt - as per taste
Ginger Garlic [GG] paste - 1 Tspn
Jeera/Cumin - 1 Tspn
Mustard - 1 tspn
Hing - a pinch
Oil - 2 Tbspn


Method

Firstly boil the frozen peas in 2 cups of water for 5 minutes or microwave on high for 5 min. Drain and keep aside.If you are using fresh peas, pressure cook them to the right extent.

Heat oil in a kadai. Add hing,mustard - let it splutter, add jeera - let it roast. Add in chopped onions and GG paste. Saute till onions are done. Now toss in the chopped tomato , tomato puree and half the amount of salt and turmeric. Let the tomatoes cook well and get mashed completely.Add the chilli powder and wrap well with the onion tomato mix. Saute till the raw smell of masala powder vanishes. Add about 1/2 cup water and the remaining salt and add in the cooked peas and mix well.Check to see if more salt/spice is needed at this stage , add if needed now.Cover the kadai with a  lid. Simmer flame and let the peas boil in the gravy for a few minutes until it thickens.Once the gravy thickens ,switch off flame.

Serve with rotis, chapathi , curd/rasam rice or on bread toast.

Notes


You may also use dry peas. If using , soak them overnight and pressure cook the peas to the right extent before making green peas masala.


Print this Post

Continue Reading >>

Friday, May 25, 2012

Onion Chutney

I was to leave for Switzerland that week and was busy emptying up my vegetables stored in the fridge :). On the night we were to leave I was left only with onions and some coconut. I was googling for onion chutney and saw this recipe and made it immediately. This is a spicy Andhra chutney that went super well with Idlis. :)

Onion Chutney


Ingredients

Recipe Reference - Adapted from Cooking with Pedatha

Spice Level - Quite Spicy
Serves - 4


Onions - 3 Large , roughly chopped
Dry Red chilli - 6
Ginger - 1 inch piece
Thick Tamarind juice - 2 Tbsp
Grated Coconut - 2 Tbsp
Jeera - 1 Tbsp
Urad dal - 1 Tbsp
Fenugreek - 1 Tspn
Mustard - 1 Tbsp
Hing - a pinch
Salt - as per taste
Oil - 2 Tbsp

To temper

Oil - 1 Tbspn
Curry Leaves - 1 Sprig
Mustard - 1 Tspn

Method

Heat oil in a pan. Add hing, mustard seeds,jeera,urad dal and fenugreek and let it roast. Add the dry red chillies and saute until it turns a dark shade. Now throw in the onions and ginger and saute till they are done well. Add in the grated coconut , saute for a minute and switch off flame.

Cool and blend with the tamarind juice and little bit of water. Transfer to the serving bowl.Add salt and mix well.

Heat oil in a tadka ladle, add mustard, let it splutter and add curry leaves. Switch off flame. Pour this tempering over the chutney. Mix well.Serve with idlis/dosai :)


Print this Post

Continue Reading >>

Wednesday, May 23, 2012

Vengaya-Poondu Kuzhambu/Onion-garlic Kuzhambu

Many a times I get bored with the dal based sambar and long for kara kuzhambu. Especially when I make some poriyal/paruppu usili or dal based sides I long for this one. So here is the recipe of a spicy vengayam-poondu [Onion-garlic] Kara Kuzhambu. I made some modifications to my basic chettinadu kara kuzhambu recipe and it turned out very yum. :)


Vengaya Poondu Kara Kuzhambu


Ingredients

Serves - 3
Spice Level - quite spicy

Small onion/shallots/sambar onion - 15
Garlic cloves - 15
Tomato - 1 chopped into small pieces
Tamarind - 1 big lemon sized ball
Curry leaves - 2 sprig
Mustard seeds - 1 Tspn
Sambar/Kuzhmabu powder - 3 Tbsp
Turmeric powder - 1/4 tspn
Salt - as per taste.
Fenugreek - 1 tspn
Jeera - 1 tspn
Hing - 1/2 Tspn
Oil - 4 tbspn

To roast and grind

Oil - 1 tspn
Cumin/Jeera - 1 Tspn
Coriander seeds - 1 Tbspn
Dry Red chilli - 3
Khus Khus - 1 Tspn
Coconut grated - 2 Tbspn


Method


Firstly heat a kadai with 1 tsp oil and roast the ingredients in the same order as given under "To roast and grind". Cool it and blend with little water to a fine paste and keep aside.

Extract thick tamarind juice out of the tamarind piece, add 2.5 cups of water to the extract. Add 3 Tbsp of sambar/Kuzhambu powder to the tamarind-water mix and dissolve well and keep aside.

Now heat a pan with 4 Tbsp oil. Add hing, mustard - let it roast. Add cumin seeds, fenugreek and let it roast. Add curry leaves, shallots and garlic and saute well till the shallots and garlic are cooked well. The raw smell of the garlic has to vanish and shallots must turn pink.Now add the chopped tomatoes, a pinch of salt and turmeric powder and let the tomatoes get cooked well.Once the tomatoes are mashed well, add the tamarind-water-powder solution to the kadai , add remaining salt, the ground paste and mix well. Add more salt/kuzhambu powder if needed at this stage. Close the kadai with a lid, move flame to low and let it boil in low heat. Once the kuzhmabu thickens, or is reduced to 1/3rd of initial quantity , or when the oil starts floating on top, remove from flame. This will take 15-20 minutes.Be patient.

Serve with hot steamed rice and some poriyal of your choice. A very satisfying lunch indeed. :)


Print this Post

Continue Reading >>
Related Posts Plugin for WordPress, Blogger...

A la carte!

Along with idli/dosai (13) Along with rice (32) Along with rotis (21) asparagus (1) baby potatoes (4) bajji (1) baking (9) banana (1) basil (1) basmati (2) beans (1) beetroot (5) bhindi (3) biryani (1) Black eyed beans (2) blueberry (1) bok choy (1) bottle gourd (1) bread (3) breakfast (4) brinjal (4) brocolli (1) buttermilk (1) butternut-squash (1) cabbage (2) cakes (7) carrot (1) carrots (3) cashews (1) cauliflower (8) cheescake (2) chettinadu (24) chettinadu delicacy (23) Chicken (7) chilli (1) Chineese (3) chinese (1) chocolate (1) chole (2) chutney (6) coconut (5) coconut milk (1) coriander (4) corn (1) cow-peas (1) cream-cheese (2) curry leaves (1) dal (3) dates (1) desserts (14) diwali 2013 (1) dosai (1) drink (1) drumstick (2) dry field bean (1) Easy (44) egg (3) fenugreek (1) fish (1) Food and Travel review (1) garlic (9) ginger (1) gobi (1) green gram (1) How To (5) Indian Flat Breads (4) indian sweets (3) International (5) ivy gourd (2) jeera (3) kootu (1) kovakkai (1) lemon (3) lentils (11) lobia (1) malai (1) mango (2) masoor dal (1) Methi (2) mint (2) mix veg (9) mochai (1) moong dal (4) mushroom (10) mutton (1) non-veg (2) onion (2) orange (1) paneer (11) parathas (1) pasta (2) peas (7) pepper (1) pickles (1) plantain (1) poriyal (1) potato (14) potatoes (2) quinoa (1) Rajma (1) rasam (1) rice flour (1) rosemary (2) shallots (1) snack (18) soup (7) soy chunks (1) spinach (6) stir-fry (1) strawberry (1) sweet potatoes (1) tamarind (5) tomato (7) toor dal (1) val bean (1) Variety Rice (13) walnut (1) wheat (2) yoghurt (1) yuuum!! (1) zucchini (2)

Latest on Food Over IP

Copyrights

All rights reserved @2012.

Unless otherwise mentioned, the text and images included in FoodOverIP blog belongs to the author. The blog author’s permission is required before any content is reproduced in any form.

  © Blogger templates The Professional Template by Ourblogtemplates.com 2008

Back to TOP  

Blogging tips