Showing posts with label desserts. Show all posts

Thursday, October 29, 2015

No bake Berry Cheesecake


This is a very yummy, eye-catching, wow-your-guests  kind of dessert. This isnt very difficult to make but there are quite a few elements involved and just takes some time, but it is totally worth it. You could choose any flavor you like - mango, berries, pineapple. I have done this before with mango and blogged about it here Mango Cheesecake-  and it was a super hit recipe at home.

Ingredients

Serves 3 

Philadelphia Cream Cheese - 1/2 cup
Castor Sugar - 1/4 cup
Fresh Cream - 1/3 cup
Strawberry-Raspberry pulp - 1 cup
Gelatin - 1 tbspn
Digestive bisuits  powdered - 1 cup
Melted butter - 4 Tbspn
Cashews - 5
Sugar - 1 tbspn
Vanilla essence - 1/2 tspn


Method

Base of the cake 

Powder the biscuits along with the cashews and 1tbspn sugar to make about 1 cup. Mix it well with melted butter . Now bring out 3 serving glasses and  spoon this into each of them and press them to make the base of the cheesecake. Put it inside the fridge. Let it stay in the fridge while you proceed with the second layer to make the cheesecake filling as below.

Cheescake mixture

This consists of the three steps as below

Step 1- Strawberry - gelatin mix

Firstly take some equal amount of fresh starwberry and raspberry with required amount of sugar to make about 1 cup of pulp. In a cup, pour about 2-3 tspn of cold water along with gelatin and stir the gelatin with hand. Now add 2-3 tspn of hot water over this - stir and let the gelatin completely dissolve. Mix the strawberry pulp with the dissolved gelatin and keep aside.

Step 2 -Whipped Fresh Cream
Whip the fresh cream separately and keep aside.

Final Cream cheese mix

Now mix the cream cheese and castor sugar well for 2-3 minutes to get a smooth texture. Pour 3/4th of the strawberry pulp mixture prepared in step1 [remaining is to be used for topping] and all of the whipped cream [step 2] and vanilla essence onto the cream-cheese/sugar mixture.

Now take out the glasses from the fridge and fill 3/4 of the glass with the cheesecake mixture. Now return to fridge and refreigerate for 1.5 hrs for it to set.

Topping

After 1.5 hrs, bring the glasses, gently spoon in the the remainining strawberry pulp on top of the cheesecake mixture in each glass. Referigerate for 5-6 hrs, for best results cool it overnight. And there we have our beautiful cheesecake ready.

Note:
You can always substitute hung curd for cream cheese, as cream cheese is expensive and difficult to get in India.

Gelatin is a meat by-product, so if you are strictly vegan, use china-grass [agar-agar] instead.

Also the quantities in each layer can be adjusted as per taste/need.

Continue Reading >>

Wednesday, June 17, 2015

Chettinadu Inipu Cheeyam/ Sweet Seeyam


This is a very popular sweet dish in Chettinadu cuisine and like many others falls in the "difficult to make" category. Sweet Seeyams are deep fried dumpling with a jaggery-moong dal stuffing inside them. The consistency of the stuffing as well as the batter that coats it are two important things in this recipe. A couple of trials and you should easily get the hang of this. I had blogged a different version of this here - but this trail turned out perfect and this one is the keeper recipe for me. The other recipe has a stuffing that is a little dry. This one is sooper gooey and moist and we prefer this texture. So you could pick which version of the stuffing you like and make them.

Ingredients

Serves - Makes about 10 pieces
Prep Time - 30 min + 2 hrs soak time
Cook time - 15 minutes

For the sweet stuffing

Moong Dal [Green Gram Dal] - 1/2 cup
Crumbled Jaggery - 3/4 cup
Grated Coconut - 1/3 cup
Cardamom powder - 1/2 Tsp
ghee - 2-3 Tsp

For the batter

Raw Rice - 1/2 cup
Urad dal - 1/3 cup
Salt - a pinch
Water as per need


How do you do it

1. To prepare the sweet stuffing, boil the moong dal until its 3/4 done. Make sure to drain the moong dal of all the water, let it dry for 15-20 minutes. Cool the dal completely and mash it up roughly with a ladle and keep aside.

2. Heat a kadai, flame must be medium level. Add the broken/crumbled jaggery and sprinkle 3 tbsp of water on top of it. Let the jaggery loosen a little and form a thick syrup. Strain the jaggery syrup, remove impurities and keep aside

3. Heat 2-3 Tsp ghee in a pan add grated coconut and saute for a minute. Add the dal and jaggery syrup and mix well. Saute in low-medium flame until it forms a thick mass.

4. Switch off flame and mix in the cardamom powder. Cool the mixture.

5. Once cooled, make small lemon sized balls and keep them aside.


6. To prepare the batter, soak the rice and dal in enough water for 1-2 hours. Drain completely and grind to a smooth paste with  little water as possible. I used about 1/4 cup water while grinding. Add a pinch of salt, mix well keep aside.

7. Take half of the above batter in a bowl. Save the remaining batter to make masala cheeyum. The consistency of the batter should be dosa batter consistency. So add water to get to that consistency. Adding too much water will make it very loose and the sweet balls will not coat well and the cheeyum might soak a lot of oil.  On the other hand if the batter is too thick, you will get a very thick outer layer, so be cautious in this step. Start with little water and then you can add more after testing a few pieces.

8. Heat a kadai with oil for deep frying. Maintain the flame in medium level. Dip the ball in the batter, coat it well with batter and drop them in oil. Deep fry to a golden brown and drain them using a slotted spoon. Put them on a plate lined with paper towels to remove excess oil.

Note: Bite into one of fried cheeyum. If you feel the outer batter layer is thick, add little water to make the batter loose, you will get a much thinner outer layer.


If you have remaining batter left, mix in some finely chopped onions, green chilli, curry leaves and salt. Spoon them into the oil and fry them until golden brown to make masala cheeyam.

Continue Reading >>

Friday, May 31, 2013

Sweet Potato Halwa | Shakarkandi ka Halwa | Sakkaravalli kizhangu Halwa


Sweet potato is not a regular item in my vegetable cart when I go shopping. Actually to be honest its been years since I cooked with this vegetable. Sweet potato was forgotten after school-time, Amma used to boil them and keep them ready for an evening snack after a tired day at school. The idea of sweet potato was a thing of the past. So how did it re-appear in my kitchen? We had a potluck party a few weeks back at a friends place and I took the responsibility of bringing dessert for about 25-30 people. I was looking for interesting halwa recipes and decided to make halwa with sweet potato. I usually hesitate to try a brand new recipe while hosting a party at home or while taking food to a friends place, but you know what, you cant go wrong with halwa can you? - milk, sugar, nuts, ghee, sweet potato -  whats not to like ? :). The halwa was very well received and I was a happy lady that day!

While I intended to make this halwa for 15 people, I realized I could get only about 10 serving. I also made this yummy and healthy Carrot Kheer for the potluck party along with this halwa.

Ingredients

Serves - 10
Prep Time - 10 min
Cook time - 45 minutes

Sweet potato - 1 kg, boiled with its skin and then peeled and mashed.
Sugar - 1 cup sugar
Milk - 1.5 cup
Cardamom powder - 1/2 tsp
Unsalted butter - 1/3 cup
Cinnamon - 1/2 tsp
Cashews - 20 broken for garnishing

How do you do it

1. Boil the sweet potatoes with its skin on. I pressure cooked for 1-2 whistles. Cool and peel its skin and mash the sweet potato flesh and keep it aside

2. Heat a non-stick pan. Add unsalted butter and let it melt. Add the mashed potatoes now and fry well for about 10 minutes.

3. Add milk and mix well and after the milk boils, add the sugar and mix well.

4. Here comes the tough part, keep stirring the contents of the pan until you get a halwa like texture and the halwa starts to leave the sides of the pan. This took me about 30 minutes of non-stop stirring. It was quite tiring to do this and switched between my left and right hand to do this job continuously. Dont lose heart, it will become halwa eventually ;). The halwa needs to be very moist.

5. Once done, switch off flame, add the cardamom powder, cinnamon powder and mix well.

Garnish with broken cashews.

Notes

1. In step 4, if you stop stirring even for a few seconds the mixture will tend to splash, so quickly cover with a lid if you are taking a moments breath.

2. The sweet potatoes I got had orange colored flesh inside - that explains the orange color of the halwa

3. I used a cup of sugar for 1 kg of sweet potatoes. The amount of sugar varies depending on how sweet the potatoes are. So vary the sugar quantity accordingly.

Continue Reading >>

Thursday, February 28, 2013

Carrot Kheer | Gajar Kheer | Carrot Payasam


I love making easy desserts that are extremely delicious. I don't have a big sweet tooth at all and I hardly crave for chocolates, ice-cream and the likes. So if you are looking for a large 8-layered fancy chocolate slathered cake, you wont find it in here :). I have never felt like getting into all that effort for a dessert. But I do live with a person who is the exact opposite. His teeth are all sweet ;). So once in a while I have to make the puddings, cakes, muffins, kheer, cookies etc for S. He has often commented about the lack of dessert posts in my blog [ can you sense the ulterior motive? ;)] and I agree. So I am trying to make atleast a couple of healthy desserts each month.

I think Carrot kheer would be one of my go-to dessert recipe if I had a lot of guests coming in. Not a lot of effort or time involved in making this one, but the end result is super delicious and also makes you feel healthy. Carrot always does. :) So lets get on to learning how to make this kheer.

Ingredients

Serves - 2
Prep Time - 10 min
Cook time - 15 min

Carrot - 4 medium, chopped into medium sized pieces
Milk - 2 cups
Sugar - 1/4 cup minus 1.5 Tsp
Raisins - 1 Tsp
broken Cashews - 1 Tbsp
Cardamom Powder - 1/4 Tsp
Ghee - 1.5 Tsp

How do you do it

1. Take the carrots and 1 cup milk in pressure cooker and pressure cook for 2-3 whistles. Let this cool completely. Blend this milk-carrot using your mixer jar into a smooth paste and keep.

2. Heat ghee in a pan, add cashews and raisins and roast until they brown. Keep aside.

3. In the same pan, add the blended carrot-milk paste and saute for 3-5 minutes. This is just to make sure there is no raw smell. Cool this mixture again.

4. Take the remaining one cup of milk in a thick bottom milk pan and bring to boil. When it starts to boil, add the sugar, cardamom powder and stir. Simmer on low heat for 15-20 minutes until the milk thickens and reduces in quantity. Cool completely.

5. Mix the reduced milk and sauteed blended carrot-milk paste and the raisins, nuts together. Fill them up in individual glasses and chill them in refrigerator.

You could add some chopped almonds on top while serving. Enjoy! :)

Continue Reading >>

Saturday, December 8, 2012

Carrot Halwa | Gajar ka Halwa | 100th post


What occasion is it? Yes, my 100the post! Yaaaaaay :-)! When I started this blog, I did set a goal to get to a 100 before the end of this year and I am very happy I kept at this. And frankly the 90s have been difficult. Now I understand why the Master-blaster Sachin Tendulkar struggled to get to a 100 centuries ;). Okay, now thats a little too much, the anology, I know ;)

Its been nothing but an enjoyable 10 months obsessing over this blog. Its become so much a part of my life and surely will continue to be so. Thanks to all of you who have been visiting, trying recipes from here and giving me feedback, that's one of the key things that pushes this blog forward. Please continue to do so :).

I also have one more update here, foodoverip has moved to its own custom domain www.thefoodoverip.com. If you happen to use the blog-spot suffix, you will be re-directed to www.thefoodoverip.com

To celebrate the 100th post, I made a classic winter dessert - Carrot halwa, popularly known as Gajar Ka Halwa. Winter is peeking into Mumbai and that means lush red winter carrots. These are the carrots that are traditionally used to make gajar halwa as against the orange colored carrots. S loves gajar halwa, and hes been at me for almost a year now to use these red carrots for making Carrot Halwa. I never got around to do it until today when he went shoping alone and dumped on me a bag of these winter carrots. And so the carrot halwa was re-born in my kitchen :)

I am not even going to start to say how yum and delicious they were, you just have to try it out yourself :-)

Ingredients

Serves - 4
Prep Time - 15 min
Cook time - 1 hr


Carrots - 1 Kg [approx 10 carrots] - Grated
Milk - 2.5 cups mixed with 1/4 cup water
Sugar - 3/4 cup + 2 Tbsp
Elachi powder - 1 generous pinch
Ghee - 4 Tbsp
Cashews - 10
Raisins - 5-6

How do you do it

1. Heat a tsp of ghee in a heavy/thick base non stick pan. Fry the cashews and raisins and set aside.

2. Add 1 more tbsp of ghee to the pan. Add the grated carrot and saute for 2-3 minutes until they turn a lighter shade. This to get rid of the rawness of the carrot.

3. Once done, add the milk into the pan and bring to boil. Then reduce the flame to medium, close with a lid, and let the carrots get cooked in the milk. This is going to take some time. It takes close to 30 minutes for the carrots to get softer/mashed and for the milk to reduce. Keep stirring now then during the 30 minutes.

4. Once almost most of the milk has been absorbed by the carrots, add the elachi powder, sugar , remaining ghee and stir it in. Once done, the carrots mixture will tend to loosen again. Let it again cook for another 15 minutes until the halwa starts to leave the sides of the pan. Add the cashews and raisins now and mix it well.

Serve this warm carrot halwa with a scoop of ice-cream. Yum! 

Continue Reading >>

Sunday, November 11, 2012

Cocont Barfi Ladoo | Easy Diwali Recipe


Happy Diwali wishes to all of you readers of Food over IP :-). I love diwali, and for most of us it is the most favorite festival - full of life, lights and colors, not to mention the yummy sweets, snacks and super shopping.

I wanted to post here much earlier, but managed to squeeze some time only yesterday to make Diwali palakaram [food] which started off with Coconut barfi. This Diwali my palakaram set consists of coconut barfi, rasagollas, tomato pickle, Masal Paniyaram and Paal Paniyaram. All the posts will appear here as soon as I finish making them ;). So what sweets and snacks do you plan to make this Diwali? 

I am not fond of heavy coconut based sweets, but S loves coconut barfi when warm and I also had to finish the grated coconut from Ayudha pooja festival that has been sitting in my freezer for a while now, so decided to go ahead and make coconut barfi for Diwali. S had this brilliant idea of using mini muffin pan to set the coconut barfi which dint work :|, so we had remove it from there and reset it the usual way on a plate. While doing that, I completely forgot about greasing the plate and hence couldn't take out the pieces in the desired square shape. So I removed all of them again and made them into a ladoo shape and hence the name coconut barfi ladoo :).

Btw which click looks better the first one or second? I clicked the one above and S the one below, but I like his better and vice versa ;)

Ingredients

Serves - Makes - 12 pieces
Prep Time - 15 min
Cook time - 15 min

Grated Coconut - 1 1/3 cup
Sugar - 3/4 cup
Cardamom powder - 1/2 Tsp
Cashew nuts - 10 pieces, broken
Water - 1/4 cup
Ghee - 2 Tsp little for greasing


How do you do it

1. Give the grated coconut a couple of pulses in your mixie/food processor to get a much finer texture of the coconut and keep aside. Grease a plate with little ghee , to which you will transfer the barfi mix later.

2. Heat 1 Tsp ghee in a wide bottom pan, and roast the cashews to a golden brown and transfer to a bowl.

3. In the same pan as above, add the sugar and water and let them boil, the sugar will dissolve and wil froth up. At about 6-7 min, you will get a single string consistency of the sugar syrup, this is when you add the coconut.

4. Mix the coconut well and keep stirring. After a few minutes it will bubble at the sides, then add a tsp ghee , cashews and cardamom powder and mix well.

5. Keep mixing, after 5-6 minutes, the mixture will form a lump mass at the center of the pan, and start to leave the sides of the pan easily. Switch off flame and transfer immediately to the greased plate. Smooth the top with a spatula and let it set. You are now free to have a few spoons full of this yummy coconut mix while warm which taste absolutely heavenly :)

6. After 15 minutes, while its a little warm, mark the pieces on barfi and cool it. Once completely cooled, return to fridge. After a couple of hours, remove the marked pieces and store in air-tight container. Keeps well for a week.

Notes

1. The consistency at which you switch off flame is very important, a minute later - the barfis will be hard, a minute sooner - they will not set well.

2. Mark pieces when warm, otherwise it will be difficult to do it later once it sets completely.

Continue Reading >>

Tuesday, August 28, 2012

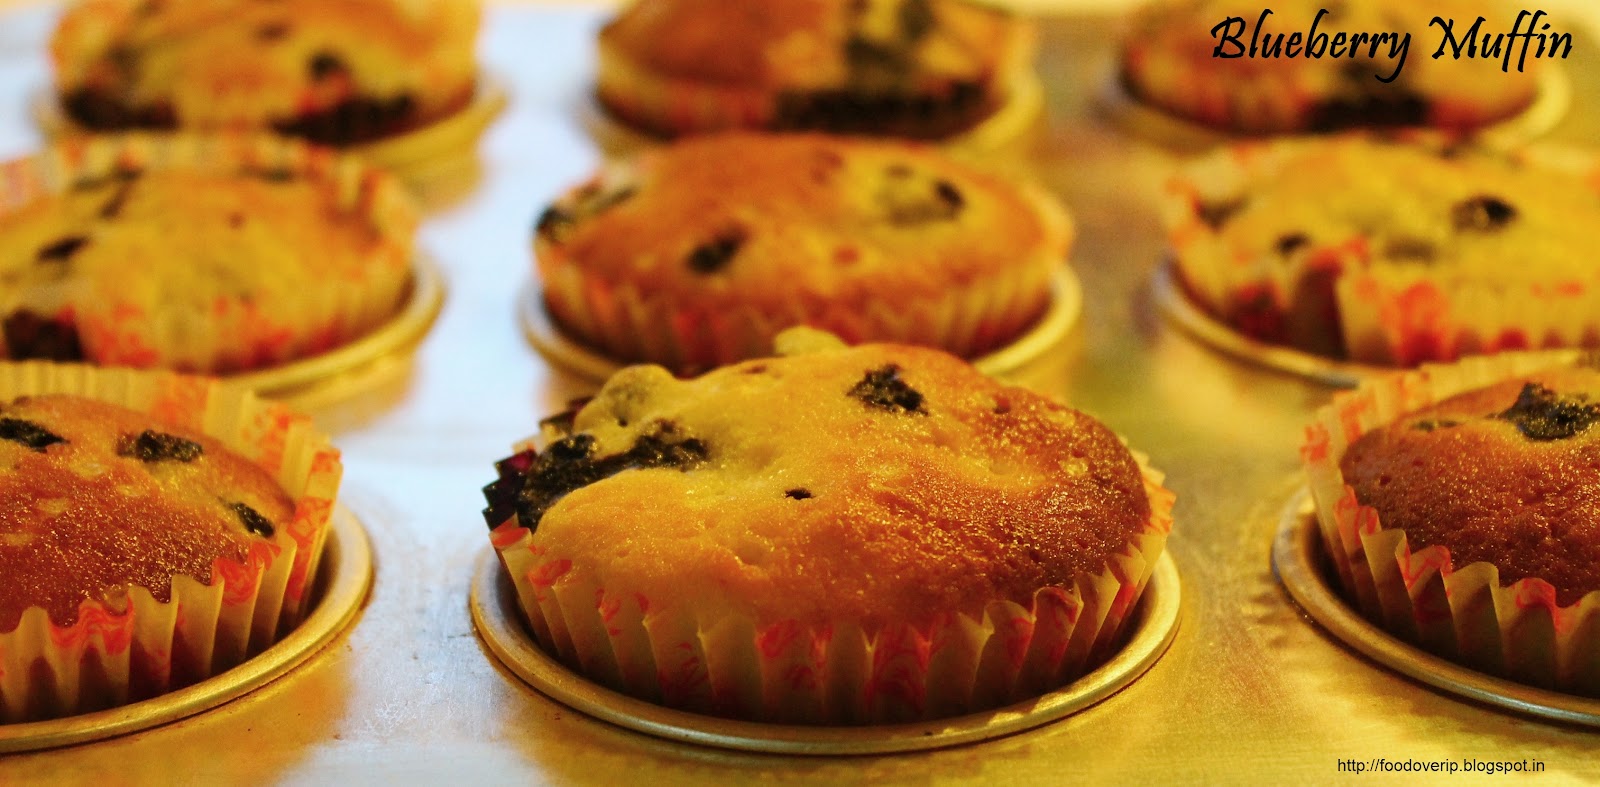
Blueberry muffins with Lemon zest

Right from the time I started baking muffins, i have been looking for fresh blueberries everywhere.Blueberries are such a rarity here in India. In-fact I have never seen them before, even in those specialty stores. But I guess it makes sense not to import them , nobody would buy them, they cost a bomb here. I have made these blueberry muffins once, a couple of years back for a family get together using dry blueberries, this time was a repeat of the same recipe but with FRESH blueberries. All the way from Netherlands :-) .

Every time I shop at Godrej Natures basket, I am like a kid in a candy store, wanting to just take it all in, trying to look at so many racks all at the same time! :D. So many ingredients I have heard/seen in cooking shows but haven't had the chance to explore yet!  This time when I went in , they had a huge board saying the exotic fruits like blueberries/passion/peaches were available and the joy that bought me, ah!!. Immediately without a second thought I picked up the only box of blueberries left and continued shopping debating all the time if I should leave the box back. Four hundred forty Rs for 150 gm of blueberries was oh so too much!. S convinced me that I should buy it and the blueberries came home with me. :) After I baked the muffins and tasted them I would definitely have to say Paisa Vasool ;). They were brilliant, soft/moist muffins with the sweet-sour blueberries bursting in your mouth every bite. Heaven!

Blueberry muffins


Ingredients

Serves - makes 9 muffins
Prep Time - 15 min
Cook time - 30 min


All purpose flour - 1 1/4 cup
Salt - 1/2 + 1/4 tsp
Baking powder - 1 + 1/4 tsp
Unsalted Butter - 90gm [ room temperature]
Castor Sugar - 3/4 cup
Sour milk/Buttermilk - 1/2 cup [at room temp]
Vanilla - 1 Tsp
Lemon zest - of one lemon
Fresh blueberries - 3/4 cup
Eggs - 2 [ at room temp]
Normal sugar -  2 Tbsp


How do you do it.

Mix the flour,salt and baking powder well sift/sieve it once and keep aside. Take 2 Tbsp of the sifted flour and add it to the blueberries and toss it so that they get wrapped in flour. This is to prevent the blueberries from sinking to the bottom of the muffin while baking.

Pre-heat oven to 180 deg C. Line the muffin tray with muffin liners.

Cream the butter and castor sugar together until smooth and creamy. Break in the eggs and mix until its incorporated well with butter-sugar.Add the vanilla essence, lemon zest ,sour milk  and mix until you get a smooth/creamy mix. Now add in the flour fully and mix gently until the flour is fully mixed. DO NOT OVER-MIX. Over-mixing will ruin the muffins. It should take you 10-12 strokes to fully mix the flour. Then fold in the blueberries with this batter , take care not to mash it.

Scoop this batter and fill each muffin cup with the batter such that its 3/4 full. Use the normal sugar and sprinkle on top of each muffin. This gives  a nice crunch to the muffins. Bake at 180 deg C for 25-30 minutes or until a toothpick inserted into the center of the muffin comes out clean. Grill for 3-4 min at 180 deg C to get the golden browning on top.

Once done, remove the tray out of the oven. Cool it on a wire rack for about 15-20 minutes. Enjoy with a hot cup of cappuccino. :)

Notes

1. Do not over-mix the batter. Over-mixing will cause the muffins to be hard.

2. Always use muffin liners , you don't have to grease the muffin tray in this case. And they come out of the pan without any drama. Much easier.

3. Fill up-to 3/4 [recommended] , if you fill them up-to the brim, they might peak and you might get flying saucer like muffin tops which we don't want. Some like the head to be really jumbo, if thats the case, you can fill them up-to the full level.


4. Always start with ingredients at room temperature.


Print this Post

Continue Reading >>

Thursday, June 14, 2012

Orange Zest Buttermilk cake with Chocolate frosting

We had a lovely weekend celebrating S's birthday in Lonavala.Both of us were a little sick , with cough/cold etc, nevertheless it was an enjoyable two days. And whats a birthday without some lovely cake. ;).


S loves orange and I chose to make an orange cake for this birthday. It came out super yum and looked absolutely delicious. :) . This orange cake is quite soft and moist since it has buttermilk in it,the orange taste comes along with every bite as Raaga rightly said so in her post.And the chocolate frosting complements the citrus taste quite well.

Orange Zest Cake with Chocolate frosting


Ingredients

Adapted from Singing Chef

Serves - 8 large pieces
Prep Time - 20 minutes
Cook time - 1 Hour


All purpose flour - 1.5 cups
Unsalted Butter - 1/2 cup [room temperature]
Castor Sugar - 1 cup
Eggs - 2 [room temperature]
Baking powder - 1/2 Tsp
Baking soda - 1/4 Tsp
Salt - 1/2 Tsp
Buttermilk - 100 ml
Vanilla extract - 1 Tsp
Orange juice - extracted from 1 orange
Orange zest - from 1 orange
Orange food color - 1 Tspn

For chocolate frosting

Dark Chocolate - 1/4 cup
Butter - 2 Tbsp
Sugar - 1/4 cup
Milk - 1/4 cup.
Coarsely powdered almonds - 2 Tbsp For decoration


Method

How to make Buttermilk

Take a cup and add a 1 Tbsp white vinegar and fill the cup till the top with room temperature milk . Keep aside for 5-10 minutes. The milk will curdle,give it a stir now.Your buttermilk is ready.You can use as much as needed as per the recipe.

Cake

Preheat oven to 180 deg C and line/grease a 10 inch round tin. I use butter paper to cover the bottom of the cake pan and spray on top of it with non-stick cooking spray

Sift all the dry ingredients - flour,salt,baking powder, baking soda. Set aside.

In a bowl, cream the butter and sugar well.Add one egg at a time and beat well after each addition.Add the buttermilk and vanilla extract and combine well again.Add orange juice and zest and give it a stir. Add the sifted dry ingredients gradually little by little along with orange food color and combine well.

Pour the prepared cake mix into the prepared cake tin and bake at 180 deg C for 30 minutes or until a toothpick inserted into the center of the pan comes out clean.You can then grill the cake for 3-5 minutes at 180 deg C to get the browning on top of the cake if you prefer to.

Cool the cake for 20 minutes before removing it out of the pan. Cool completely before pouring frosting on top of the cake.

Chocolate frosting

You need to use a double boiler method for this.In this method, you don't melt the chocolate directly. Pour a few inches of water into a large saucepan and place a smaller saucepan so that it’s base sits in the water. Put the dark chocolate in the smaller saucepan and bring the water to a low boil.Once the chocolate starts to melt, add in butter, milk and sugar and keep stirring until everything combines well.The mixture will start to froth up and thicken at one point, that's when you switch off the flame.Let it cool for 15-20 minutes.

Once the cake and frosting have cooled down, pour the frosting on top of the cake. Chop up some almonds coarsely and decorate the cake by putting some on the top of the cake.


Print this Post

Continue Reading >>

Tuesday, June 5, 2012

Eggless Dates cake

The moment I saw Lavi's post on Egg-less dates cake and how it tastes like adhirisam , I wanted to try it as S likes adhirisam a lot. I made this as a surprise cake when S returned home after a business trip overseas. I never mentioned to him about it being a "dates" cake. I was sure he would decide it wouldn't taste good even before eating a tiny piece of it. :).

He liked the cake and confirmed it indeed did taste a little like adhirisam and only later i revealed it was a dates cake. So something healthy in a cake. ;)

Eggless Dates Cake


Ingredients

Recipe Source - Home cook recipes

Serves - One eight inch square cake , 8-10 medium sized pieces
Prep time - 20 minutes
Cooking/Baking time - 30-40 minutes

Seedless Dates - 18
Milk - 3/4 cup
Sugar - 3/4 cup
All Purpose flour - 1 cup
Oil - 1/2 cup [Rice bran or any odorless neutral oil]
Baking soda - 1 tsp
Cashews, Badam [chopped] and raisins - 1/3 cup


Method

Preheat the oven to 170 deg C. Spray an 8 inch square cake pan with non-stick cooking spray and line with butter paper.

Boil the milk first and keep aside. When the milk is warm, add in the dates and let them soak in it for 2 hours. Now pour this in your mixer/blender jar along with sugar and blend it to a smooth paste.Add oil and blend again. Pour this filling into a large bowl now.

Mix the flour and baking soda together. Take a tbsp of the this flour and mix with 1/3 cup of badam,cashews and raisins and keep aside. This will prevent the dry fruits from sinking to the bottom of the cake.

Now add the flour into the blended milk-dates-sugar-oil gradually a tablespoon by tablespoon. Do not add large quantities of flour and try to mix them, it would create a lot of lumps. Once the flour has been fully mixed , add the badam,cashews and raisins and mix well.

Now pour this mix into the prepared cake pan. Bake for 30 minutes at 170 deg C or until a toothpick inserted through the center of the cake comes out clean. Allow the cake to cool down for 10-15 minutes and then remove it out of the pan.Cut into different slices and hog. :). Once cooled down completely store the remaining in an air-tight box and refrigerate . We enjoyed it as our breakfast for 3 days. :)

Serve warm with vanilla ice cream or with a cup of tea/coffee.


Print this Post

Continue Reading >>

Thursday, May 3, 2012

Walnut Jam Lemon-zest Muffins

It has been a long time since I baked, and this walnut jam muffin has been on my mind for quite some time. Since we don't get fresh blueberries in India, the bakeries here use a blueberry preserve , or a blueberry shot. I love how these blueberry muffins when you take a bite into it, the jam just bursts into your mouth. :). Heaven!

I dint have blueberry jam, hence used the regular mixed fruit jam, along with some walnuts to make this. It worked out fine, S loved it and finished almost all the muffins I baked in a couple of days.Yes , in my home if you don't eat cookies/chocolates/pastries or must I say "anything sweet" fast, you just don't eat them at all  ;) .  Lucky for S, that I don't have much of a sweet tooth. :)

This recipe was also inspired after looking into William Sonomas Hazelnut-Strawberry jam muffins.
My friend N who blogs here [BTW you get some super baking recipes from her] introduced me to his recipes and they are awesome. :).

 Walnut Jam Muffins

 
Ingredients


Serves - makes about 10 muffins


 All Purpose flour - 1.5 cups
 Castor sugar, white - 1/2 cup
1 1/2 tsp. baking powder
1/4 tsp. baking soda
1/4 tsp. salt
1/2 cup unsalted butter, melted
1 cup butter milk
1 egg at room temp
1 tsp. vanilla extract
1/3 cup finely chopped walnuts
1 Tsp of Kissan mixed fruit jam / muffin
1 Tbsp Lemon zest

Method

Preheat you oven to 180 deg C for 10 minutes. Line a muffin tray with muffin liners and keep aside.

Mix all the dry ingredients except sugar - flour, baking powder, baking soda,salt in bowl and give it a stir with a spatula. Take 2 tbspn of this flour and mix well the chopped walnuts. The walnuts are floured this way to make sure they spread evenly across the muffins and prevent from sinking to the bottom of the muffin.

Cream [mix with a spatula] the butter and sugar in a bowl until you get a creamy texture . Add egg, and mix well.Now add in the vanilla extract and stir. Add in the buttermilk and flour alternately and mix with the liquids, mix until the flour is moistened with the liquids. Don't over-mix. Add in chopped walnuts and lemon zest and give a quick stir.

Now spoon the muffin mixture and drop until 3/4 of the muffin liner is full. Drop a tsp of jam into the center of the mixture and poke it with the back of a spoon until the jam color just peeks from inside. Fill all the muffins this way. Bake at 180 deg C for 25 minutes or until a toothpick comes out clean when poked into the center of the muffin.Once the muffins are done, get  the top rod alone of the oven heated [grill mode] and let it be for 3-5 minutes until the top of the muffin slightly browns.

Once done, cool the muffins in a wire rack for 30 minutes and then start gobbling. ;)


Print this Post

Continue Reading >>

Friday, March 16, 2012

Banana Bread

I had 4 really ripe bananas which i needed to finish off and that was enough motivation to try the banana bread . This is the first loaf that i did try to bake. Turned out fine :).

Banana Bread


Ingredients

Ripe Bananas - 4, mashed well.
Flour - 1 + 3/4 cup
Granulated Sugar - 1 cup
Butter at room temperature- 120gm
Cinnamon - 1/2 Tspn
Baking soda - 1 tspn
Baking powder - 1 Tspn
Salt - 1 Tspn
Eggs -2
vanilla Extract - 1 tspn
Milk - 2 Tbspn


Method

Preheat the oven to 175 deg C for 10 minutes.Prepare a 9*5 loaf pan for baking.I usually use a non-stick cooking spray to spray the pan, line it with parchment paper and spray again with non-stick cooking spray.

Meanwhile prepare the cake mix as below.

Cream the butter and sugar and whisk till you get a smooth mix. Break in the eggs one by one, add mashed bananas and vanilla extract. Mix till all of them combine well.Now add in the flour,baking soda,baking powder, cinnamon,salt and milk. Mix well till all of the ingredients come together.

Pour the cake mix into the prepared loaf pan and bake for 50 minutes to one hour at 175 deg C. At the 50th minute, insert a tooth-pick into the center of the loaf and if it comes out clean , its done, else bake for 10 more minutes.

Once the cake is done, cool it for 20 - 30 minutes, before you slice them. Don't be impatient, if you try
to slice them when its hot, it will crumble. I cooled it for 30 minutes, and put it in the fridge over-night.It sliced like a charm the next day.

Note: I used 165 deg C for 1 hour as my oven heats up quite quickly, so adjust your oven temperature accordingly.


Print this Post

Continue Reading >>

Urad Dal Halwa /Aadikool


Aadikool or Urad dal halwa is a famous chettinadu sweet dish usually had after morning breakfast. Its a 10 minutes dessert if you have all the ingredients. Really!! :).

Urad Dal Halwa


Ingredients

Urad dal flour - 1 cup
Broken Jaggery - 1/2 cup
Water - 1 cup
Oil - 1/2 cup

Note: To make the urad dal flour, you need to dry roast the urad dal till brown , cool it and grind it in a mixer jar to a smooth powder.


Method

Firstly boil a cup of water in a pan, and add in the jaggery pieces. Let the water boil in low flame, till all of the jaggery dissolves. Then switch off flame and keep aside the jaggery syrup.

Heat a pan with 1/2 cup oil. Add in the urad dal powder, mix well with the oil. There must be enough oil for all the flour to soak in. If its less, you will end up with a lot of lumps in the halwa which we don't want.After a minute, add in the jaggery syrup, and mix well with the flour. Switch off flame when you get a consistency which is not as thick as a halwa and not too loose either, it needs to be mid way as it tends to thicken later.

And thats it you are done. :)

Print this Post

Continue Reading >>

Friday, February 24, 2012

Carrot cake with Cream-Cheese Frosting

I have known this recipe for long now, but never got around to do it. The time seemed apt today as I wanted to clear up the carrots in my fridge and some remaining cream cheese. :). So its almost like the carrots and cream cheese wanted to be made into a cake. :)

Carrot Cake with Cream-Cheese frosting


Ingredients

Cake recipe adapted from - Laura in the Kitchen

For the cake 

Shredded Carrot - 1.5 cups
All Purpose Flour - 1  and 3/4 cups
Chopped almonds - 3 Tbspn
Raisins - 2 Tbspn
Sugar - 1/2 cup
Brown sugar - 1/4 cup
Baking soda - 1 tspn
Cinnamon - 2tspn
Salt - 1/2tspn
Vegetable oil - 1 cup
Eggs - 2
Vanilla extract - 1Tbspn
Grated orange zest - 1Tspn

For the Frosting

Cream cheese - 100 gms
Unsalted Butter - 1/4 cup
Powdered Sugar - 1/2 cup
Water -1 Tbspn
Vanilla essence - 1 tspn


Method

Preheat your oven at 170 deg C and get that out of the way.Spray an 8 inch square baking pan with non-stick cooking spray and line it with parchment/butter paper.Or prepare the baking tray as you usually do while you bake.

In a bowl, toss the shredded carrots, almonds, raisins and 2Tbspn of all purpose flour and mix well with a spoon. Keep aside. This step will prevent the carrots and raisins from sinking to the bottom of the cake while baking.

Now in another large bowl, add sugar,brown sugar and oil. Mix well. Now break in the eggs into them, add vanilla extract and mix well. Now add all the dry ingredients one by one into the bowl,and also add in the shredded carrots/almonds/raisins as well.Mix with a spatula till everything comes together.Pour the mix into the prepared baking tray and even-out the top layer well with a spatula. Bake at 170 deg C for 20 mins. The original recipe called for 176 deg C for 30 min. But my oven heats up pretty quickly and this temperature and baking time worked for me. So if you know your oven , adjust the temperature and timing accordingly.

How to prepare frosting

Make sure the butter and cream cheese are in room temperature.Mix all the ingredients for the frosting till you get a nice smooth creamy texture, add a tbspn of water if needed. You must be able to easily spread the frosting on top of the cake.

After the cake is done [test it by inserting a tooth-pick into the centre of the cake and until it comes out clean], cool it for 30-40 minutes.Once the cake is completely cooled, apply the frosting on top of it. Leave it on for 15-20 minutes till the frosting sets.

Cut a piece of cake and enjoy it along with a cup of hot tea. :)

 
Print this Post

Continue Reading >>

Thursday, February 16, 2012

Super Easy No-bake Mango Cheesecake

The two words no-bake and cheesecake caught me and i had to try it. This is Valentines' day special dessert, which i wanted to do, but ended up being a day late. But never mind , let me take you to the recipe without further delay.

I consulted many recipes from various sources over the internet and came up with a mixed version. But main recipe reference is from Edible garden

No-Bake Mango Cheescake


Ingredients

Serves 3

Cream Cheese or Hung curd - 1/2 cup
Castor Sugar - 1/4 cup
Fresh Cream - 1/3 cup
Mango pulp - 3/4 cup
Gelatin - 1 tbspn
Mcvities digestive bisuits  powdered - 1 cup
Melted butter - 4Tbspn
Cashews - 5
Sugar - 1 tbspn
Vanilla essence - 1/2 tspn

Method

Base of the cake 

Powder the biscuits along with the cashews and 1tbspn sugar to make about 1 cup. Mix it well with melted butter . Now bring out 3 serving glasses and  spoon this into each of them and press them firmly to make the base of the cheescake.Put it inside the fridge. Let it stay in the fridge while you proceed with the second layer to make the cheescake filling as below.

Cheescake mixture

This consists of the three steps as below

Step 1- Mango pulp - gelatin mix

In a cup, pour about 2-3 tspn of cold water along with gelatin and stir the gelatin with hand. Now add 2-3 tspn of hot water over this - stir and let the gelatin completely dissolve. Mix the mango pulp with the dissolved gelatin and keep aside.

Step 2 -Whipped Fresh Cream 
Whip the fresh cream separately and keep aside.

Final Cream cheese mix

Now mix the cream cheese and castor sugar well for 2-3 minutes to get a smooth texture. Pour 3/4th of the mango pulp mixture prepared in step1 [remaining is to be used for topping] and all of the whipped cream [step 2] and vanilla essence onto the cream-cheese/sugar mixture.

Now take out the glasses from the fridge and fill 3/4 of the glass with the cheescake mixture. Now return to fridge and refreigerate for 1.5 hrs for it to set.

Topping

After 1.5 hrs, bring the glasses, gently spoon in the the remainining mango pulp on top of the cheesecake mixture in each glass. Referigerate for 5-6 hrs, for best results cool it overnight. And there we have our beautiful cheescake ready.

Note:
You can always subsitute hung curd for cream cheese, as cream cheese is expensive and difficult to get in India.But i had tried this recipe with cream cheese.Lucky me! ;).

Gelatin is a meat by-product, so if you are strictly vegan, use chinagrass [agar-agar] instead.

Also the quantities in each layer can be adjusted as per taste/need. I have used more mango pulp mixture for the topping, than necessary.

Print this Post

Continue Reading >>
Related Posts Plugin for WordPress, Blogger...

A la carte!

Along with idli/dosai (13) Along with rice (32) Along with rotis (21) asparagus (1) baby potatoes (4) bajji (1) baking (9) banana (1) basil (1) basmati (2) beans (1) beetroot (5) bhindi (3) biryani (1) Black eyed beans (2) blueberry (1) bok choy (1) bottle gourd (1) bread (3) breakfast (4) brinjal (4) brocolli (1) buttermilk (1) butternut-squash (1) cabbage (2) cakes (7) carrot (1) carrots (3) cashews (1) cauliflower (8) cheescake (2) chettinadu (24) chettinadu delicacy (23) Chicken (7) chilli (1) Chineese (3) chinese (1) chocolate (1) chole (2) chutney (6) coconut (5) coconut milk (1) coriander (4) corn (1) cow-peas (1) cream-cheese (2) curry leaves (1) dal (3) dates (1) desserts (14) diwali 2013 (1) dosai (1) drink (1) drumstick (2) dry field bean (1) Easy (44) egg (3) fenugreek (1) fish (1) Food and Travel review (1) garlic (9) ginger (1) gobi (1) green gram (1) How To (5) Indian Flat Breads (4) indian sweets (3) International (5) ivy gourd (2) jeera (3) kootu (1) kovakkai (1) lemon (3) lentils (11) lobia (1) malai (1) mango (2) masoor dal (1) Methi (2) mint (2) mix veg (9) mochai (1) moong dal (4) mushroom (10) mutton (1) non-veg (2) onion (2) orange (1) paneer (11) parathas (1) pasta (2) peas (7) pepper (1) pickles (1) plantain (1) poriyal (1) potato (14) potatoes (2) quinoa (1) Rajma (1) rasam (1) rice flour (1) rosemary (2) shallots (1) snack (18) soup (7) soy chunks (1) spinach (6) stir-fry (1) strawberry (1) sweet potatoes (1) tamarind (5) tomato (7) toor dal (1) val bean (1) Variety Rice (13) walnut (1) wheat (2) yoghurt (1) yuuum!! (1) zucchini (2)

Latest on Food Over IP

Copyrights

All rights reserved @2012.

Unless otherwise mentioned, the text and images included in FoodOverIP blog belongs to the author. The blog author’s permission is required before any content is reproduced in any form.

  © Blogger templates The Professional Template by Ourblogtemplates.com 2008

Back to TOP  

Blogging tips