

Showing posts with label How To. Show all posts

Wednesday, August 1, 2012

Dosai/Dosa Batter recipe | How to make dosai

Anybody out there who doesn't like dosai? Please knock here - I am yet to meet somebody who doesn't like it! ;). Its a favorite among many and is quite popular among the non-Indian crowd as well. :). In my home, this is a staple like idlis and I always grind dosai batter separately. A lot of folks use idli batter to make dosai as well, but I feel when you do that you end up with soft dosai that are not so crispy. Also dosai batter making is quite easy and most of us can do it well unlike the idli batter. Go ahead and give it a try :) . Lets get started!

Dosai | Dosai Batter


Ingredients

Idli Rice - 2 cups
Raw Rice - 2 cups
Urad dal - 3/4 cup
Salt - 8 tsp
Water - as per need

** I get really good quality urad dal here and hence 3/4 cup is enough for me. Normally I would recommend you to start with 1 cup urad dal. **

How do you do it

The ratio of rice and dal mentioned here is not a standard. You can tweak it according to your need. The concept here is that - urad dal gives softness and color to the  dosai and raw rice make the dosai crispy. So start with the above proportions of idli rice, raw rice and dal, if you find your dosa too crispy,increase the dal quantity or decrease the raw rice quantity. If you want the dosai to be more crispy, increase raw rice quantity or decrease the urad dal quantity. So play around with the proportions to suit your need. For me the above ratio works well.

Wash idli rice ,raw rice and urad dal and soak all of them together in water for about 4-5 hours.Water level needs to be well above the rice and dal. Do not wash the urad dal thoroughly, just wash it once. Washing it quite well would remove the yeast content and hence deter the fermentation process.

Add all the soaked rice and dal along with the water used to soak them in into your wet grinder/mixie  and grind them for 30-40 minutes to get a smooth textured batter. Add water in between to make sure your grinder moves smoothly. You need to use a ladle and scrape the sides of the grinder vessel, and along the hinges of the grinder stone where the dal/rice might get stuck. Do this 2-3 times. I used 2-3 cups of water while grinding for the above proportions. The final consistency of the batter has to be a little thinner than dosai batter as the batter will thicken after fermentation. You can see the consistency of the batter in the picture as well. Just before you finish grinding, add salt into the vessel and let the grinder spin for a minute or two. Transfer this into a vessel now. We are done, that simple :). No mixing with hand etc are needed for this like idli batter. The next step is to ferment this batter.

Note: Water quantity to be used while grinding, mentioned above is approximate. It depends on various things such quality of rice, dal and the amount of water you use to soak the rice, dal etc. So use your judgement to vary the amount to get the right texture.

Fermentation Process

The best part about dosai batter is that even if it doesn't ferment well, your dosai will be okay/good unlike idli batter where if its not fermented well, idlis will turn out hard.

Now we need to ferment this batter for about 8-10 hours. I have a really huge vessel and I ferment the entire mix at one go. You need to have a vessel where the batter occupies only 60% of the space, as after fermentation the batter will rise above ~ 25-30%. So use two vessels if needed. What my Amma does is that, she keeps half the batter inside the fridge immediately and ferments the rest. You could do that too and later ferment the other half when needed.

For fermentation, the optimum temperature is 30-32 deg C. If the temperature is below 30 deg C, it may take more than 10 hours to ferment, and if the temperature is > 32 deg C, and the batter stays out for > 8 hours, it will become sour. For me,it takes about 12 hours to ferment, after which i move the containers to the refrigerator. If you are staying a cold place, the following should work.

1. Preheat oven for a few minutes and place the vessel inside the oven, close the oven door.
2. Turn on the oven light, keep the batter vessel inside and leave it closed.
3. If you don't have an oven, take warm water in a huge vessel and place the batter vessel inside the vessel containing warm water and leave it.

So once the batter has risen, move it to the fridge. This should stay good for about 10 days , its lasted me that much.

Note: I have used a steel vessel and as well as a tupperware box for the batter to ferment in, and both has worked well. But in any case, do not close the vessel with air-tight lid.

How to make Dosai


When you take the dosai batter out of the fridge to make dosai, check for salt and batter consistency. If the batter is thick, add water and  bring it to dosai batter consistency and add more salt if required.

Heat a dosai pan. Once the pan is moderately hot, take a ladle full of dosai batter, and spread it in the form of concentric circles like in the picture. Wait for a few seconds and then drizzle a few drops of oil on top of the dosai. Cover the pan with a lid if you don't intend to flip the dosai and cook the other side too and that's what I do. Once the bottom browns and becomes crispy, remove it.

Serve hot with tomato chutney or chettinadu sambar! :)

Notes: 

If you have only idli batter and want to make dosai , you can mix rice-flour with water and add to idli batter, this will also give a crispy texture. I have tried both these methods but grinding dosai batter separately obviously works much better.

You can use this batter to make kuzhi-paniyaram and Appam too.

Print this Post

Continue Reading >>

Sunday, July 15, 2012

Guide to super soft idlis | How to make soft idlis

Getting idli batter right at the first few attempts is quite difficult and I am sure all of us would agree to that. I have had my fair share of problem with idlis. :) . The first couple of times I dint get it right, I started buying batter from shops here which was okay for dosai's , but idli - I don't think so. In all of my 23 years, I had never once paid attention to how my Amma makes idli batter. I have a huge smile on my face as I am writing this - There were days when I ridiculed/joked/complained about the idlis my mom made , and as always pat came the reply "Let me see, how you make idlis when the time comes" ;)Don't mistake me here, her idlis were great, once in a while when it wasn't - I dint spare my mom from idli comments. Little did I know about the process of idli batter then. :)

A lot of things have gone wrong with my many attempts at this - wrong proportions of dal and rice, bad quality urad dal, not fermenting properly, hard idlis, softer-flatter than necessary idlis and many such things. Eventually after all those trails, I learnt how to get them perfect :). So here is me giving you a cheat sheet for making soft fluffy idlis.Its definitely longer than a cheat sheet  ;). This is the longest post I have ever written and probably would write.

Idli Batter


Ingredients

Whole Urad dal - 1 cup [Measure it flat on the cup]
Idli Rice - 5 cups - [Measure it flat on the cup]
Salt - 8 tsp
Water - as per need.


How do you do it

Rice-Dal ratio:

Wet grinder is the best appliance for making idli batter. Yes, you can use your food processor/mixie - but in my opinion , wet grinder is the best. So i strongly recommend buying a wet grinder if idli/dosai is staple food for you.

The usual ratio of Dal:Rice is 1:4. But this is not the thumb rule. It largely depends on the quality of dal you are using. The quantity of urad dal and the texture of ground urad dal are majorly responsible for the way the idlis turn out. Try using 1:5, if you feel the idlis turn out a little hard, make it 1:4. If you have used more urad dal than necessary, the idlis will turn out flat and way too soft than necessary and if you have used less dal than whats needed, you will end up with hard idlis.So try out different ratios and see what works for you.

Wash the rice well and keep aside. Also wash the dal and keep aside. While washing urad dal, be careful not to over-wash it. Just wash it once, that is enough. Over-washing urad dal will result in washing away the yeast content in it and hence deter the fermentation process.

Take two containers having the rice and dal. Soak the rice in water for 4-6 hours (not more),water level should be 1-2 inches above the rice. Urad dal needs to be soaked for about 45 minutes-1 hour (not more), again water level needs to be an inch above the dal.

Basic process of Grinding and Consistency of Batter

Add in the urad dal along with the soaked water into the grinder vessel, let it grind for about 5 minutes. After 5 minutes, add water maybe 1 cup and let it grind for another 10 minutes. You need to use a ladle and scrape the sides of the grinder vessel, and along the hinges of the grinder stone where the dal might get stuck 2-3 times. You might think the urad dal is ground well and its done in about 15-20 minutes, but do not stop after 20 minutes. Urad dal needs to grind for atleast 40-45 minutes to get that smooth and fluffy texture. So let it grind for 40 minutes, adding water little by little and also scraping the sides as and when necesary. You can see the texture of ground urad dal in the picture, the final ground dal needs to be of that consistency and texture. After grinding dal, transfer it to a big vessel.

Note: Make sure the urad dal is not watery, it should not take you more than 2 cups of water during the grinding process. If you add too much water, you will not get a fluffy texture and end up with not-so-good idlis.

Now add the soaked rice along with the water to the grinder vessel. Grind the rice for about 30-35 minutes. The texture of ground rice should be a little thinner than the dosa batter consistency. In the same way as before, keep scraping the sides of the vessel 2-3 times to make sure the rice is ground well. Along with the water already used for soaking the rice, you may need to add another 2 cups of water during the process. Once done, add this ground rice to the vessel where you had transferred the dal to. Add about 8 tsp salt now.

Now using your hand , mix the ground rice and dal thoroughly. You need to mix well for atleast 5 minutes to make sure that the dal and rice have been mixed properly. Add water if the batter is too tight. Be careful though, the consistency of this needs to be a litle more denser than dosa batter consistency. Once mixed well, as a finishing touch, beat the mixture with your fist 4-5 times. Thats it, we are pretty much done.

Note: Water quantity to be used while grinding, mentioned above is approximate. It depends on various things such quality of rice, dal and the amount of water you use to soak the rice, dal etc. So use your judgement to vary the amount to get the right texture.

Fermentation Process

Now we need to ferment this batter for about 8-10 hours. I have a really huge vessel and I ferment the entire mix at one go. You need to have a vessel where the batter occupies only 60% of the space, as after fermentation the batter will rise above ~ 25-30%. So use two vessels if needed. What my Amma does is that, she keeps half the batter inside the fridge immediately and ferments the rest. You could do that too and later ferment the other half when needed.

For fermentation, the optimum temperature is 30-32 deg C. If the temperature is below 30 deg C, it may take more than 10 hours to ferment, and if the temperature is > 32 deg C, and the batter stays out for > 8 hours, it will become sour. For me,it takes about 12 hours to ferment, after which i move the containers to the refregirator. If you are staying a cold place, the following should work.

1. Pre-heat oven for a few minutes and place the vessel inside the oven, close the oven door.
2. Turn on the oven light, keep the batter vessel inside and leave it closed.
3. If you dont have an oven, take warm water in a huge vessel and place the batter vessel inside the vessel containing warm water and leave it.

So once the batter has risen, move it to the fridge. This should stay good for about 10 days , its lasted me that much.

Note: I have used a steel vessel and as well as a tupperware box for the batter to ferment in, and both has worked well. But in any case, do not close the vessel with air-tight lid. Just close them with a normal plate during fermentation.

Do's and Dont's for Idli Batter preparation

1. Do not over-wash urad dal, you might wash away the yeast content.
2. Do not overstock urad dal. Buy 1 kg at a time, and use very good quality of urad dal.
3. Do mix the ground rice and dal thoroughly with your hand. It must be completely blended well together.
4. Do not forget to add salt during mixing, after fermentation is over, you should not disturb the batter, hence salt cannot be added later.
5. Make sure you get the ratio of dal:rice right and while grinding the texture of dal needs to be fluffy and smooth.

How to Make idlis

I use the traditional Idli chatti [vessel] with idli plate , a cloth on top of idli plate and steam idlis on it. You can use your way of making idlis - microwave vessel/ idli cooker/ idli vessel method.What I do is, fill the idli vessel with water upto 30% level, bring to boil, make sure steam comes out of the vessel. Place the idli plate lined with with cloth on top of the vessel as you can see the pics. Now take the batter out, beat the batter on top gently with the ladle to loosen it up, scoop one ladle full of batter and fill each idli hole. Close the idli vessel with the lid. Never mix the batter, just take the batter from the top. Steam for 7 minutes on high flame for the idlis to get done. Switch off flame and now take the idli plate and invert this on to another plate. Remove the inverted idli plate and cloth, transfer the idlis. Since I use the cloth method, the top of my idlis wont be flat, it will be a little textured as you can see in the picture. In the pressure cooker method, both bottom and top of the idlis will be smooth, which I am not fond of and hence always use the idli chatti way. :)

Note: If you notice a yellow layer on top of the batter after fermentation or when you take it out of the refrigerator to make the idlis, remove that layer and use the rest. Its okay.

Idli FAQ

Q. My Idlis turned out hard, what could be the reason?
A. The quantity of urad dal you had used must be less Or The consistency of the batter might have been too thick Or the fermentation process did not happen well.

Q. My idlis turned out flat and too soft
A. The quality of Urad dal was too good, so slightly reduce the quantity of dal next time. Or the batter consistency was too thin.

Q. Fermentation did not happen properly and batter did not rise well
A. You did not mix the rice and dal thoroughly. Or you washed the urad dal thoroughly.Or the temperature was not optimum for fermentation to take place.


PS: Join my Facebook page FoodOverIP to get updates about upcoming posts and share your feedback.

Print this Post

Continue Reading >>

Sunday, July 1, 2012

Chettinadu Vellai Paniyaram | 50th Post and counting

First up I am dedicating this post to my family. To the people who would just about do anything to see me happy.

Welcome to my 50th post. :) Yahoo! Finally!. When S started a sample blog for me, he never did think I would go beyond a few  posts. But to his surprise and mine, I have taken this seriously and have been dedicating enough time to contribute to this blog and I am loving it :). These days the crockery section in showrooms interest me more than the clothes/accessories section. ;)

I also thank the few food bloggers who visit my page regularly and leave comments.It feels good when fellow bloggers appreciate the work and it is good motivation for me to continue posting.Thanks a ton guys.

This being my 50th post I wanted it to be something special. So it has to be some kind of paniyaram , which is my absolute favorite. Vellai Paniyaram is a chettinadu delicacy made by deep frying the batter ---made by grinding urad dal and raw rice together. It is served as a savory item to satisfy your 4pm hunger cravings :). You can have this along with milagai chutney, Idli podi or just eat it plain . My mom was staying with me for  a good couple of weeks in Mumbai and it was super awesome.So we she made this for S and me in Mumbai.This recipe is a little tricky as you need to make adjustments after seeing how the paniyaram turns out and after a few trails , you will get the right mix for the paniyaram batter.

Vellai paniyaram


Ingredients

Recipe Source - My mom

Serves - Makes about 20 Paniyarams
Prep Time - 2.5 hours
Cook time - 1 hr

Raw Rice - 1 cup [not heaped , measure it flat on the cup]
Urad dal -  1/4 cup or a fistful of dal. [Oru pudi]
Salt - to taste
Oil - for deep frying

For Adjustments

Milk - as per need [max 1/4 cup needed]
Idli Batter - as per need [max 1/3 cup needed]


Method

Soak the rice and dal together in water for 2 hours and not more. Drain the water from the soaked rice-dal and keep aside and use little by little for grinding. Grind the dal and rice together in your mixer to a smooth paste, the consistency of the batter should neither be as thick as idli batter nor as thin as dosa batter. The consistency needs to be in between the two. So while grinding, be careful of the amount of water your are adding.

Add salt to the ground batter and keep aside.

Heat oil in a flat kadai. The temperature of the oil must be medium, so that the paniyaram gets cooked inside as well.Take a small ladle full of batter and drop it into oil. The paniyaram will puff up and come above in a few seconds. Within a minute turn it upside down and allow it to cook for 1 more minute and remove it from oil.Drain on tissue paper.It shouldn't take more than a minute or 2 to get the paniyaram done.The paniyarams will be a little thick in the middle and thin around the edges.

Now taste the paniyaram. The correct texture of these paniyarams are such that they are slightly thick in the middle. If you feel that it is too thick, then add about 2 tbsp of milk, on the other hand if you feel that it is not soft enough then add 4-5 tbsp of idli batter. After making the adjustments, try making the paniyarams again. Repeat the process until you reach the correct thickness and softness.

With the above measurements of rice and dal, we had to add milk + idli batter 3 times.So make the paniyaram one by one, taste it, add milk [2 Tbsp] and idli batter [4-5 Tbsp]  each at a time, and stop when you think the density and softness of the paniyaram is apt. Then you can continue making the rest of the paniyarams with the proper batter.

Serve warm with milagai chutney

Notes

1. Recipes of idli batter and dosa batter will soon be up. :)

2.  If you are worried batter might become runny after addition of milk only since you feel the paniyaram is thick, then add idli batter to correct the consistency. With the above measurements i had to add idli batter and milk , 3 times, so my batter was of the right consistency.

3. Do not add more than 1/4 cup urad dal. If you add more urad dal, the paniyarams will drink oil and you may have to add rice flour to correct it.


Print this Post

Continue Reading >>

Wednesday, May 30, 2012

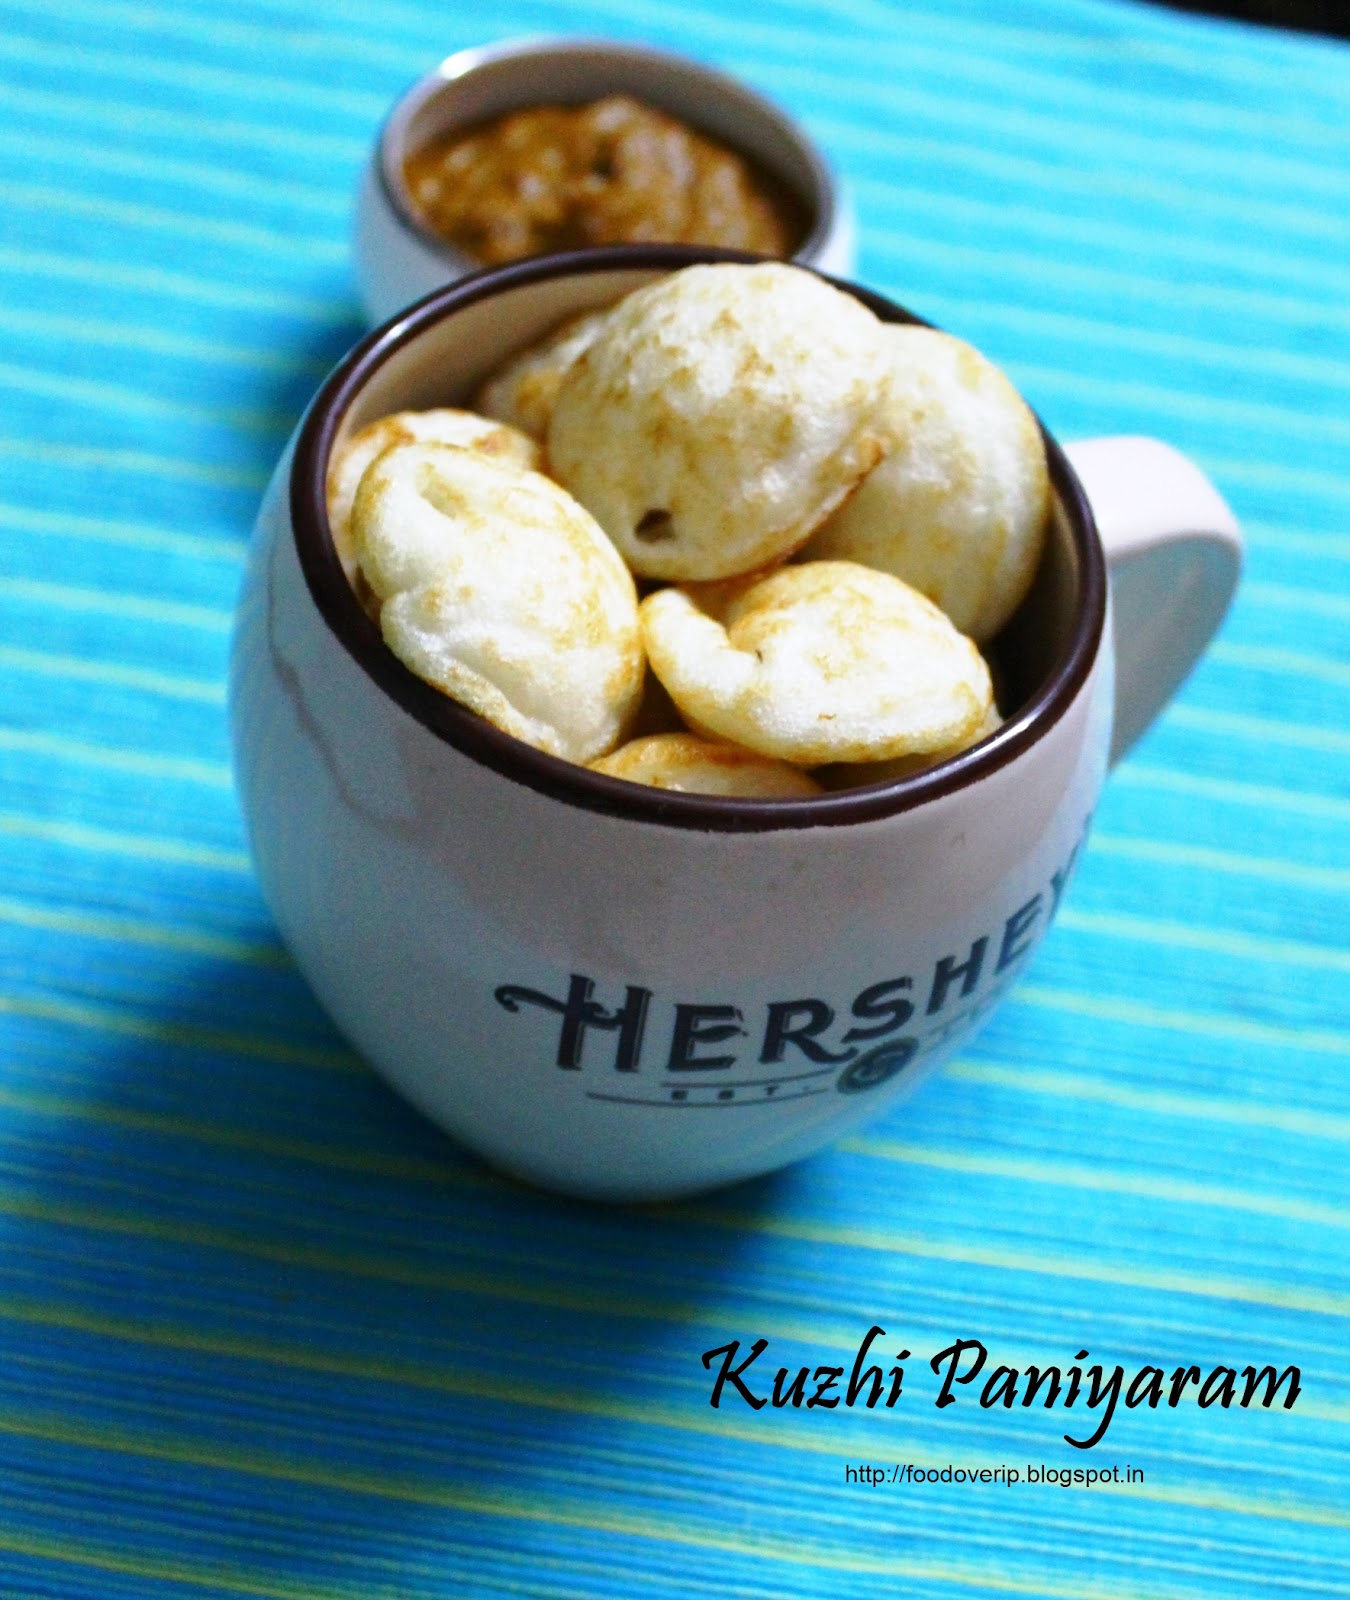
Kuzhi Paniyaram.

I feel like having some kuzhi paniyaram right now. Just the thought of it makes me want it. :). One of my top favorites and not S's [for a change ;)]. This paniyaram is a traditional chettinadu tiffin item usually had with milagai chutney.

Kuzhi Paniyaram, though simple and easy to make , is time consuming if you are cooking for many people [ read >2]. My mom when she makes this, moves the stove to the floor from the kitchen slab, sits down and makes them patiently for me, my sis and dad.And each of us would gobble up more than 20-30 paniyarams. :)

Kuzhi Paniyaram


Ingredients

Dosai batter - 4 cups
Fenugreek powder - 1/2 Tbspn
Oil - as required
You also need a kuzhi paniyaram pan like the one in the picture to make this.


Method

Mix dosa batter and fenugreek powder well. Heat the paniyram pan. Add a 2-3 drops of oil in each of the holes. When the oil is warm, take a ladle full of batter and drop into each hole until its 3/4 full. Do not fill the paniyaram up-to the brim, you will find it difficult to turn the paniyarams over later.The flame needs to be medium-low to make sure the paniyarams are cooked inside as well.After a couple of minutes once the bottom of paniyaram browns, using a  wooden skewer turn the paniyaram over to cook the other side. Once both sides are done transfer to a plate. Serve warm with tasty milagai chutney.

Notes

You many also heat a tbsp of oil in a pan, add in some mustard, jeera, chopped onions , curry leaves, green chili and saute them for  a few minutes . Pour this tempering into the dosa batter with methi/fenugreek powder and mix well to get a more flavorful batter for the paniyarams.


Print this Post

Continue Reading >>

Monday, April 16, 2012

Medhu vadai / Lentil Fritters

Wishing you all a very happy belated Tamil New year. So on to some festival food. :)
Medhu vadai or Ulundu vadai is a standard item in all South Indian breakfast specials. It is the absolute favorite of most Indians I have come across. I hardly know people who don't like vadai. If I am having breakfast in any restaurant in south India, this is sure to be one of my orders. In my household, this is sure to make an appearance in almost all special occasions . I made this a couple of days back for Tamil New year. :)

This is one of the special items that took me some time to get the hang of it. I still cannot say I have mastered it. :) . It needs practice to get the round shape with the hole , you should also know what consistency the batter has to be and a few other pain points.

Medhu Vadai


Ingredients

Makes roughly around 20 vadais

Urad dal - 1 cup
Raw Rice - 2 Tbspn
Toor Dal - 1 tbspn
Salt - as per taste

Onion - 1 Large finely chopped
Green chilli - 5 finely chopped
Curry leaves - 2 Sprigs , crushed well
Coriander leaves - 2 Tbspn , chopped well.

Oil - for deep frying - 2 cups

Method

Soak the urad dal, raw rice, toor dal in water for 45 minutes, water level must be well above the dal in the container. Drain excess water and grind it in your mixer with as little water as possible. This step is very important, add as much water as needed for your mixer blade to rotate well  without getting jammed. if you are able to grind without any water - great!. Max you can add maybe 2 -3 Tbspn of water.Grind till you get a smooth fluffy texture of the dal.

Transfer to a container. Add salt, and the chopped onions,green chilli,curry leaves and coriander leaves to it. Mix well.Now the dough is ready for the vadais.

Heat oil in the kadai to fry the vadais.Now take a polythene sheet and wipe it with water. Have a bowl of water by your side - jus to dip you hands to get rid of the dough in between frying and making the vadai shape.

Pinch a medium sized ball of the dough, and place it on the polythene sheet. With you index finger , make a hole in the center of the dough and get the shape as in the picture above.Once done transfer the dough from the polythene sheet [must retain the shape you have made and must not collapse] to your right hand and drop in hot oil.The oil must be moderately hot. Let the vadais fry for a couple of minutes in medium heat, then turn it over to get the other side done. Drain on absorbent paper.

Serve hot with chutney/sambar. Idly sambar and vadai is the perfect Tamil breakfast. Nothing can beat this classic trio. :)


Notes

1. If you are not able to shape the dough as said , and it collapses, you might have used excess water while grinding. The dough needs to be tight for vadais to hold the shape.If you run into this, dont worry, just drop them like bondas, it will still taste good. :). The first time I attempted vadais, thats what I did. ;). As a remedy, you can try freezing the batter for a couple of hours and then try to shape it [This works, i have tried this]. Another fix might be to powder 2 tbspn of aval [poha/flattened rice] and mix it along with the dough, freeze it for 2 hours and try again. [My Paati's suggestion]

2. If your vadais are absorbing too much oil, again the reason is , you may have used excess water while grinding. Adding a couple of tbspn of rice flour might help in this case. I have already added raw rice to the ingredient list due to this.

3. So the key point is to make sure to use as little water as possible while grinding.


Print this Post

Continue Reading >>
Related Posts Plugin for WordPress, Blogger...

A la carte!

Along with idli/dosai (13) Along with rice (32) Along with rotis (21) asparagus (1) baby potatoes (4) bajji (1) baking (9) banana (1) basil (1) basmati (2) beans (1) beetroot (5) bhindi (3) biryani (1) Black eyed beans (2) blueberry (1) bok choy (1) bottle gourd (1) bread (3) breakfast (4) brinjal (4) brocolli (1) buttermilk (1) butternut-squash (1) cabbage (2) cakes (7) carrot (1) carrots (3) cashews (1) cauliflower (8) cheescake (2) chettinadu (24) chettinadu delicacy (23) Chicken (7) chilli (1) Chineese (3) chinese (1) chocolate (1) chole (2) chutney (6) coconut (5) coconut milk (1) coriander (4) corn (1) cow-peas (1) cream-cheese (2) curry leaves (1) dal (3) dates (1) desserts (14) diwali 2013 (1) dosai (1) drink (1) drumstick (2) dry field bean (1) Easy (44) egg (3) fenugreek (1) fish (1) Food and Travel review (1) garlic (9) ginger (1) gobi (1) green gram (1) How To (5) Indian Flat Breads (4) indian sweets (3) International (5) ivy gourd (2) jeera (3) kootu (1) kovakkai (1) lemon (3) lentils (11) lobia (1) malai (1) mango (2) masoor dal (1) Methi (2) mint (2) mix veg (9) mochai (1) moong dal (4) mushroom (10) mutton (1) non-veg (2) onion (2) orange (1) paneer (11) parathas (1) pasta (2) peas (7) pepper (1) pickles (1) plantain (1) poriyal (1) potato (14) potatoes (2) quinoa (1) Rajma (1) rasam (1) rice flour (1) rosemary (2) shallots (1) snack (18) soup (7) soy chunks (1) spinach (6) stir-fry (1) strawberry (1) sweet potatoes (1) tamarind (5) tomato (7) toor dal (1) val bean (1) Variety Rice (13) walnut (1) wheat (2) yoghurt (1) yuuum!! (1) zucchini (2)

Latest on Food Over IP

Copyrights

All rights reserved @2012.

Unless otherwise mentioned, the text and images included in FoodOverIP blog belongs to the author. The blog author’s permission is required before any content is reproduced in any form.

  © Blogger templates The Professional Template by Ourblogtemplates.com 2008

Back to TOP  

Blogging tips