Showing posts with label chettinadu. Show all posts

Wednesday, June 17, 2015

Chettinadu Inipu Cheeyam/ Sweet Seeyam


This is a very popular sweet dish in Chettinadu cuisine and like many others falls in the "difficult to make" category. Sweet Seeyams are deep fried dumpling with a jaggery-moong dal stuffing inside them. The consistency of the stuffing as well as the batter that coats it are two important things in this recipe. A couple of trials and you should easily get the hang of this. I had blogged a different version of this here - but this trail turned out perfect and this one is the keeper recipe for me. The other recipe has a stuffing that is a little dry. This one is sooper gooey and moist and we prefer this texture. So you could pick which version of the stuffing you like and make them.

Ingredients

Serves - Makes about 10 pieces
Prep Time - 30 min + 2 hrs soak time
Cook time - 15 minutes

For the sweet stuffing

Moong Dal [Green Gram Dal] - 1/2 cup
Crumbled Jaggery - 3/4 cup
Grated Coconut - 1/3 cup
Cardamom powder - 1/2 Tsp
ghee - 2-3 Tsp

For the batter

Raw Rice - 1/2 cup
Urad dal - 1/3 cup
Salt - a pinch
Water as per need


How do you do it

1. To prepare the sweet stuffing, boil the moong dal until its 3/4 done. Make sure to drain the moong dal of all the water, let it dry for 15-20 minutes. Cool the dal completely and mash it up roughly with a ladle and keep aside.

2. Heat a kadai, flame must be medium level. Add the broken/crumbled jaggery and sprinkle 3 tbsp of water on top of it. Let the jaggery loosen a little and form a thick syrup. Strain the jaggery syrup, remove impurities and keep aside

3. Heat 2-3 Tsp ghee in a pan add grated coconut and saute for a minute. Add the dal and jaggery syrup and mix well. Saute in low-medium flame until it forms a thick mass.

4. Switch off flame and mix in the cardamom powder. Cool the mixture.

5. Once cooled, make small lemon sized balls and keep them aside.


6. To prepare the batter, soak the rice and dal in enough water for 1-2 hours. Drain completely and grind to a smooth paste with  little water as possible. I used about 1/4 cup water while grinding. Add a pinch of salt, mix well keep aside.

7. Take half of the above batter in a bowl. Save the remaining batter to make masala cheeyum. The consistency of the batter should be dosa batter consistency. So add water to get to that consistency. Adding too much water will make it very loose and the sweet balls will not coat well and the cheeyum might soak a lot of oil.  On the other hand if the batter is too thick, you will get a very thick outer layer, so be cautious in this step. Start with little water and then you can add more after testing a few pieces.

8. Heat a kadai with oil for deep frying. Maintain the flame in medium level. Dip the ball in the batter, coat it well with batter and drop them in oil. Deep fry to a golden brown and drain them using a slotted spoon. Put them on a plate lined with paper towels to remove excess oil.

Note: Bite into one of fried cheeyum. If you feel the outer batter layer is thick, add little water to make the batter loose, you will get a much thinner outer layer.


If you have remaining batter left, mix in some finely chopped onions, green chilli, curry leaves and salt. Spoon them into the oil and fry them until golden brown to make masala cheeyam.

Continue Reading >>

Friday, November 30, 2012

Chettinadu Masal Paniyaram


Masal Paniyaram is a bonus savory dish that you can make when you couple it with Paal Paniyaram with no extra effort involved. Its the same batter, you just need to add some tempering into it to make this super delicious Masal Paniyaram. So almost always when I plan to make one of them the other accompanies it. Also medhu vadai for every other festival breakfast really bores me. So this Diwali Masala Paniyaram took Medhu Vadais place :).

Ingredients

Serves - 5
Prep Time - 30 min
Cook time - 30 min


For the Paniyaram

1/3 cup urad dal
1/2 cup raw rice
Oil - for deep frying the paniyarams

Other Items
Onion - 1 medium sized, minced finely
Curry Leaves - handful, chopped well
Green chilli - 3-4, chopped finely
Salt

For Tempering
Oil - 1 Tsp
Hing - a generous pinch
Mustard - 1 Tbsp

How do you do it

1. Soak the rice and dal in enough water for 1-2 hrs. Drain the water and reserve it. Grind in blender/mixie using the reserved water little by little. Add water needed only for your grinder blade to rotate smoothly, the lesser water you use the better. If you add too much water, the paniyarams will soak oil. Grind it to a very smooth paste, there should be no dal/rice particles left as such. Transfer to a container and keep aside. You can grind this the previous night and refrigerate to to use in the morning.

2. Add required salt, chopped onion, green chilli, curry leaves into the batter and mix well.

3. Heat 1 Tsp oil in a kadai. Add hing and mustard, let them pop. Pour this tempering into the batter and mix well again.

4. Heat oil in a kadai to deep fry the paniyarams. Spoon the paniyaram batter little by little into the kadai. Add till the kadai is almost full, fry in low-medium flame. When the paniyarams start to turn golden brown, remove them on a tissue paper.

Serve with sambar/chutney!

Notes

Grind smoothly with as little water as possible. This is a very important step, adding too much water will make the paniyarams soak oil.

Fry in medium-low flame, do effective flame management to make sure the insides of the paniyarams are cooked well.

Continue Reading >>

Monday, November 26, 2012

Chettinadu Mutton Kola Urundai | Deep Fried Spiced Meat balls


Mutton kola Urandai reminds me of the Sundays when me and my sis used to have these meat balls hot from the oil at 11ish and we would finish most of these before lunch time :). If any at all remains after the lunch session Amma would save these for me for the evening coffee. This dish is Amma's special and most of them who have had this in our home have been very impressed. If you get minced mutton, this is an easy one and pairs very well with just rasam and rice. Of all the non-veg starters I have eaten all my life, this one beats them all :).

Minced meat has very high fat content, so its not something you would want to do regularly, but once in a while its such a pleasure indulging in these mouth-watering kola urundais. All you non-veg lovers, you just have to trust me on this one, this would definitely be a winner in your home.

Ingredients

Serves - makes around 20 urundais
Spice Level - Moderate
Prep time - 15 min
Cook time - 30 min


Minced Muttin - 350gm
Small Onion/Shallots - 10
Garlic cloves - 4 medium
Ginger - 1, 1 inch piece
Green chilli - 3
Dry Red chilli - 3
Coconut grated - 2 Tbsp
Roasted Gram/Pottu Kadalai - 2 Tbsp
Egg - 1
Salt - as per need
Oil - 1 Tsp + for deep frying
Fennel - 1 Tsp
Jeera - 1 Tsp

How do you do it

1. Wash the minced meat and keep aside. Put it on a strainer, so all the water drains off.

2. Heat 1 tsp oil in a kadai. Add jeera, fennel - let them roast. Add onion, garlic, ginger and saute for a few minutes until the onions are cooked well. Add the green chilli now and give it a stir.

3. Add the minced mutton now and saute it low-medium flame. It will give out water, you need to keep sauteing/stirring it until all the water is absorbed. This would take 10-15 minutes.

4.Cool the above mixture and grind with red chilli, coconut, roasted gram and salt into a fine paste. Don't add any water , if needed you may sprinkle water. Transfer to a bowl

5. Break an egg into the bowl and mix well with minced mutton paste.

6. Heat oil in a kadai for deep frying. Take oil necessary to fry only two batches, not more. The oil will get very cloudy after a couple of batches and you will not be able to see anything if you fry the other batches in the same oil.

7. Make 5-6 lemon sized balls. Drop them in oil and fry until dark brown in low-medium flame. Drain them on a tissue paper. Make sure the insides are cooked well. Repeat till all the minced mutton paste is done.

Notes

1. As mentioned after 2-3 batches, you may need to change the oil completely because you will not be able to see anything as the oil froths up and will be cloudy. So use as little oil as needed for deep frying and change oil as required. I managed to fry everything in the same oil, but Amma changes oil once in between.

2. Follow the recipe and proportions exactly, so that the meat balls don't break in oil.

Continue Reading >>

Tuesday, November 13, 2012

Chettinadu Paal Paniyaram | A Diwali Special


I am typing this in a great hurry as I have a thousand things to do this week with family visiting us, trips to nearby places, visiting relatives etc etc, but here I am as promised with the Paal Paniyaram post. My blog would be really incomplete without Paal Paniyaram featuring here and what an auspicious day for it to make an appearance ;). Any occasion is incomplete for us without a chettinadu delicacy for morning palakaram and Paal Paniyaram as a dessert did complete justice to our Diwali breakfast today :).

A very happy and safe diwali to all of you!

Ingredients

Serves - 5
Prep Time - 30 min
Cook time - 30 min


For the Paniyaram

1/3 cup urad dal
1/2 cup raw rice
Oil - for deep frying the paniyarams

For the milk

Coconut grated - 1/2 cup
Elachi powder - 1/2 Tsp
Sugar - 1/4 cup
Milk - 1/2 cup

How do you do it

1. Soak the rice and dal in enough water for 1-2 hrs. Drain the water and reserve it. Grind in blender/mixie using the reserved water little by little. Add water needed only for your grinder blade to rotate smoothly, the lesser water you use the better. If you add too much water, the paniyarams will drink oil. Grind it to a very smooth paste, there should be no dal/rice particles left as such. Transfer to a container and keep aside. You can grind this the previous night and refrigerate to to use in the morning.

2. Take coconut milk out of the grated coconut, about 2.5 cups. Grind coconut for a few pulses in mixie and squeeze the pulp as much as possible to get the juice out. Take the pulp and keep it on a strainer. Pass hot water little by little through the strainer and squeeze the pulp to get the coconut milk from it , till you get about 2.5 cups of coconut milk.

3. Dilute half a cup of pure milk with 1/2 cup water, bring to boil, mix with the coconut milk, add the sugar, elachi powder and let it dissolve.

4. Keep 3 cups of hot water in a bowl. Once you fry the paniyarams, add them to this bowl, this will remove the oil from the paniyarams.

5. Heat oil in a kadai to deep fry the paniyarams. Spoon the paniyaram batter little by little into the kadai. Add till the kadai is almost full, fry in low-medium flame. When the paniyarams start to turn light brown, remove them and put them in hot water.

Note : The paniyarams will puff up as they get fried, so add a tsp by tsp of batter each time to fill the kadai, not more. We want small sized paniyarams. Make sure the paniyarams don't turn golden brown, you should remove it when its a very light shade of brown.

6. Remove the paniyarams from hot water after a minute and add it to the milk. Repeat step 5 and 6 till the batter is over. Let the paniyarams soak in coconut milk for an hour.

7. Yummy Paal Paniyarams ready to serve on a special occasion :)

Notes

Grind smoothly with as little water as possible. This is a very important step, adding too much water will make the paniyarams drink oil.

When adding the paniyaram batter to the kadai, add a tsp by tsp, to fill the kadai, do not add big spoonful of batter, they will puff up while getting fried , and you will end up with really big paniyarams. 

Do not fry until deep brown. When its a very light shade of brown, or when it starts to brown, remove them.

Fry in medium-low flame, do effective flame management to make sure the insides of the paniyarams are cooked well.


Continue Reading >>

Monday, October 1, 2012

Murungakai Puzhi Kuzhambu

I love tangy curries and kara/Puzhi kuzhambu tops the list. Veggies like drumstick, ladies finger, radish are best suited to make this kind of kuzhambu. The tanginess and spice is imparted to the vegetable and they taste awesome. Puzhi Kuzhmabu, a poriyal and some papad - makes for an awesome lunch on a cold day.


Ingredients

Serves - 2
Spice Level - High
Prep Time - 20 min
Cook time - 20- 30 min

Drumstick - 1 , cut into medium sized pieces , half cooked in a cup of water [ microwave for 3-4 minutes on high]
Shallots/Small onion - 15 peeled
Garlic pods - 10 peeled
Tomato - 1 , chopped
Curry Leaves - 2 sprigs
Tamarind - size of a lemon
Water - 3 cups
Kuzhambu powder - 4 Tbsp
Coriander powder - 1 Tsp
Salt - as per need
Turmeric - a pinch
Oil - 3 Tbsp
Mustard - 1 Tsp
Hing - 1/2 Tsp
Fenugreek - 1/2 Tsp

How do you do it

1. Make a thick tamarind extract by using 1/4 cup water and the lemon sized tamarind piece. Mix 3 cups of water to it, add the coriander powder, kuzhambu powder mix well. Keep aside.

2. Heat oil in a kadai. Add hing, mustard , fenugreek , curry leaves to temper. Add the shallots and garlic pods and saute well until the shallots turn translucent. Add the tomatoes now, some salt and turmeric and cook till they become soft and mushy.

3. Add the drumstick pieces along with the water used to cook it in and boil for a minute.

4. Add the tamarind extract prepared in step one now, remaining salt, simmer flame and close the lid of kadai.

5. Cook until the curry is reduced in half/thickened or until oil floats on top.

Serve with appalam and steamed rice.


Print this Post

Continue Reading >>

Tuesday, September 25, 2012

Chettinadu Egg Curry

I have been thinking about making this egg curry for almost a month. The thought planted itself on my mind and wouldn't get out until I made it. This happens often with me , I would plan on making a curry the next day, and some how for what ever reason that wouldn't happen. I will spend the next few days visualizing the dish and start craving for it and it would tease me until I got around to do it. This was one such curry. So one fine Sunday afternoon for lunch, we had egg curry with peas pulao.

This chettinadu egg curry is from the book "Authentic chettinadu" which was given to me as a wedding gift. :). I haven't cooked much from it, usually Amma is my source for all the chettinadu stuff, but she doesn't make egg curry that often at home and I liked the version in the book. Its a spicy dish that should pair up quite well with dosai , idli, plain rice as well as any variety rice.


Chettinadu Egg Curry


Ingredients

Recipe Source - Authentic Chettinadu curries book

Serves - 2
Spice Level - High
Prep Time - 20 min
Cook time - 15 min


Egg - 4 [hard boiled, and peel the skin]
Shallots - 10, chopped well
Tomato - 1 Large - chopped finely
Masala/Curry powder - 1 Tsp
Coriander Leaves - few tbsp chopped finely
Oil - 1 Tbsp
Jeera - 1 Tsp
Curry Leaves - 2 Sprigs
Hing - a pinch
Salt - as per need
Turmeric - a pinch

To grind to a paste

Shredded coconut - 5 Tbsp
Dry Red chilli - 2
Pepper - 1 Tbsp
Garlic cloves (small) - 5
Ginger - 1 inch piece
Cumin -1 Tsp
Fennel - 1 Tsp
Coriander seeds - 2 Tsp
Cashews - 4
Curry Leaves - 2 sprigs
Water - few tbsp to grind with

How do you make it.

1. Dry roast the ingredients under "to grind to a paste" on low flame except cashews and curry leaves until it slightly starts to brown and you get a good aroma. Cool and blend including the curry leaves and cashews with few tbsp of water into a fine paste.

2. Make slits in the boiled egg so the curry can get in. Just make light slits, not too deep, we dont want the egg to break when its added into the curry.

3. Heat oil in a kadai. Add jeera, hing and curry leaves. Let it roast. Add shallots and saute until they are translucent. Add the tomato pieces , little salt and turmeric and cook until they are soft and mushy and let out juice.Add the masala powder and cook for a minute. Now add in the paste and saute for a few seconds. Add 3/4 cup water and remaining salt and let the curry boil. Adjust consistency of the curry according to your needs here - add more water if you need a loose curry or let it boil to thicken if you want a thicker consistency.

4. Once the curry reaches the correct consistency and the paste has cooked well, add the egg pieces and coriander leaves and wrap gently. Switch off flame.

Allow the gravy some resting time before serving.

Print this Post

Continue Reading >>

Saturday, September 8, 2012

Chettinadu Mandi

This is a signature Chettinadu side dish and always takes an important place in our Vazhai-elai saapadu [banana-leaf lunch]. I am huge fan of this side dish and so is S. I could get away without making anything else for lunch when we have mandi. Curd rice, mandi and appalam is an awesome combination for a very satisfying lunch.

You would be surprised at what forms the base of this dish. Mandi/Arisi Mandi is the water collected when you wash idli rice. You could collect this water while making idli batter or dosai batter and refrigerate it for later use. This arisi mandi water is what makes the dish very tasty and quite unique. I would highly recommend you to try this dish , its a guaranteed hit. :-)

Mandi


Ingredients

Serves - 2
Spice Level - Moderately Spicy
Prep Time - 20 min
Cook time - 15 min

Arisi Mandi - 3 cups
Shallots/sambar onion - 15 , peeled and chopped lengthwise.
Garlic - 15 , peeled , don't chop it.
Green chilli - 4, slit lengthwise and cut in half
Potato - 1, chopped into medium sized pieces
Radish - 1 , sliced into thin pieces
Beans - 5 , cut into medium sized pieces
Drumstick - 1 , cut into medium sized pieces
Ladies finger - 5, cut into medium sized pieces
Tamarind - size of a small lemon, extract juice from this and keep aside.
Oil - 2 Tbsp
Mustard - 1 Tsp
Fennel - 1 Tsp
Curry Leaves - 2 sprigs

When you make idli batter or dosai batter, before soaking idli rice, wash 3 cups of this rice once very lightly and drain. Add 3 cups water to this rice and soak for 10 minutes. Now what you need to do is dip your hand into the bowl and wash the rice well so you get a foggy water. Try to wash as much as possible to get a thick arisi mandi. Now collect this water and refrigerate and use while making mandi. This water would stay good for about 2 days.

Its not necessary to use all the above veggies, you could use 3-4 from the list. Other vegetables like mochai, avarkai , keerai can be included. No English veggies like carrot/cauliflower/cabbage etc should be used.

How do you do it

Firstly mix bhindi/ladies finger with 1 tsp oil , 1/4 tsp salt and microwave on high for 4-5 minutes. Keep aside. This is to make sure the bhindi gets cooked easily without being slimy later.

Take 1 cup of Arisi Mandi and mix with the tamarind juice and keep aside.

Heat oil in a kadai. Add mustard, let it splutter. Add fennel,curry leaves now. Then add in the onions, garlic. Saute for a couple of minutes. Add green chilli , saute till onions are translucent.Add in the bhindi now and make sure they are cooked well , it should not be gooey. Now add in all the other veggies except for potato and saute for 2 minutes. Add the 2 cups of arisi mandi now. When the mandi starts to boil, add in the potato pieces too. When the potatoes are half cooked, add the tamarind water mixed with mandi , salt and cook on medium-low flame until all veggies are cooked well. Let the curry boil at the end for about 2-3 more minutes before switching off flame. The consistency of the mandi is such that its neither too thick nor too watery. So if its too thick, add water , boil for few more minutes, if its too watery, continue simmering until curry thickens.

Serve with curd rice and appalam. 

Print this Post

Continue Reading >>

Tuesday, September 4, 2012

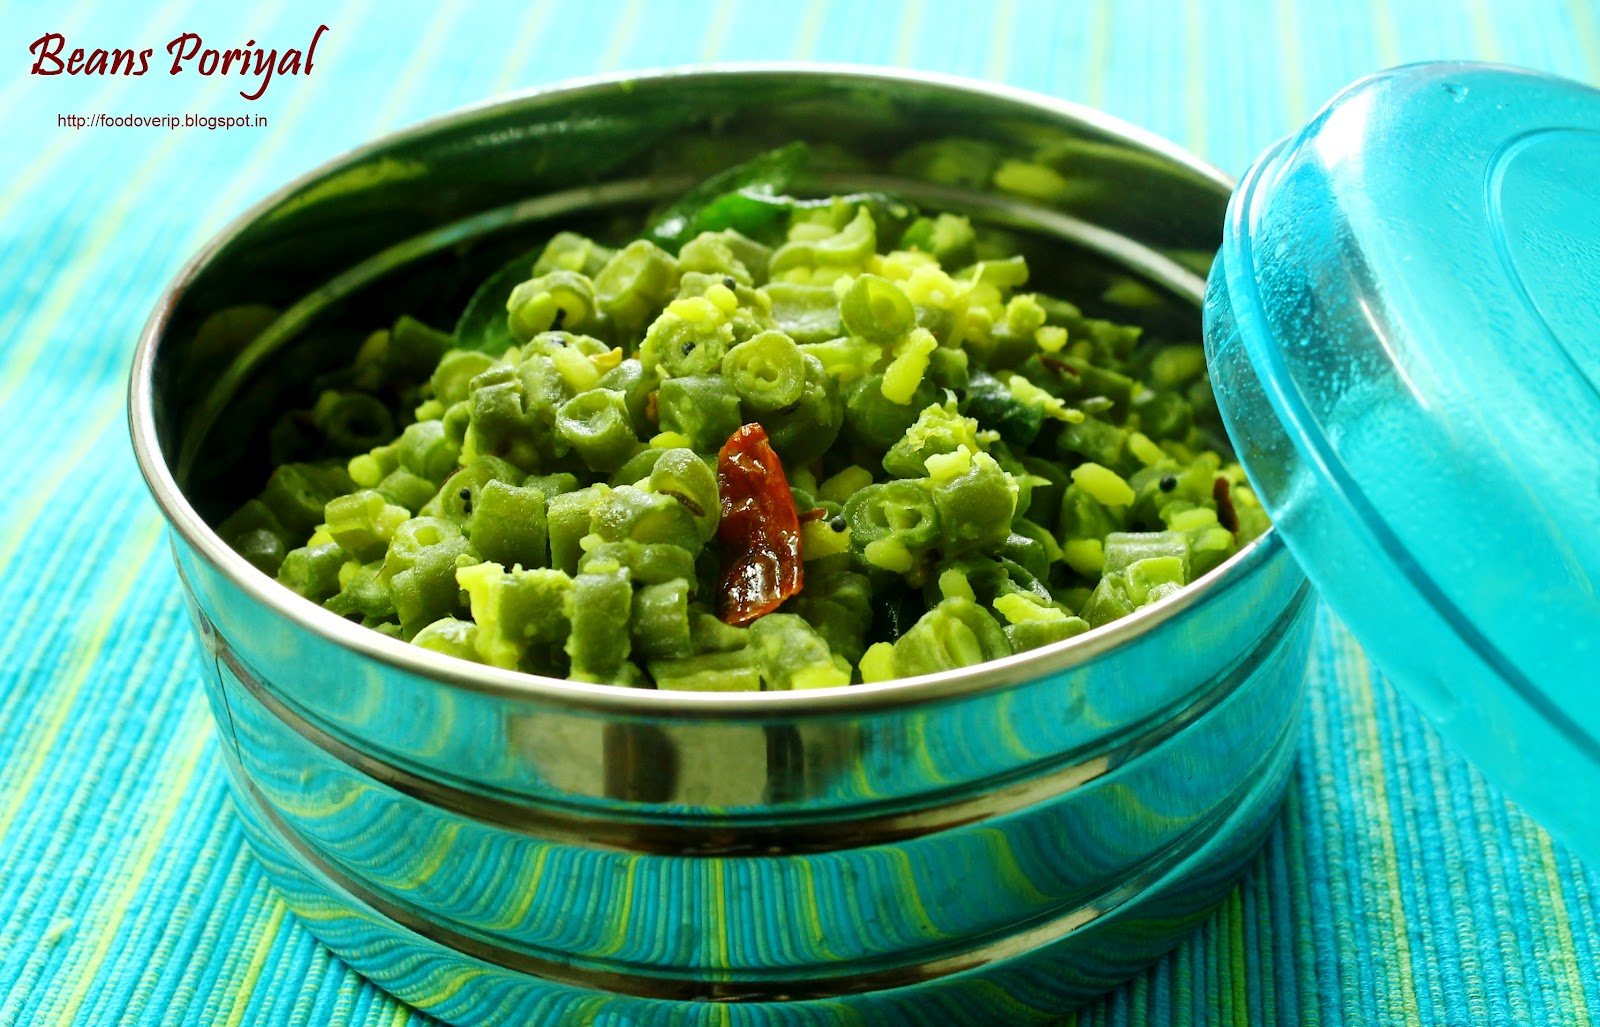
Bean Paruppu Poriyal | Beans-Moong dal stir fry

Combine beans and moong dal for a poriyal dish and its the tastiest poriyal ever. I don't prefer making poriyals with grated coconut, I would like a dal to be used instead and this does get many folks to like the poriyal rather than considering them to be quite boring. Try this poriyal and it would become a favorite, trust me!.

Beans Poriyal


Ingredients

Serves - 2
Spice Level - Moderately Spicy
Prep Time - 20 min
Cook time - 10 min


Moon dal - 1/4 cup , pressure cooked with a pinch of turmeric such that its tender but doesn't get mashed when added later
Beans - 250 gm , chopped into small pieces and steamed until tender
Oil - 1 tbsp
Mustard - 1 Tsp
Urad dal - 1 Tsp
Jeera/Cumin  - 1 Tsp
Dry Red chilli - 1
Curry leaves - 1 sprig

How do you do it

Heat oil in a kadai. Add mustard, urad dal, jeera and let it roast. Break the red chilli and add along with curry leaves. Add the boiled beans, half the amount of salt and saute for a 3-4 minutes. Add the boiled moong dal and mix well. Add remaining salt and saute for a couple of more minutes. Remove from flame.

Serve with rice and some spicy gravy/kuzhambu

Notes

I prefer the moong dal being tender but firm such that it doesn't get mashed when added to the beans. But amma boils the moong dal quite well, so that it gets mashed when added later. You may do it either way.


Print this Post

Continue Reading >>

Wednesday, July 18, 2012

Kovakai Kootu | Mildy spiced Ivy Gourd with lentils

Kovakai/Ivy gourd is not a favorite among many, S is no different. Its a very healthy veggie to take in and the only way I could hide its taste was to make a kootu :). If you belong to same category , try this kootu!. Its a very simple , healthy preparation and a really quick one. Me - I can eat this subji in many other preparations as well :).

Kovakai Kootu


Ingredients

Recipe Source - My Mom  ** She is great in tricking you into eating veggies you don't like :) **

Serves - 2
Spice Level - Not spicy
Prep Time - 10 min
Cook time  - 20 min


Ivy Gourd/Kovakai - 300 gm [ chopped into small pieces]
Moon dal - 1/4 cup
Small/Sambar Onion/Shallots - 3
Garlic cloves - 2
Curry leaves - 1 Sprig
Turmeric - 1/2 Tsp
Kuzhambu/Sambar powder - 1/2 Tsp
Jeera - 1 Tsp
Water - 2 cups

To Temper


Oil - 1 Tsp
Mustard - 1 Tsp
Hing - a pinch
Urad dal - 1/2 Tsp

Salt - as per need

How do you make it

Take a pressure cooker, dump all ingredients [except the "To Temper" and salt] and pressure cook for 15-20 minutes. Keep on high flame until the first whistle and then lower flame for the remaining time. Let the cooker cool down. Meanwhile heat 1 Tsp oil in a kadai. Add hing, mustard and urad dal and let them roast. Now open the pressure cooker. Heat the cooker again at low flame , add required salt and let the kootu come to a boil . Adjust consistency of kootu now. Add more water if needed, or if its still in a loose state, let it thicken. When you have the desired consistency, switch off flame and pour in the tempering and mix well.

Serve with rice and some spicy potato curry.

Notes

You can use the same recipe with snake gourd [Podalangai] too, it will be equally yum! :)


Print this Post

Continue Reading >>

Thursday, July 5, 2012

Green Gram Sambar/ Pasi Payar Kuzhambu

Pasi Payar kuzhambu comes to my rescue when I run out of vegetables in my fridge :). This kuzhambu is very easy to make, healthy and tasty. Rice, Payar kuzhmabu and some potato chips make a quick and delicious lunch combination.

Pasi Payar Kuzhambu


Ingredients

 Serves - 4
 Spice Level - Moderately Spicy
 Prep time - 20 minutes
 Cook time - 15 minutes

Green Gram/Pasi Payar - 1 cup
Onion - 1 Large , chopped well
Tomato - 1 Large , chopped
Garlic cloves - 3
Kuzhambu powder/Sambar powder - 3 Tbsp
Turmeric - a pinch
Salt as per taste
Tamarind extract - extract from a lemon sized tamarind
Oil - 1 Tbsp
Mustard - 1 Tsp
Jeera - 1 tsp
Hing - a pinch
Curry leaves - 1 sprig


Method

Wash the green gram well.Heat a kadai and add the washed green gram and dry roast it until you get the aroma of the green gram. Should take 2-3 minutes.Remove from flame and pressure cook for 15-20 minutes. Take care not to over cook the green gram.

Heat oil in a kadai. Add hing, mustard and jeera. Let them splutter.Add chopped onion, garlic and curry leaves. Saute till the onions are done. Add in the tomato,turmeric and half the quantity of salt. Saute till the tomatoes are soft and are mashed well.Now add in the sambar powder and saute till the raw smell of the powder vanishes. Add in the cooked green gram, stir well. Add 3 cups water, tamarind extract, remaining salt and let the kuzhmabu come to a boil. Simmer flame and let it get cooked for 10 more minutes until you get a thick kuzhmabu and all flavors come together.

Serve with rice and any chips of your choice for a great lunch.

Notes

1. While adding tamarind extract, be careful. I usually add half the quantity of tamarind , taste and add more if necessary. So adjust tamarind extract quantity accordingly.


Print this Post

Continue Reading >>

Sunday, July 1, 2012

Chettinadu Vellai Paniyaram | 50th Post and counting

First up I am dedicating this post to my family. To the people who would just about do anything to see me happy.

Welcome to my 50th post. :) Yahoo! Finally!. When S started a sample blog for me, he never did think I would go beyond a few  posts. But to his surprise and mine, I have taken this seriously and have been dedicating enough time to contribute to this blog and I am loving it :). These days the crockery section in showrooms interest me more than the clothes/accessories section. ;)

I also thank the few food bloggers who visit my page regularly and leave comments.It feels good when fellow bloggers appreciate the work and it is good motivation for me to continue posting.Thanks a ton guys.

This being my 50th post I wanted it to be something special. So it has to be some kind of paniyaram , which is my absolute favorite. Vellai Paniyaram is a chettinadu delicacy made by deep frying the batter ---made by grinding urad dal and raw rice together. It is served as a savory item to satisfy your 4pm hunger cravings :). You can have this along with milagai chutney, Idli podi or just eat it plain . My mom was staying with me for  a good couple of weeks in Mumbai and it was super awesome.So we she made this for S and me in Mumbai.This recipe is a little tricky as you need to make adjustments after seeing how the paniyaram turns out and after a few trails , you will get the right mix for the paniyaram batter.

Vellai paniyaram


Ingredients

Recipe Source - My mom

Serves - Makes about 20 Paniyarams
Prep Time - 2.5 hours
Cook time - 1 hr

Raw Rice - 1 cup [not heaped , measure it flat on the cup]
Urad dal -  1/4 cup or a fistful of dal. [Oru pudi]
Salt - to taste
Oil - for deep frying

For Adjustments

Milk - as per need [max 1/4 cup needed]
Idli Batter - as per need [max 1/3 cup needed]


Method

Soak the rice and dal together in water for 2 hours and not more. Drain the water from the soaked rice-dal and keep aside and use little by little for grinding. Grind the dal and rice together in your mixer to a smooth paste, the consistency of the batter should neither be as thick as idli batter nor as thin as dosa batter. The consistency needs to be in between the two. So while grinding, be careful of the amount of water your are adding.

Add salt to the ground batter and keep aside.

Heat oil in a flat kadai. The temperature of the oil must be medium, so that the paniyaram gets cooked inside as well.Take a small ladle full of batter and drop it into oil. The paniyaram will puff up and come above in a few seconds. Within a minute turn it upside down and allow it to cook for 1 more minute and remove it from oil.Drain on tissue paper.It shouldn't take more than a minute or 2 to get the paniyaram done.The paniyarams will be a little thick in the middle and thin around the edges.

Now taste the paniyaram. The correct texture of these paniyarams are such that they are slightly thick in the middle. If you feel that it is too thick, then add about 2 tbsp of milk, on the other hand if you feel that it is not soft enough then add 4-5 tbsp of idli batter. After making the adjustments, try making the paniyarams again. Repeat the process until you reach the correct thickness and softness.

With the above measurements of rice and dal, we had to add milk + idli batter 3 times.So make the paniyaram one by one, taste it, add milk [2 Tbsp] and idli batter [4-5 Tbsp]  each at a time, and stop when you think the density and softness of the paniyaram is apt. Then you can continue making the rest of the paniyarams with the proper batter.

Serve warm with milagai chutney

Notes

1. Recipes of idli batter and dosa batter will soon be up. :)

2.  If you are worried batter might become runny after addition of milk only since you feel the paniyaram is thick, then add idli batter to correct the consistency. With the above measurements i had to add idli batter and milk , 3 times, so my batter was of the right consistency.

3. Do not add more than 1/4 cup urad dal. If you add more urad dal, the paniyarams will drink oil and you may have to add rice flour to correct it.


Print this Post

Continue Reading >>

Wednesday, May 30, 2012

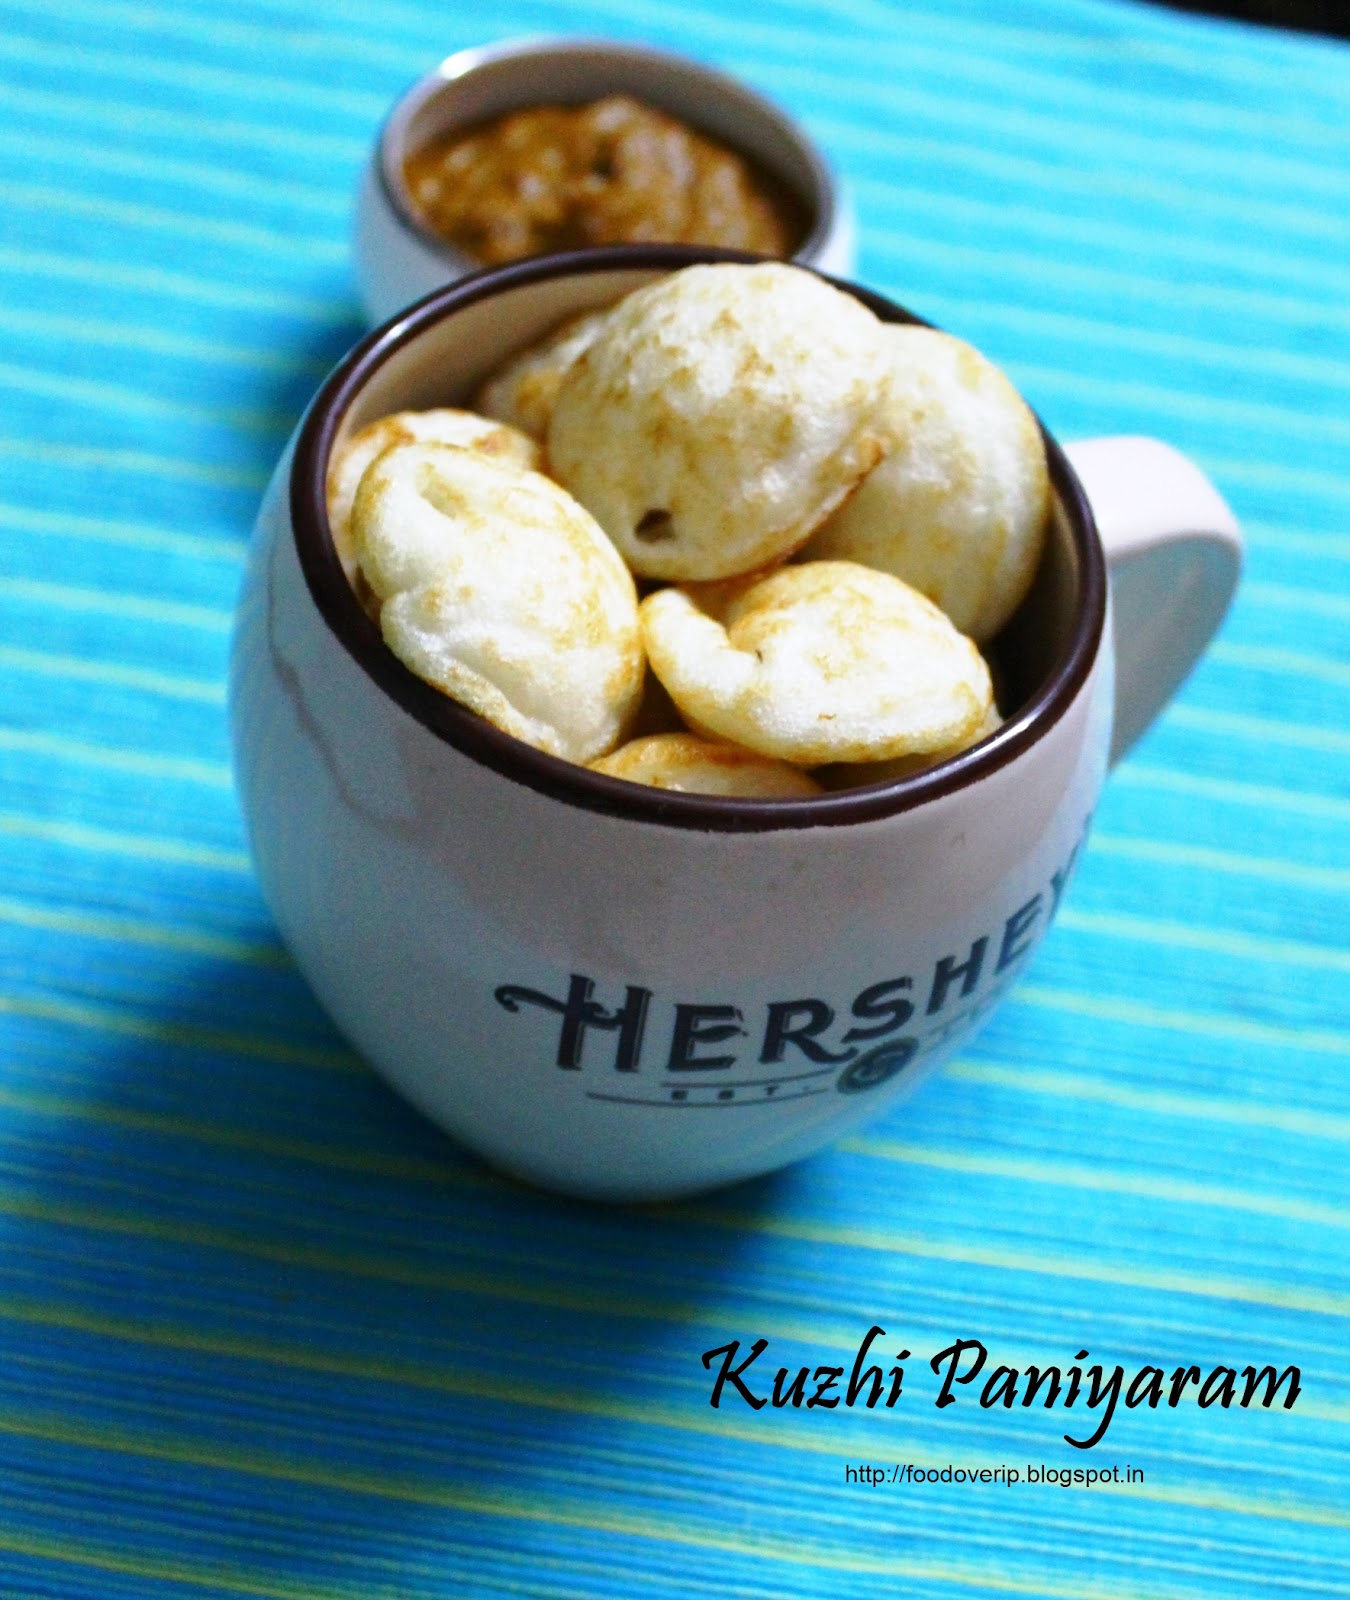
Kuzhi Paniyaram.

I feel like having some kuzhi paniyaram right now. Just the thought of it makes me want it. :). One of my top favorites and not S's [for a change ;)]. This paniyaram is a traditional chettinadu tiffin item usually had with milagai chutney.

Kuzhi Paniyaram, though simple and easy to make , is time consuming if you are cooking for many people [ read >2]. My mom when she makes this, moves the stove to the floor from the kitchen slab, sits down and makes them patiently for me, my sis and dad.And each of us would gobble up more than 20-30 paniyarams. :)

Kuzhi Paniyaram


Ingredients

Dosai batter - 4 cups
Fenugreek powder - 1/2 Tbspn
Oil - as required
You also need a kuzhi paniyaram pan like the one in the picture to make this.


Method

Mix dosa batter and fenugreek powder well. Heat the paniyram pan. Add a 2-3 drops of oil in each of the holes. When the oil is warm, take a ladle full of batter and drop into each hole until its 3/4 full. Do not fill the paniyaram up-to the brim, you will find it difficult to turn the paniyarams over later.The flame needs to be medium-low to make sure the paniyarams are cooked inside as well.After a couple of minutes once the bottom of paniyaram browns, using a  wooden skewer turn the paniyaram over to cook the other side. Once both sides are done transfer to a plate. Serve warm with tasty milagai chutney.

Notes

You many also heat a tbsp of oil in a pan, add in some mustard, jeera, chopped onions , curry leaves, green chili and saute them for  a few minutes . Pour this tempering into the dosa batter with methi/fenugreek powder and mix well to get a more flavorful batter for the paniyarams.


Print this Post

Continue Reading >>

Wednesday, May 23, 2012

Vengaya-Poondu Kuzhambu/Onion-garlic Kuzhambu

Many a times I get bored with the dal based sambar and long for kara kuzhambu. Especially when I make some poriyal/paruppu usili or dal based sides I long for this one. So here is the recipe of a spicy vengayam-poondu [Onion-garlic] Kara Kuzhambu. I made some modifications to my basic chettinadu kara kuzhambu recipe and it turned out very yum. :)


Vengaya Poondu Kara Kuzhambu


Ingredients

Serves - 3
Spice Level - quite spicy

Small onion/shallots/sambar onion - 15
Garlic cloves - 15
Tomato - 1 chopped into small pieces
Tamarind - 1 big lemon sized ball
Curry leaves - 2 sprig
Mustard seeds - 1 Tspn
Sambar/Kuzhmabu powder - 3 Tbsp
Turmeric powder - 1/4 tspn
Salt - as per taste.
Fenugreek - 1 tspn
Jeera - 1 tspn
Hing - 1/2 Tspn
Oil - 4 tbspn

To roast and grind

Oil - 1 tspn
Cumin/Jeera - 1 Tspn
Coriander seeds - 1 Tbspn
Dry Red chilli - 3
Khus Khus - 1 Tspn
Coconut grated - 2 Tbspn


Method


Firstly heat a kadai with 1 tsp oil and roast the ingredients in the same order as given under "To roast and grind". Cool it and blend with little water to a fine paste and keep aside.

Extract thick tamarind juice out of the tamarind piece, add 2.5 cups of water to the extract. Add 3 Tbsp of sambar/Kuzhambu powder to the tamarind-water mix and dissolve well and keep aside.

Now heat a pan with 4 Tbsp oil. Add hing, mustard - let it roast. Add cumin seeds, fenugreek and let it roast. Add curry leaves, shallots and garlic and saute well till the shallots and garlic are cooked well. The raw smell of the garlic has to vanish and shallots must turn pink.Now add the chopped tomatoes, a pinch of salt and turmeric powder and let the tomatoes get cooked well.Once the tomatoes are mashed well, add the tamarind-water-powder solution to the kadai , add remaining salt, the ground paste and mix well. Add more salt/kuzhambu powder if needed at this stage. Close the kadai with a lid, move flame to low and let it boil in low heat. Once the kuzhmabu thickens, or is reduced to 1/3rd of initial quantity , or when the oil starts floating on top, remove from flame. This will take 15-20 minutes.Be patient.

Serve with hot steamed rice and some poriyal of your choice. A very satisfying lunch indeed. :)


Print this Post

Continue Reading >>

Thursday, May 10, 2012

Chettinadu Chicken Kuzhambu

Another brilliant chettinadu chicken item. Rice , Chicken Kuzhambu and chicken gravy for a Sunday lunch is a perfect setting.Cooking up a storm for Sunday lunches make me feel very good. And that too if its a non-vegetarian menu, I please myself and S to  the maximum extent possible.

Enough said, lets move on to the recipe.! :)

 Chicken Kuzhmabu


 Ingredients


 Recipe Source - Adapted from solaiachiskitchen


 Serves - 3
 Spice Level - Moderately Spicy

 Chicken - 350 gms
 Small/Sambar Onions - 20, chopped lengthwise
 Garlic cloves - 20, minced well
 Ginger garlic paste- 2 Tspn
 Tomatoes - 2 small sized, chopped
 Chilli/Curry powder- 1 Tbspn
 Coriander powder-2 Tbspn

 To Temper

 Oil - 2 Tbspn
 Cloves - 2
 Bay-leaf - 1
 Cinnamon - 1 inch stick
 Fennel - 1 Tspn
 Jeera - 1 Tspn
 Curry leaves - 2 Sprigs
 Mint Leaves - half a handful

 To grind to a paste

 Coconut grated - 2 Tbspn
 Fennel - 1 Tspn
 Cashews - 5

To marinate Chicken

Curd-2 Tbspn
Turmeric powder-1 Tspn
Curry/Chilli powder-2 Tspn
Salt-2 Tspn
Ginger garlic paste-1 Tspn


Method

Firstly marinate the chicken with the items under "To marinate chicken" and keep aside for 1 hour.
Grind the items under "To grind to a paste" with little water to a smooth paste.

Once the chicken pieces are marinated well, start off with the following. Heat 2 Tbsp oil in a pressure cooker. Add the items under "To temper" one by one and roast well. Add onions, garlic and ginger-garlic paste and saute well.Add tomatoes pieces and saute well.Now add the curry and coriander powder and mix well. Saute for 1 more minute. Add the marinated chicken pieces and mix well with the masala. Saute for 2-3 more minutes. Now add about 2 cups of water and salt and stir well.Close the cooker and pressure cooked for 10 minutes. Start with high flame, and once the first whistle comes out, move the flame to low and cook for he remaining time. Let the cooker cool. Once the cooker cools, open the lid, add the ground paste, and let the kuzhmabu boil. Taste now to see if the salt-spice level is as per taste. If needed more , you can add them at this stage. Also if the gravy is thick now, add more water, or if its watery, let it boil until you get desired consistency. So once you get the desired consistency, switch off flame.

Serve this chettinadu chicken kuzhmabu with steamed white rice, and chicken gravy. :)


Print this Post

Continue Reading >>

Thursday, April 26, 2012

Spicy Chettinadu Pepper Chicken

This is my first non-veg recipe on this blog. Hopefully we will see many more :). I always have difficulty trying to work with the raw smell of chicken/fish/mutton etc, so I delegate the task of cleaning them and doing the basic marination of turmeric/salt to my dear S  :). Due to this problem I have stayed away from cooking non-vegetarian. As they say I do it once in a blue-moon ;).

Non-vegetarian dishes always reminds me of Sundays. When I was growing up, Sunday meant mutton/chicken clear soup in the mornings, big non-veg meals for lunch and dosai/idli with remaining non-veg curries during the dinner time. :). Infact on those Sundays when its a fried item, like Fish Fry, Mutton Chops, or Mutton Cola Urundai [mutton meat balls] , we would start eating them way before lunch beings and mom would warn us about how nothing is going to remain during lunch time.Good Old Sundays.I would like that, and from now on, Sunday's in my home would also be like that hopefully. I am going to give it a earnest try and start to gain expertise over cooking non-vegetarian food,  not forgetting S huge love for non-veg food.

Pepper chicken is a very popular spicy Chettinadu dish. Goes very well with chicken biriyani or with rice and chicken Kuzhambu and also many other things if you know what I mean ;)

Chettinadu Pepper Chicken


Ingredients

Recipe Source - Adapted from Solais Kitchen

Serves - 3
Spice Level - Quite Spicy


Chicken pieces - 500 gm
Onion - 2 Larges , chopped very finely
Tomato - 2 small sized , chopped into small pieces
Ginger garlic paste - 1 Tsp
Coriander powder - 1 Tbsp
Pepper powder - 2 Tbsp
Lemon juice - Juice out of half a lemon
Turmeric - a pinch
Coriander Leaves - a handful , chopped

To Temper

Oil - 4 Tbsp
Bay leaves - 1
Cloves - 2
Cinnamon - 1inch stick - 1
fennel - 1tspn
Curry Leaves - 2 Sprig

To marinate chicken

Curry/Chilli powder - 1 Tbsp
Salt - 2 Tsp
Turmeric - 1 Tsp
Ginger Garlic paste - 1 Tsp

Method

Firstly clean the chicken well. Then marinate the chicken with the items under "To marinate chicken" and keep aside for 30 minutes.

Heat oil in a kadai, and add in one item after another from the "To Temper" list. Let it roast. Add in the onions, ginger-garlic paste and saute well till translucent.Add in the tomato pieces , a pinch salt, a pinch of turmeric, and saute until the tomato pieces are soft and mashed well.Now add in coriander powder and mix well.Add the remaining salt as per need. Remember 2 Tsp was used while marinating chicken . Add 1/4 cup water and mix well with the masala and let it be for a minute or two. Now lower flame and add in the chicken pieces and wrap well with the masala. Saute well until the chicken pieces get moist. Don't wait until it gives out a lot of water. Just a little bit would do.Then close the kadai with a lid and let it get cooked in low-medium flame. Once the chicken is cooked, add the pepper powder and mix well.Saute for a couple of more minutes. Add coriander leaves and mix well. Switch off stove.

Before serving squeeze lemon juice over it. Serve with rice and chicken kuzhmabu. :)


Print this Post

Continue Reading >>

Thursday, April 19, 2012

Easy Chettinadu No-curry powder Sambar

You can prepare sambar for idli/dosai/idiyappams in 15 minutes . Really :). This is usually my comfort food - Idli +Chettinadu sambar. When I have been deprived of Indian food for long during vacations , and get back home, this is first thing I make. This sambar is extremely simple and soothing. A week without this combination is enough for me and S to start longing for it.Now on to the recipe.


Easy Chettinadu No-curry powder Sambar


Ingredients

Serves - 4
Spice Level - Quite Spicy

  1.  Toor Dal - 1/2 cup
  2.  Tomatoes - 2 Large - chopped into medium sized pieces
  3.  Potatoes - 2 Medium - chopped into medium sized pieces
  4.  Brinjal -  1 Large - Chopped into 5 pieces6
  5.  Green chilli - 6 slit lengthwise, chopped in half
  6.  Onion - 1 Large - chopped well
  7.  Curry Leaves - 1 Sprig
  8.  Jeera - 1 Tspn
  9.  Turmeric - 1/4 Tspn
  10.  Water 2 cups
Salt - to taste
Thin Tamrind extract - 2Tbspn [optional]

To temper

Oil - 2 Tbspn
Mustard - 1 Tbsp
Urad Dal - 1 Tbspn
Curry Leaves - 1 sprig


Method

Take a pressure cooker and toss in all ingredients from 1-10. The water level must be around 1 inch above the vegetables/dal.Mix well. Pressure cook for 15-20 minutes, moving the flame from high to sim after the first whistle.Let the cooker cool off. Open the lid ,heat the cooker containing sambar ,add salt and tamarind extract [if using] and stir well with a ladle.Let the sambar boil.Add more water if needed and adjust consistency according to your needs.Some people like the sambar to be more loose. Also the dal will be mostly mashed well after 20 minutes of pressure cooking.

Meanwhile heat 2 Tbspn oil in a small pan. Add mustard , once it splutters add urad dal. Once the urad dal browns, add curry leaves and switch off flame. Add this tempering to the sambar and boil for 2 more minutes.Switch off flame and transfer to serving bowl.

This is the sambar we make for idli/dosai/pongal/idyappams/vadai.

Note

1. Tamarind extract is optional. Since i have added two large tomatoes, I haven't used tamarind extract. If you would like it to be more tangy, you may use it.


Print this Post

Continue Reading >>

Sunday, March 25, 2012

Beetroot Vadai

This is one of  the deep fried snack which is probably healthy as beetroot can be sold in this way for sure :).You can sneak in other veggies like snake gourd,cabbage,or anything remaining that you might want to finish. And it goes without saying that any shallow/deep fried snack is always a hit :). Now off to the recipe.

Beetroot Vadai


Ingredients

Serves - Makes around 25 vadais
Spice Level - Quite Spicy

Beetroot - 2 medium, grated.
Toor dal - 1/2 cup
Channa dal - 1/2 cup
Onion - 1 big, finely chopped
Dry Red chilli - 7
Curry Leaves - 3 sprig
Ginger-Garlic paste - 1 Tspn
Hing - a pinch
Turmeric - a pinch
Salt - as per taste
Cumin - 1 Tspn
Saunf - 1 Tspn
Oil for shallow frying.


Method

Soak toor dal, channa dal,red chilli, jeera and saunf in 1 cup of water for 20 minutes. Drain the water and grind it to a paste.It shouldn't be too coarse or either too smooth,somewhere midway. Use only 4-5 Tbspn of water while grinding. Using too much water will result in the vadais absorbing too much oil.It is fine if a few pieces of dal are not fully ground.Now add the grated beetroot, chopped onion, hing, curry leaves,turmeric and salt with this paste and mix well.

Heat about 1/2 to 1 cup oil in a kadai. Once the oil is quite hot, move the flame to sim. Pinch small lemon sized balls of the mix, flatten them on your palm and drop in oil.Fry it for two minutes on low flame and move the flame to medium.Fry until both sides are done well.

Server hot with green chutney as a snack with masala chai. Nothing can beat this kind of snack. :)

Notes


1.While frying make sure,both the insides and outsides of the vadai are done well. If the oil is too hot, the outsides will brown faster,but it will still be undercooked inside.On the other hand if the flame is too low, the vadai will absorb too much oil.So take care while frying.


Print this Post

Continue Reading >>

Friday, March 16, 2012

Urad Dal Halwa /Aadikool


Aadikool or Urad dal halwa is a famous chettinadu sweet dish usually had after morning breakfast. Its a 10 minutes dessert if you have all the ingredients. Really!! :).

Urad Dal Halwa


Ingredients

Urad dal flour - 1 cup
Broken Jaggery - 1/2 cup
Water - 1 cup
Oil - 1/2 cup

Note: To make the urad dal flour, you need to dry roast the urad dal till brown , cool it and grind it in a mixer jar to a smooth powder.


Method

Firstly boil a cup of water in a pan, and add in the jaggery pieces. Let the water boil in low flame, till all of the jaggery dissolves. Then switch off flame and keep aside the jaggery syrup.

Heat a pan with 1/2 cup oil. Add in the urad dal powder, mix well with the oil. There must be enough oil for all the flour to soak in. If its less, you will end up with a lot of lumps in the halwa which we don't want.After a minute, add in the jaggery syrup, and mix well with the flour. Switch off flame when you get a consistency which is not as thick as a halwa and not too loose either, it needs to be mid way as it tends to thicken later.

And thats it you are done. :)

Print this Post

Continue Reading >>

Authentic ChettinaduTherrakal/Coconut Gravy with brinjal and potato

This is another authentic Chettinadu dish . The coconut based gravy is used as a side dish for dosais and Idlis. It is super yum and this preparation never fails to impress. This curry has been a super hit in all parties that I have hosted until now:).

Therakkal


Ingredients

Brinjal - 2 medium sized, chopped into small pieces
Potato - 1 Medium sized , chopped into small pieces
Tomato - 1 Medium sized, chopped.
Onion - 1 Large , chopped finely
Ginger-garlic paste - 1 Tspn
Curry Leaves - 1 Sprig

To Temper

Mustard - 1 tspn
Jeera - 1 Tbspn

To dry roast and Grind

Mustard - 1 Tbpn
Jeera - 1 Tbpn
Raw Rice - 2 Tbspn
Fenugreek - 1 Tspn
Saunf - 1 Tspn
Khus Khus - 1 Tspn
Dry red chilli - 4
Grated Coconut - 1/2 cup


Method

Heat a pan and dry roast the following - throw in mustard, jeera,raw rice, fenugreek,khus-khus,saunf one after the other. Let them roast for a minute or two.Then add in the grated coconut and dry red chilli. Roast for couple of more minutes and switch off flame. Cool and blend in a mixer with 1/2 cup water to a smooth paste.

Now in the same pan , heat 2 Tbsp of oil. Add mustard and when it splutters, add jeera ,let it roast.Add in the onions,curry leaves and ginger-garlic paste. Saute till onions are translucent.Add the tomatoes and saute till its soft and juicy.Add the brinjal pieces and saute till soft. Now add the ground paste and 1.5 cups of water, and let it boil. When it boils, toss in the potato pieces, and cook till they are half done. Add salt and cook on low flame till the potatoes are fully done and all the flavors in the curry come together. Add more water if you would like to loosen the gravy.

Serve with hot idli, or freshly done dosais. Awesome combination I tell you!.


Print this Post

Continue Reading >>

Saturday, March 10, 2012

Carrot Thayir Pachadi/Carrot Curd Curry

This preparation belongs to the absolutely easy/yummy/healthy dish category. If you are one among those who licks clean the raitha, mor-kuzhambu, other curd based savory dishes off the bowl you will love this.When you are cooking for a big lunch group,you can easily pass this off as one dish and it will not take more than 10 minutes of your time.Best served with rice and kara-kuzhmabu and appalam.

Carrot Raitha


Ingredients

Carrot - 2 small ones grated.
Jeera - 1 Tspn
Mustard - 1Tspn
Curd/yoghurt - 1 cup
Salt - as per taste.
Curry leaves - 1 sprig
Hing - 1/4 Tspn
Oil - 1 Tbspn
water - 1 cup

Method

Heat oil in a tawa pan. Add hing and then mustard. When the mustard splutters, add jeera and curry leaves - let it roast.Toss in the grated carrot and saute for a minute. Switch off flame.

Add 1 cup curd and 1/2 cup water to a serving bowl. Beat/whisk well till you get a creamy/smooth texture. Add more water if needed [as per desired consistency] and beat well again. Add in the prepared carrot curry and salt into the curd. Mix well. Its done. :)


Print this Post

Continue Reading >>
Related Posts Plugin for WordPress, Blogger...

A la carte!

Along with idli/dosai (13) Along with rice (32) Along with rotis (21) asparagus (1) baby potatoes (4) bajji (1) baking (9) banana (1) basil (1) basmati (2) beans (1) beetroot (5) bhindi (3) biryani (1) Black eyed beans (2) blueberry (1) bok choy (1) bottle gourd (1) bread (3) breakfast (4) brinjal (4) brocolli (1) buttermilk (1) butternut-squash (1) cabbage (2) cakes (7) carrot (1) carrots (3) cashews (1) cauliflower (8) cheescake (2) chettinadu (24) chettinadu delicacy (23) Chicken (7) chilli (1) Chineese (3) chinese (1) chocolate (1) chole (2) chutney (6) coconut (5) coconut milk (1) coriander (4) corn (1) cow-peas (1) cream-cheese (2) curry leaves (1) dal (3) dates (1) desserts (14) diwali 2013 (1) dosai (1) drink (1) drumstick (2) dry field bean (1) Easy (44) egg (3) fenugreek (1) fish (1) Food and Travel review (1) garlic (9) ginger (1) gobi (1) green gram (1) How To (5) Indian Flat Breads (4) indian sweets (3) International (5) ivy gourd (2) jeera (3) kootu (1) kovakkai (1) lemon (3) lentils (11) lobia (1) malai (1) mango (2) masoor dal (1) Methi (2) mint (2) mix veg (9) mochai (1) moong dal (4) mushroom (10) mutton (1) non-veg (2) onion (2) orange (1) paneer (11) parathas (1) pasta (2) peas (7) pepper (1) pickles (1) plantain (1) poriyal (1) potato (14) potatoes (2) quinoa (1) Rajma (1) rasam (1) rice flour (1) rosemary (2) shallots (1) snack (18) soup (7) soy chunks (1) spinach (6) stir-fry (1) strawberry (1) sweet potatoes (1) tamarind (5) tomato (7) toor dal (1) val bean (1) Variety Rice (13) walnut (1) wheat (2) yoghurt (1) yuuum!! (1) zucchini (2)

Latest on Food Over IP

Copyrights

All rights reserved @2012.

Unless otherwise mentioned, the text and images included in FoodOverIP blog belongs to the author. The blog author’s permission is required before any content is reproduced in any form.

  © Blogger templates The Professional Template by Ourblogtemplates.com 2008

Back to TOP  

Blogging tips