Showing posts with label snack. Show all posts

Thursday, August 7, 2014

Paneer Bread Roll [Step by Step Recipe with Pics]


Tea time snack to tempt you? You are in the right place! :). Paneer Bhurji stuffing inside your favorite choice of bread, coated with ghee and then toasted to a shiny brown is one of the most delicious snack ever. The other day when I wanted to make Parathas with paneer bhurji filling, a friend of mine suggested making these bread rolls and am glad I made these. Not only were they yummy but these were very easy to make also. If you have any kind of filling that needs to be used this would be a perfect way to do that. Now off to the recipe

Ingredients

Serves - 2
Spice Level - Moderate
Prep Time - 30 min
Cook time- 5 min

Bread slices - 5-6 or as needed [ I used whole wheat bread ]
Ghee - Few tbsp to coat
Tomato ketchup - Few tbsp to use as a spread
Paneer Bhurji - 1 cup [Click on link for Paneer bhurji Recipe]


How do you do it 

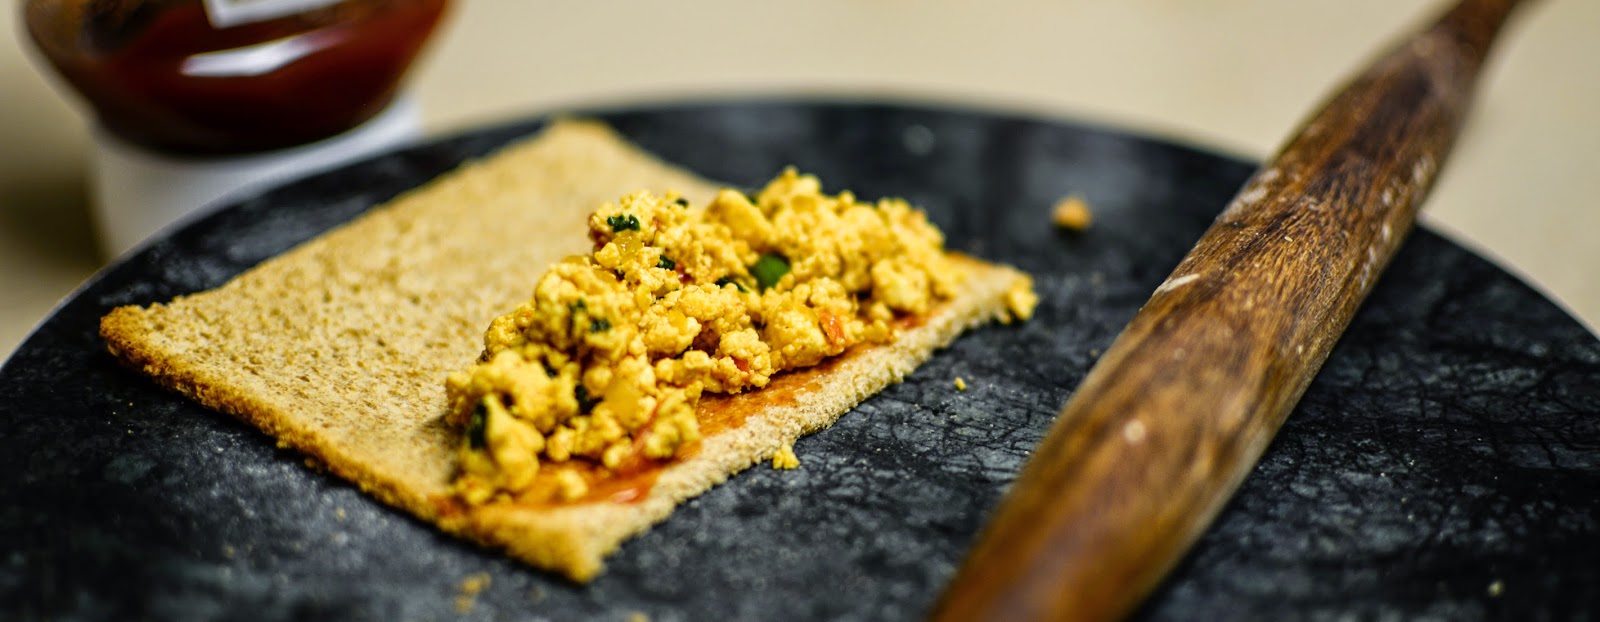
1. Trim the edges of the bread. Use a rolling pin and roti stone like below and flatten the bread well.


2. Apply a coat of ketchup on one column of the bread. You can use any kind of spread that you like, I would have ideally liked to use some mint-coriander chutney here.


3. Place the filling carefully on that column. Dont let it spread all over.


4. Roll the bread carefully and seal with little water. Apply a little ghee all over the rolled bread.


5. Repeat the same for all bread slices.

6. Heat a pan and toast the bread on both sides on medium flame to get to a nice brown color. On the other hand, for a sinful version, you could deep fry these in oil too :).


Yummy Paneer Bread rolls ready. Serve these with green chutney or you can have them as is.

Continue Reading >>

Saturday, February 1, 2014

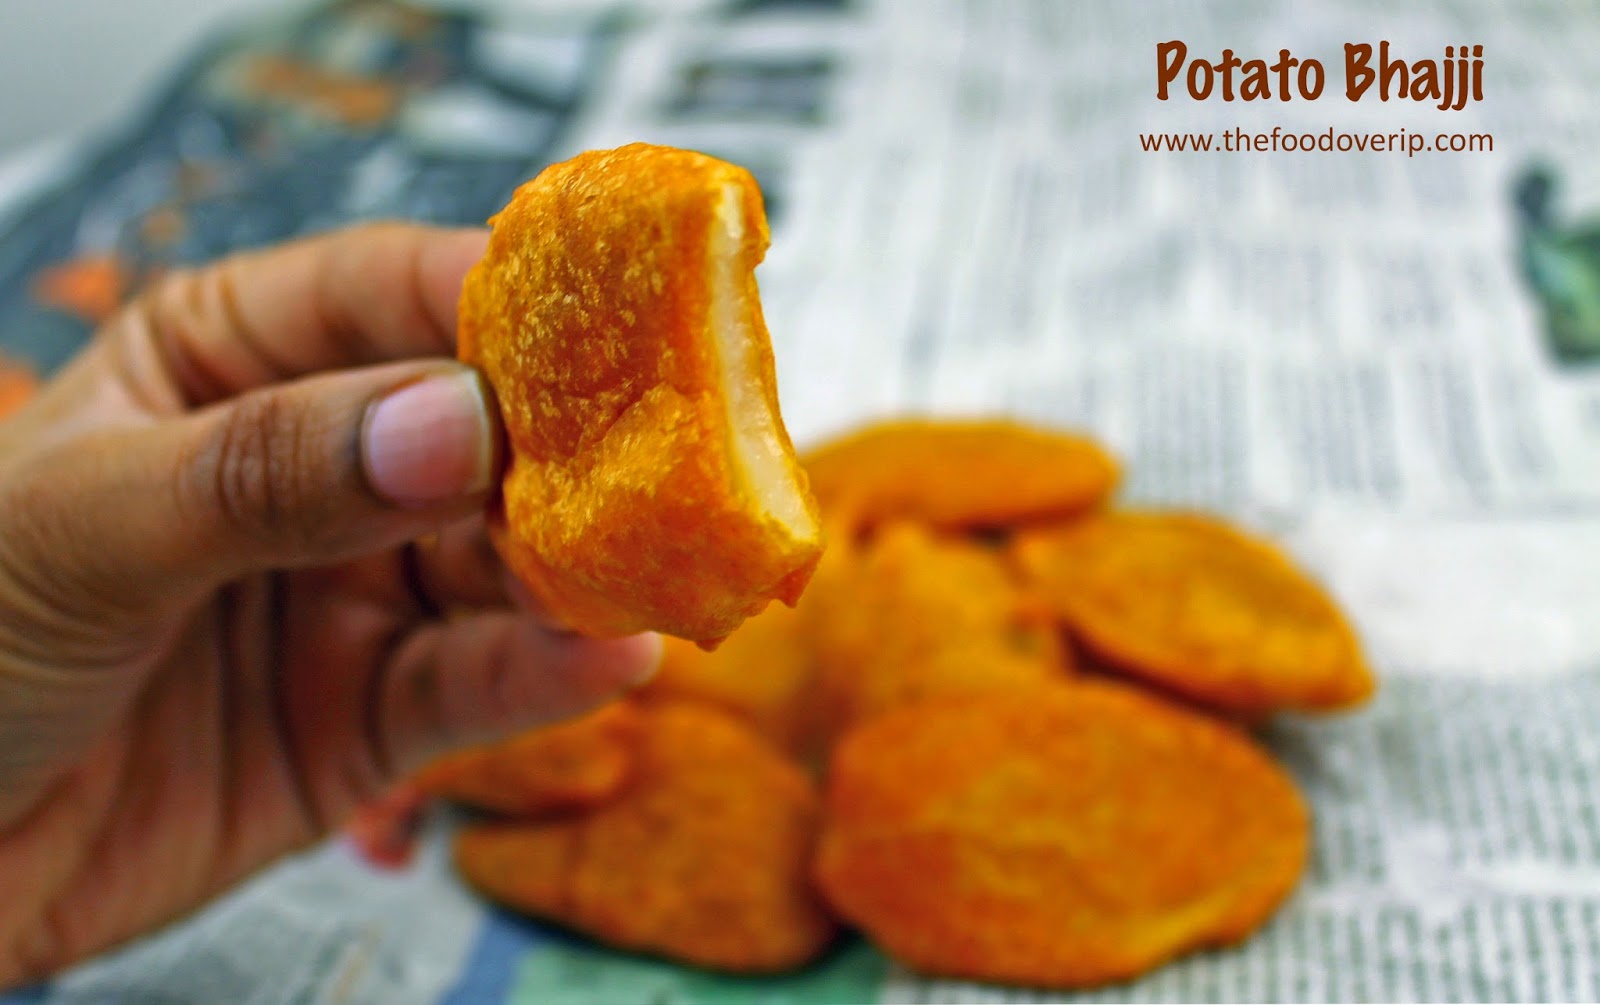
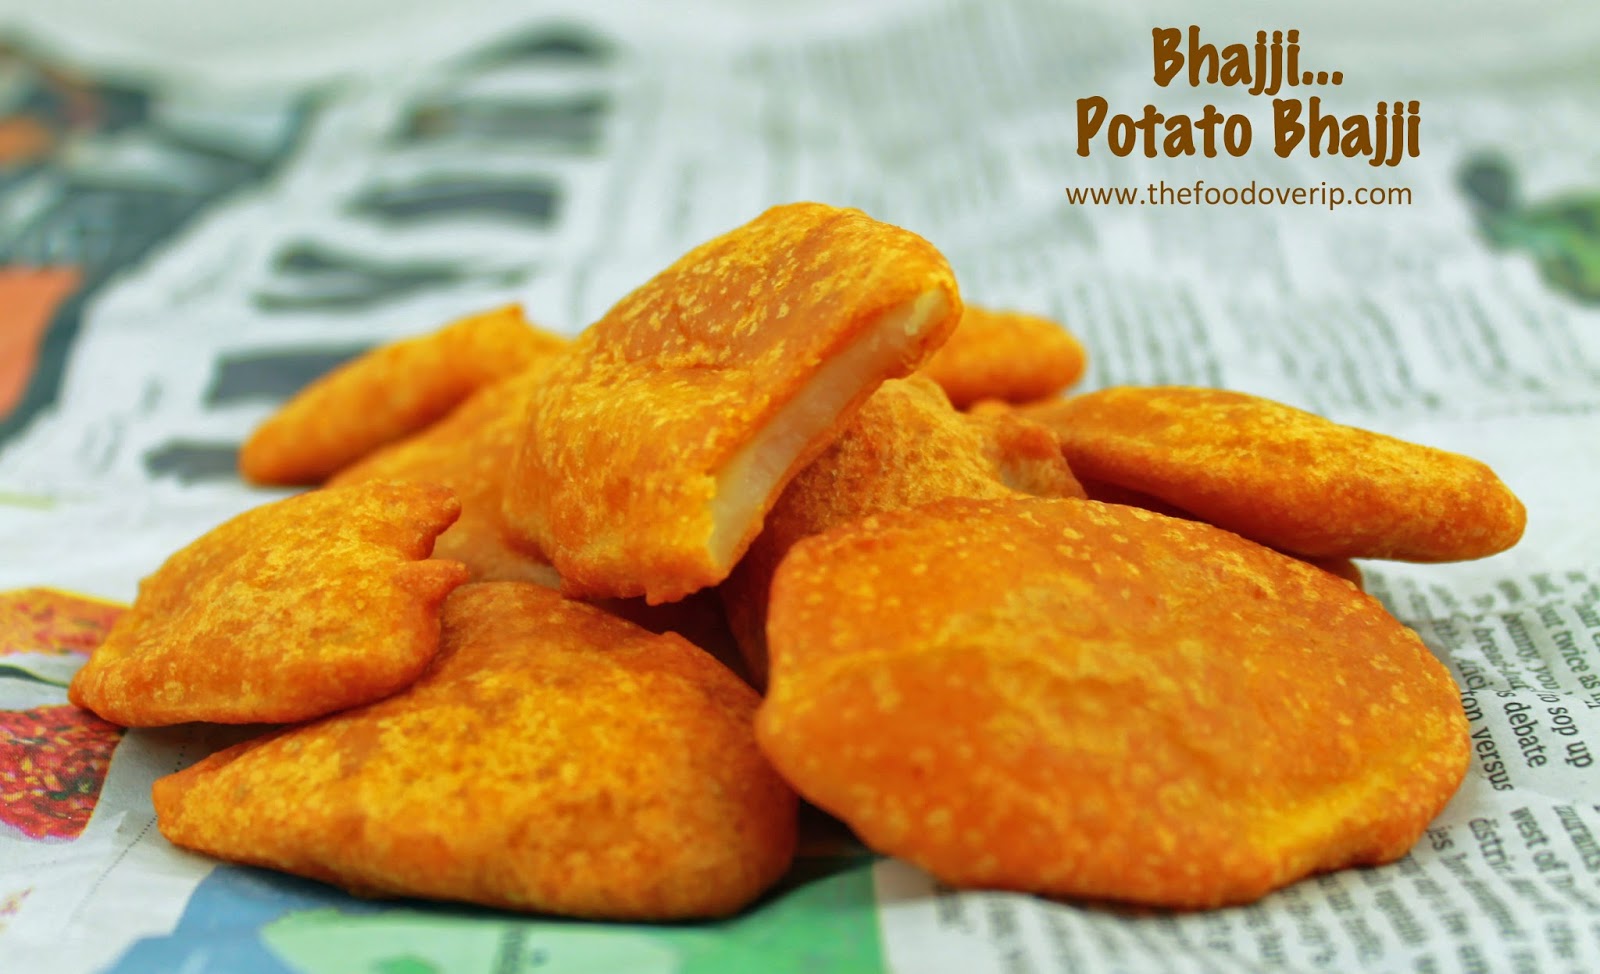
Potato Bajji | Potato Fritters


If only potato bajjis were a healthy thing, I would make them for snack everyday :), its one of my most favorite tea time snack. Ginger chai and potato bajji is an awesome combo. Especially when the weather outside is gloomy and rainy I long for these. So after a really long time I made these last weekend and savoured each and every piece and wishing with each piece that it doesnt get over soon ;). Potato bajji is a very famous South India snack and all the tiny road-side chai shops make them during the evening time. It reminds me of all the chit chat times we have had outside our office in bangalore hogging these bajjis along with chai :). Good Old times.

It is a very easy snack to make, thin slices of potato dipped in a spiced chickpea flour mixture and deep fried until golden brown, in and out of the kitchen in 20 min :). Enjoy these perfect weekend snack soon!

Ingredients

Serves - makes about 15 pieces
Spice Level - Medium
Prep Time - 10 min
Cook time - 5 min

Potato - 2 medium sized, peeled and sliced into thin pieces
Chickpea Flour/Besan/Kadalai maavu - 1 cup [sieved/sifted and keep aside]
Turmeric - 1/4 tsp
Red Chilli powder - 2 Tsp
Salt - 1 Tsp
Corn Flour - 1 Tsp
Baking soda - a pinch
water - as per need
Oil - to deep fry the bajji


How do you do it

1. First mix the sieved besan, salt, turmeric, red chilli powder, baking soda, corn flour well in a bowl.

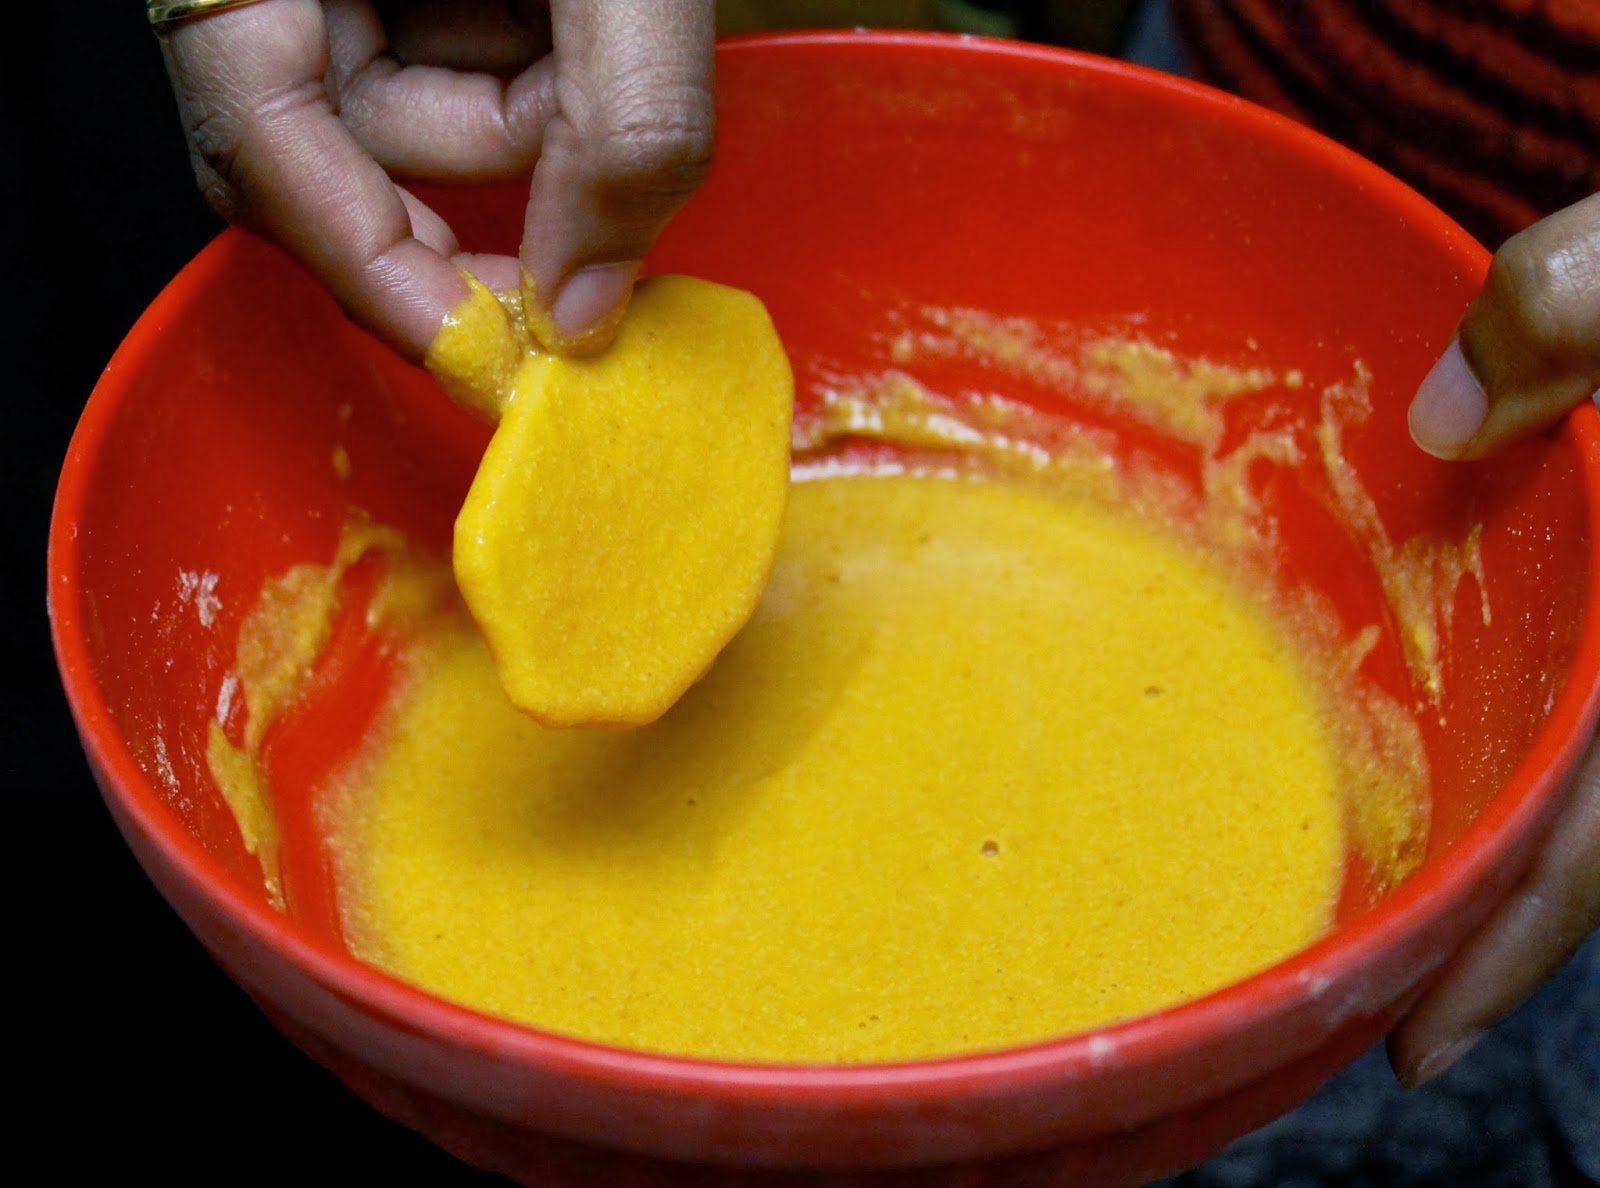
2. Add water slowly and make a not too thick, not too thin paste. The consistency of the paste is important, the potato slices must be able to coat well without the paste dripping off it completely. See picture below.


3. Heat oil in a pan to deep fry these pieces. When the oil is medium hot, drop a few coated potato pieces and fry until golden brown. Make sure the oil is not too hot, not warm, it needs to be medium hot for the potato to get cooked as well.

4. Drain on a tissue paper to remove excess oil.

Serve with ketchup or green chutney and chai. :)

Continue Reading >>

Wednesday, June 26, 2013

Bok Choy Pakora


Bok choy is a Chinese leafy vegetable that I hadnt cooked with before though I had come across many recipes of bok choy along the lines of spinach poriyal/kootu etc. To me bok choy is a hybrid between Indian spinach and cabbage. It is a very nutritious vegetable and I am glad my friend S suggested that we try a recipe with bok choy. S who blogs here [a super creative cooking blog] and also has a super awesome art website here - something I go wow about every time I open it, came up with this fun idea about choosing one healthy vegetable every month that we would cook with and post the recipe on our blogs. So I went ahead, bought bok choy and it was lying in my refrigerator waiting to be made into something. Being in Florida we have these daily evening showers quite often and on one such gloomy and rainy Saturday me and S were in mood for some pakora and chai time in our balcony and that is the story of my bok choy pakora :)

Ingredients

Serves - 4
Spice Level - Moderate
Prep Time - 15 min
Cook time - 15 min

Bok choy - 1 , chopped in thin strips
Onion - 1 , sliced thinly
Besan/Chickpea Flour - 1 cup
Rice flour - 2 tbsp
Ajwain/Omam - 1/4 tsp
Water - as per need
Hing - 1/4 tsp
Salt - as per need
Red chilli powder - 2 Tsp
Baking soda - 1 tsp
Oil - for deep frying

How do you do it

1. Mix besan, rice flour, salt, baking soda and all the spice powders in a bowl. Add water to this as necessary to make a thick paste of dropping consistency.

2. Mix in the sliced onions and bok choy now and mix well.

3. Heat oil in a kadai for deep frying. Add spoonful of the pakora batter into the oil. Deep fry in medium flame till golden brown. Drain on tissue paper.

4. Serve these pakora with tomato ketchup of green mint chutney.

Enjoy these yummy pakora with chai :)

Continue Reading >>

Wednesday, May 29, 2013

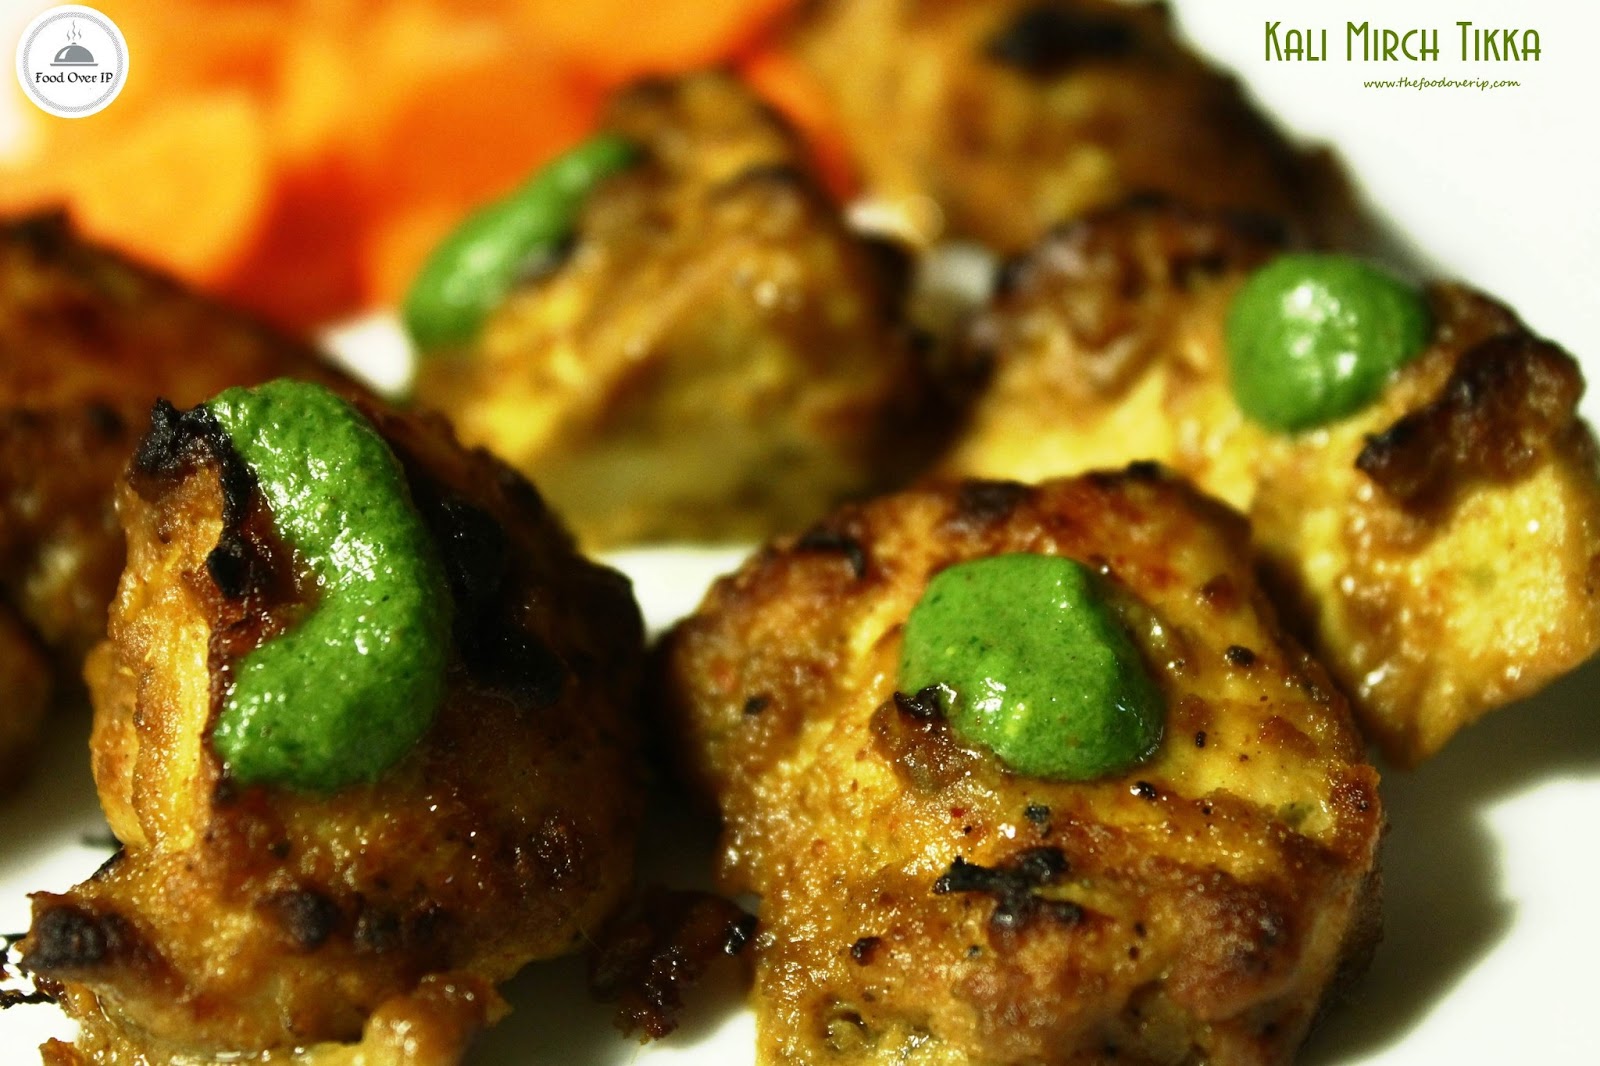
Murgh Kali Mirch Tikka | Black pepper grilled chicken


Appetizers in Indian [Bombay-Bangalore] restaurants are very highly priced, so much for a few pieces of grilled chicken. I used to feel bad about wanting to order them all the time we went to one. You know when you are in between those days when you feel you have been eating at super restaurants too often and want to minimize those visits, but you end up there anyways and try to not order too much. Even then, I cant resist the temptation for kebabs, I just have to eat them if I am dining outside. Back then I had no other choice since I couldn't replicate the restaurant type kebabs at home with my OTG. It took forever to broil chicken and they turned out dry and stretchy. So I am not to be blamed!

Now having access to a very powerful oven in my US kitchen, I am grilling away to my hearts content :). One of my favorite chicken kebab recipe follows.

Ingredients

Serves - 10 pieces
Spice Level - Moderate
Prep Time - 25 min
Cook time - 20 min

250 gm boneless chicken cut into 1/2 inch pieces
Peppercorn - 2 Tbsp
Ginger Garlic paste - 2 Tsp
Green chilli - 3
Oil - 2 Tbsp
Onions - 2 medium sized, sliced thinly
1/2 cup hung curd/Greek Yogurt or normal yogurt which isn't very sour
1/2 tbsp corn flour
1 Tsp garam masala
1 Tsp Tandoori Masala
Salt to taste
1/4 Tsp cardamom powder

How do you do it

1. Dry roast pepper corns on a heated kadai and crush to a coarse powder using mortar-pestle or your mixer grinder. Grind green chillies and ginger-garlic paste to a fine paste.

2. Heat oil in a kadai and saute the onions until brown. Cool and grind to a paste.

3. In a large bowl, combine the brown onion paste, yogurt, corn-flour, ginger-garlic-green chilli paste, crushed peppercorns, salt, garam masala, tandoori masala, cardamom powder. Add the chicken cubes, mix well and marinate for 1 hr in the refrigerator.

4. Pre-heat oven to 400 deg F.

5. Line a baking sheet with aluminium foil. Smear it with oil. Arrange the chicken pieces on this baking sheet.

6. Broil on high for about 20 minutes in total. Turn the chicken over after mid-time.

Serve hot with mint chutney and lemon wedges.

Continue Reading >>

Tuesday, May 7, 2013

Hara Bhara Paneer Tikka | Coriander- Mint Grilled Cottage cheese


Anything to do with coriander, mint or garlic, we love it and my fridge never runs out of them. This super tongue tickling marinade made with these three aromatic herbs along with some other spices can be used in many ways. I have used the marinade for chicken tikkas, paneer tikkas or mix a few tsp of this with yogurt and you have the restaurant type green chutney that's on the table as a sauce for the tikka starters. This hara bhara chutney has a very addictive taste and its one of my favorite. I always ask for two cups of green chutney on my table at a restaurant right away because I know I would just drink loads of this one. 
When you are craving for something yummy or your evening weekend snack, you can whip this up in minutes, marinate chicken/tofu/paneer/fish or any other vegetable that you like for about 30 minutes, broil in the oven for about 10-15 minutes and you have a delicious appetizer ready for you.

Ingredients

Recipe Source - Adapted from Sanjeev Kapoors Tandoori cooking at home book
Serves - 3
Spice Level - Moderate
Prep time- 15 min + 30 min marination time
Cook time - 15 min

Paneer - 200 gm, cut into 1 inch cubes
Coriander leaves - 3 handful
Mint leaves - 1 handful
Garlic cloves - 5
Serrano peppers green - 2
Garam Masala - 1/2 tsp
Tandoori Masala - 1 tsp
Lemon juice - 1 tsp
Gram Flour/Besan - 1 Tbsp
Oil - 1 tsp
Yogurt - 1/2 cup
Salt - as required

How do you do it

1. Grind coriander leaves, mint leaves along with garlic and Serrano peppers to a coarse paste with little water.

2. Mix the above paste with yogurt. Add the spice powders, lemon juice, oil, besan and required salt to the yogurt and whisk well to get a smooth textured marinade.

3. Add the paneer cubes to the marinade, and wrap them well in it. Refrigerate for minimum 30 minutes.

4. Line a cookie baking sheet with aluminium foil and smear it with oil. Place the paneer pieces on it.
Broil on high in pre-heated oven for about 10-15 minutes or until the paneer starts to crisp and browns a little on top. Keep an eye on the oven when you broil. Broiling for too long will toughen the paneer and it wouldnt taste good.

Continue Reading >>

Thursday, November 8, 2012

Easy Veg Patties


I looked around for a lot of recipes of veg kebabs/patties which did not use potatoes, but couldnt find anything to my statisfaction. So I started forming a recipe on my own and did not really plan on what ingredients or how I wanted to make it. The only restriction I had that was not to use more than one small potato due to the no carb diet that we are on currently. I used the veggies that I had with one potato to form the base and some rice flour as a binding agent, all cooked and sauteed with some spices and toasted on an iron griddle to make this veg kebab.

Two large patties served with some soup, made for a very filling dinner also leaving us feeling healthy at the same time. Its a quick one, so whenever you have a lot of veggies in small quantities, throw everything together to make this tawa veg pattie for an easy dinner, or stuff it up in between a 6 inch Italian bread with some sauces and salad veggies to have your sub of the day :)


Ingredients

Serves - Makes 4 large patties
Spice Level - Moderate
Prep Time - 15 min
Cook time - 20 min

Onion - 1 medium, chopped finely
Ginger Garlic [GG] paste - 1 Tsp
Mushroom - 4-5 pieces, cleaned and chopped finely
Potato - 1 medium, quartered and cooked and mashed well
Beans - 5-6, chopped finely
Beetroot - 1 , cut into medium pieces
Carrot - 1 Large , cut into thin roundels
Green chilli - 2 , cut finely
Masala/Curry powder - 1/2 Tsp
Coriander powder - 1 Tsp
Turmeric - 1/4 Tsp
Jeera - 1/2 Tsp
Hing - 1/4 tsp
Coriander leaves - 1 Tbsp , chopped well
Salt - as per need
Oil - 1 Tsp + as per need , to toast the patties
Rice Flour - 2 Tbsp
Corn Flour - 1 Tsp

How do you do it

1. First toss the carrots, beets, beans into a pressure cooker and cook with 1 cup of water for 3-4 whistles. Once cooled, remove the lid, drain and reserve the excess water and mash the veggies completely. Once mashed, take handful of these mashed veggies and the squeeze the water from them as much as possible [reserve this water] and keep aside. Use the water you get from the veggies for any other dish prep of yours - sambar, rasam or soup etc. Do not throw it away , its a nutritious vegetable stock.

2. Microwave the potato for 5 minutes in 1 cup water, drain the water, and mash the potatoes and keep aside.

3. Heat 1 tsp oil in a kadai. Add hing and jeera, let them roast and give a nice aroma. Add in the chopped onions and saute till translucent. Add the green chillies and GG paste and saute for a minutes. Add the mushrooms now and saute them till they let out water and get cooked and change color to a darker shade.

4. Now add the other veggies and spice powders - turmeric, curry powder, coriander powder, salt and mix well. Saute until you get a dry mixture without moisture. Add the mashed potatoes and mix well, cook for 2 more minutes. Switch off flame.

5. Transfer the mix to a bowl, and let it cool down a bit. Add the chopped coriander leaves, rice flour and corn flour to the mixture and combine well. Check for salt and seasoning , and make the required changes to suit your taste.

6. Divide this mix into 4 to 5 round balls and flatten them to form a round pattie shape of medium thickness.

7. Smear little oil on top of a heated iron griddle/tawa. Place a pattie on the tawa to toast. Apply oil on the sides of the pattie and toast both sides in low-medium flame for about 5 minutes until they are cooked well and you get the dark crispy spots on the outer layer. Be gentle while flipping the patties, make sure not to break them.

Serve this pattie with some salad and soup.


Continue Reading >>

Wednesday, October 24, 2012

Channa Sundal

I just gone done with cooking and relishing an elaborate meal and I seem to be the right frame of mind to have a really long nap ;). So a quick post this is going to be, a very easy one - Channa Sundal. Channa Sundal makes an appearance only once a year in my kitchen at the time of sarawati pujai. So if I dont click pics of it now and blog about it, we will have to wait a year to see this recipe in this space. :). Enjoy the festival mood, do the dandiya, eat sundal and have fun :)


Ingredients

Serves - 2
Spice Level - moderate
Prep Time - 8 hrs of soaking time.
Cook time - 5 min

Channa/Chole/Chickpeas - 1 cup
Oil - 1 Tbsp
Mustard - 1 Tsp
Dry Red Chilli - 2
Hing - 1 pinch
Curry Leaves - 2 Sprigs
Jeera/Cumin - 1/2 Tsp
Salt - as per need
juice of half a lemon

How do you do it

1. Soak the channa in enough water for 8 hrs or overnight. Pressure cook the soaked channa for 3 whistles. Drain the water and keep the channa aside.

2. Heat oil in a kadai. Add hing, mustard and jeera. Let them splutter and roast. Break the red chilli and toss them in along with curry leaves. Stir for a few seconds. Add the channa now, required salt and mix well until the channa is coated well with the tempering and takes in the flavors well - 3-4 minutes.

3. Switch of flame, mix in the lemon juice and enjoy this easy snack


Print this Post

Continue Reading >>

Sunday, September 2, 2012

Mushroom Pesto Bruschetta

Did I tell you that I am head over heels in love with mushroom?  I have no issues having a mushroom soup as an appetizer, tandoori mushroom for an entree, mushroom tikka masala with naan for main course :).  Any restaurant I visit for the first time, I always choose at least one mushroom dish, that way I am quite adventures with mushroom dishes. S was one among the many people who dint like mushroom, now I wonder if he doesn't mind the vegetable due to my obsession with it or did he acquire the taste naturally. This month my kitchen has been quite mushroom heavy and I have been forbidden to buy any mushroom by S until further asked otherwise!  Ha ha! So during the mushroom month, I wanted to make a mushroom bruschetta and it was a winner :).

Another Aromas cafe inspired dish this is. One of my favorite frequent orders is their cheese mushroom bruschetta, and  bruschettas are quite simple to make if you don't have to make the baguette itself  :). Some french baguette, sauteed mushroom and some pesto and you are ready to put up an awesome starter for a party.

Mushroom Pesto Bruschetta


Ingredients

Serves - 2 [Makes around 10-12 pieces]
Prep Time - 20 min
Cook time - 15 min


1 French baguette
Mushroom - 200 gm cleaned and chopped finely
Shallots - 4-5 , chopped finely
Coriander leaves - 4 Tbsp finely chopped
Salt - as per need
Pepper - to season as per need
Garlic cloves - 4 chopped finely
Shredded Parmesan/mozzarella cheese - 5 Tbsp
Olive oil - 1 tbsp

For the Pesto

Basil Leaves - 1 Handful
Almonds - 5-6
Garlic cloves - 2
Olive oil -  4-5 Tbsp
Salt - as per need

How do you do it

First to make the pesto , chop the almonds and dry roast them until they give out a nice aroma and slightly start to brown.

Bring 1 cup salted water to a boil; add basil, and submerge with a spoon. Let it boil for a minute or two. Immediately drain in a colander. Rinse with cold water until cool, then pat basil completely dry in paper towels

Combine the basil leaves, toasted almonds , garlic cloves , salt and grind in a food processor without any water for first few pulses. Then add olive oil tbsp by tbsp and grind until all of them come together well. The final texture of pesto will be a little coarse. Keep aside.

In a frying pan heat olive oil. Add mushrooms and saute until liquid evaporates (about 3-5 min.). Add shallots and garlic, saute for 1 more minute. Add coriander leaves, salt and pepper to taste. Remove from heat.

Cut the french baguette into diagonal cross section of 1 inch. Brush one side with olive oil. Place slices on a baking sheet and broil in oven until LIGHTLY golden brown (this takes only 2 min). Remove from oven and spread each slice with basil pesto and topped with mushroom mixture. Last sprinkle some cheese on top. Return to a preheated 180 degree C. oven. Bake until cheese is melted and center toppings are hot (about 2-5 minutes).

You can toast the baguette even in a frying pan if you don't have an oven. Brush the baguette on both sides with oil and toast only one side until slightly browned. Don't let it brown a lot. Remove from frying pan, spread with pesto, top with mushroom mixture and some cheese on the browned side, return to pan and close with a lid and heat on low flame until  the cheese melts.


Print this Post

Continue Reading >>

Friday, August 17, 2012

Garlic pull-apart rolls [Eggless] - A Tribute to Julia Child

Happy 100th to Julia Child :) . For those who don't know, Julia Child was a very famous American chef who mastered french cooking and revolutionized American cuisine through her approachable version of a sophisticated French cooking school,TV cooking shows and award-winning cookbooks.

To know about Julia Child read here. Also if you are into cooking even a little bit , you should catch the movie Julie and Julia , its quite an inspiring and entertaining watch.

Now coming to these awesome pull-apart garlic rolls - the picture should speak for itself, so I am going to cut the story short and keep it simple :). These pull apart rolls are super soft pillow like bites which makes for a perfect weekend lunch/dinner. The garlic flavor comes through well, but I feel these rolls require a strong flavored soup or some kind of  spicy curry to use as a dipping sauce. If you want to have this with your evening chai or coffee, I would suggest you to customize the spread - probably make some veg/chicken curry stuffing for these rolls. But if you are one of them who likes to munch on some mildly flavored bread during your tea-time, these rolls by themselves works just fine. So off to the recipe.

Btw see the tomato basil soup in the white bowl , pretty no? :D

Garlic pull-apart rolls


Ingredients

Adapted from  mysingaporekitchen

Serves - 3  , makes 12 mini rolls
Prep time - 1 hr
Cook time - 30 min


For the dough

All purpose flour/Maida - 3 cups
Warm water - 1 cup plus little more
Yeast- 1tbps
Salt - 2 tsp
Sugar- 2 tbsp
Olive Oil- 2 tbsp

For final touch up on the rolls

Sesame seeds - as per need
Milk - few Tbsp

For the Garlic spread

Salted Butter - 50 gm [should be in soft-solid form]
Garlic cloves - 8-10 finely minced
Coriander leaves - a handful chopped well


How do you do it

Mix all the ingredients for the dough with warm water except oil into a smooth and soft ball. Knead for at least 10 minutes, the dough should spring back when you touch it. Once done add 2 tbsp of olive oil and knead once more. Keep it in a bowl covered with foil/cling film  for 45 minutes after which you should see the quantity of dough doubled. The first pic is the doubled quantity. I decided to take step wise pics only after the dough doubled , and hence the original quantity is not shown. I needed one cup of  warm water plus few more tbsp to make a slightly sticky dough, adjust water quantity accordingly , must be around 1 cup +/- few tbsp of water

Meanwhile prepare the garlic spread by mixing butter, minced garlic and chopped coriander together into a smooth spreadable texture as shown in the picture.

Also prepare a baking tray [ I used a tart pan to get a flower kind of shape] for baking these rolls. You could use any loaf tin or round cake tin too.Pre-heat oven for 10 minutes at 180 deg C.

Now to prepare to rolls - Punch down the air from the dough and divide the dough into 3 equal portions. Take one portion and using your rolling pin, roll into a rectangle of 1/2 inch thickness.[Apply flour to prevent sticking of the dough]

Take a tbsp of garlic spread and apply evenly all over the rectangle.Now roll the spread dough along its length [see in pic]. Cut into 4 equal parts. Repeat the same for the remaining two portions, you should have 12 rolls now. Let the rolls stand with the cut side facing up. Apply a tsp of garlic spread on top of the rolls too. Brush all sides of the roll with milk. Spread few sesame seeds on the sides and top of each roll. Place on prepared baking pan.

Let these rest for 20 more min for proofing. When you place the rolls in the baking tray, place them close to each other so that they touch each other.

Bake for 20-25 minutes at 180 deg C until done perfectly. Grill for 3-4 minutes at 180 deg C until you get the browning effect on top and sides of the rolls. Once done, cool if for 5-10 minutes and serve warm, fresh out of the oven with some soup or curry of your choice. For the shining effect, I applied some olive oil on the rolls once they were out of the oven.

We had this for lunch with  tomato basil soup and it was a super hit at home :) .


Print this Post

Continue Reading >>

Saturday, August 11, 2012

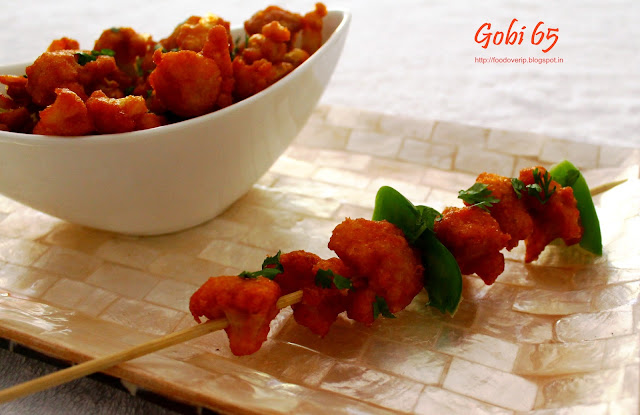
Gobi 65 - Restaurant Style

The first thing this Gobi 65 reminds me of are how me and my cousins were not allowed to eat this in my paati's place when they made this. :(. Usually Gobi 65 is made on Sundays as a special vegetarian item for my Grandad/uncle who did not eat non-vegetarian dishes. So the rule in the house was that , those who were non-vegetarians are not allowed to eat Gobi 65 as it was reserved for the vegetarians. Hmmp! ;)

How many of you have wondered where this tag "65" came from for various dishes such as chicken, Gobi, paneer etc. I have - many a times but never looked it up until now.  There are many different stories for how the name came about. Below are the two interesting ones from wiki :)

Chicken 65 is alleged to be a dish introduced in 1965 at the famous Buhari Hotel restaurant in Chennai by its founder A.M.Buhari, a pioneer in the South Indian food industry. They also offer Chicken 78, Chicken 82 and Chicken 90, introduced in 1978, 1982 and 1990 respectively.

Another storyline is that northern Indian army soldiers frequented a military canteen in Chennai. Its menus were written in Tamil, the local language. As most soldiers could not read Tamil, they made their choice by citing the number of the dish on the menu. The dish's popularity spread among the soldiers by word of mouth. They'd simply ask for "number 65"; soon, the dish became known officially as "Chicken 65".

Gobi 65

Ingredients

Serves - 3
Prep Time - 20 min
Resting time - 30 min
Cook time - 15 min


Cauliflower - 1 medium sized
Maida/All purpose flour - 1/2 cup
Corn flour - 3 Tbsp
Red Chilli/Curry powder - 1-2 Tbsp [adjust according to spice level]
Ginger Garlic [GG] paste - 1 Tsp
Salt - as per need
Water - 1/4 cup to make the marinade [ adjust accordingly]
Red food color - a pinch [optional]
Turmeric - 1/2 tsp + a pinch
Oil - for deep frying [1/2 cup]

Lemon - 1/2 [ to squeeze juice on top before serving]

How do you do it

Separate the cauliflower florets , and slice into medium sized pieces. We first need to clean the cauliflower. Boil few cups of water [2-3] . Add a tsp of salt and 1/2 Tsp turmeric to the boiling water. Now throw in the cauliflower pieces mix well,and let it boil for 2-3 minutes on high flame. Switch off flame. Stir the cauliflower pieces well and drain completely. By now your cauliflower pieces must be half cooked. It should be firm to bite. Use tissue paper and pat the pieces to remove excess water from the cauliflower. Keep aside and let it dry.

Mix the maida, corn flour,chilli powder, GG paste , salt , a pinch of turmeric , red food color in a bowl and form a thick paste of this with water. The consistency of this is important, it should be as thick as your toothpaste. I used 1/4 cup of water, but adjust accordingly when you make the paste. Taste the marinade to check for salt-spice level and make changes as needed. Add the cauliflower pieces to this marinade and wrap well, so all the pieces are coated well. This needs to rest for a minimum of 30 minutes.

Heat oil [medium heat] in a kadai for frying the cauliflower pieces. Drop a little marinade to check if the oil is heated properly, if it rises above immediately, you are ready to go. Drop 8-10 pieces of cauliflower into the oil, deep fry until it turns into a nice red color. Remove from oil and drain on tissue paper. Repeat the same and fry them in batches.

While serving you could squeeze lemon on top of these pieces. Needless to say it makes an absolutely delicious starter :).

Notes

The cauliflower pieces needs to be firm to bite and only half cooked. Do not overcook them.

It is important to drain the water completely from the cauliflower and gently pat with tissue paper to remove excess water without damaging the florets.But don't try to remove too much , little water content of the gobi will help to easily wrap the Gobi in the marinade. Standard rule for deep frying is that water content has to be very low

The consistency of the marinade needs to be thick, as thick as your toothpaste.

When frying,I dropped the cauliflower piece by piece, instead of dropping a handful of pieces together. They tend to stick together in the oil and trying to break them up while frying or later seemed difficult.

If you do not want to deep fry it, you could take a baking tray lined with foil, apply some oil on it, spread Gobi on the foil, drizzle few drops over the Gobi and the grill it in the oven for about 20 minutes for 200 deg C, turning the Gobi over after10 min to grill evenly


Print this Post

Continue Reading >>

Friday, July 13, 2012

Veg Cutlets

Most of my summer holidays during school time was spent in Salem with my cousins and grandparents.Taking the kovai express train from Chennai to Salem became a routine. The early morning busyness of Chennai central railway station smelling of fresh fish, ah how i used to crib about that smell, people pushing trolleys all over the place, my heart hoping I would get a window seat ;) - all those memories remain so fresh even now. The kovai express must be the most traveled route by far for me. I have exhausted that route so many times :).

You must be waiting for the connection between the kovai express and cutlets right? :P. One of the things i used to look forward to during these train journeys was the vegetable cutlets from their pantry. :). One of my all time favorite snack. I have wondered how these cutlets sold outside turned up so firm with a crunchy outer texture.Few of my cutlet making experiences went bad, and I gave up hopes until I recently landed on a winner recipe and I am going to share that with you now. I have used this method 3-4 times now, turns perfect each and every time. Though the process is time consuming, its worth every second :)

Veg Cutlets


Ingredients

Adapted from homecooksrecipe

Serves - Makes about 15-20 cutlets
Spice Level - Moderately Spicy
Prep Time - 2.5 hours
Cook time - 30 min


Potato - 3 medium sized , boiled and mashed completely
Beetroot - 1 small sized ,grated finely
Beans - 6 chopped finely
Carrot - 1 chopped finely
Green peas - fistful
Onion - 1 chopped finely

Oil - 1 tbsp
Saunf/ Fennel- 1 tsp
Jeera/Cumin - 1 Tsp
Hing/Asafoetida - a pinch
Green Chilli - 4 finely chopped
Ginger garlic paste - 1 tsp

Coriander powder - 1 tsp
Corn Flour - 1 tsp
Garam Masala - 1 tsp
Turmeric  - a pinch
Red Chilli/Curry powder - 1 Tsp
Coriander Leaves - 1 tbsp - finely chopped

Maida/All purpose flour - 1/4 cup mixed with water to form a thin paste to dip the cutlets in.
Brown Bread - 6 slices + 2 slices

salt - as per taste.


How to make it

1. Firstly boil the potatoes, drain the water used to cook the potatoes in if remaining, mash the potatoes completely and refrigerate for 1 hour minimum.

2. Toast the 6 brown bread slices to a dark brown shade and crumble them in your food processor / mixer to get bread crumbs

3. Make the maida paste and keep aside.

4. Boil all the vegetables to a mash-able extent - beetroot,carrot,beans,peas. Once boiled, drain the excess water and take the veggies. Make balls of these boiled veggies and squeeze out all the liquid from these veggies as much as possible. This step is very important as the water content needs to be as little as possible for the cutlets to shape up fine.

5. Heat oil in a kadai. Add hing, jeera and saunf - let them roast. Add in the chopped onions, green chilli,Ginger-garlic paste and saute till the onions are done. Add the turmeric powder, garam masala and coriander powder, chilli powder and saute well. Add the boiled veggies now and saute until you get a dry mixture with no moisture content.

5. Add mashed potato, coriander leaves and mix well with the veggies. Saute for a couple of minutes and switch of flame and let this cutlet mixture cool.

6. Dip the 2 bread slices in water, squeeze the water out of the bread and add bread pulp to the cutlet mixture. Add the corn flour and salt too now and mix well.

7.Pinch a lemon sized ball from the mixture and flatten into a round shape using your fingers.

8. Dip the cutlet first in maida mix quickly and and then in bread crumb mixture. The cutlet should be wrapped well with the bread crumbs as it forms the outer texture. Maida paste here acts as a bonding agent between the cutlet and bread crumb.

9. Do this for all cutlets, arrange on a plate , wrap with a cling film and refrigerate for minimum 30 minutes.You can store even overnight and thaw it for 30 minutes before frying.Before frying ,bring the cutlets to room temperature by keeping them out for 10 minutes.

10. Heat 1/4 cup of oil in a pan and deep fry the cutlets, till they turn into golden brown color in medium flame.

11. Remove the Cutlets on tissue paper, serve with tomato ketchup. Makes an awesome pair with a cup of steaming chai :)


PS: Join my Facebook page FoodOverIP to get updates about upcoming posts and share your feedback.


Print this Post

Continue Reading >>

Thursday, July 12, 2012

Beetroot Paruppu Usili/Beetroot-lentil crumbs stir fry

I have already blogged about the traditional beans usili here and I always stuck to using either beans or cabbage for paruppu usili. I am not very fond of beetroot due to its inherent sweetness , but Amma keeps reminding me to use it at least weekly once due to its high nutrition content. Over the past few months she has been asking me to use beetroot for this dish and I kept postponing it and wasn't very impressed about the idea - I was worried it might be a little sweet. So when she was in Mumbai , she made it for lunch one day and I must admit I was wrong, I enjoyed the dish thoroughly. It was an instant hit. The beetroot is grated finely and it gets blended well with the spiced lentil crumbs that the sweetness disappears and it tastes quite well.We added a carrot too along with beetroot :)

So Amma's target achieved - Giving me a  beetroot dish that I might be fond of. Ah, the things that Ammas' do for their kids however old they might be. :)

Beetroot Paruppu Usili


So follow the same recipe as the cabbage-beans-paruppu usili, but just use finely grated beetroot and grated carrot [1 Large beetroot + 1 carrot ] instead of the beans and cabbage.When you add the carrot and beetroot to the lentil crumbs in the kadai, saute well to make sure the rawness of the beetroot and carrot vanishes and they are cooked completely before switching off flame.

Serve with Rice and Rasam.


Print this Post

Continue Reading >>

Sunday, July 1, 2012

Chettinadu Vellai Paniyaram | 50th Post and counting

First up I am dedicating this post to my family. To the people who would just about do anything to see me happy.

Welcome to my 50th post. :) Yahoo! Finally!. When S started a sample blog for me, he never did think I would go beyond a few  posts. But to his surprise and mine, I have taken this seriously and have been dedicating enough time to contribute to this blog and I am loving it :). These days the crockery section in showrooms interest me more than the clothes/accessories section. ;)

I also thank the few food bloggers who visit my page regularly and leave comments.It feels good when fellow bloggers appreciate the work and it is good motivation for me to continue posting.Thanks a ton guys.

This being my 50th post I wanted it to be something special. So it has to be some kind of paniyaram , which is my absolute favorite. Vellai Paniyaram is a chettinadu delicacy made by deep frying the batter ---made by grinding urad dal and raw rice together. It is served as a savory item to satisfy your 4pm hunger cravings :). You can have this along with milagai chutney, Idli podi or just eat it plain . My mom was staying with me for  a good couple of weeks in Mumbai and it was super awesome.So we she made this for S and me in Mumbai.This recipe is a little tricky as you need to make adjustments after seeing how the paniyaram turns out and after a few trails , you will get the right mix for the paniyaram batter.

Vellai paniyaram


Ingredients

Recipe Source - My mom

Serves - Makes about 20 Paniyarams
Prep Time - 2.5 hours
Cook time - 1 hr

Raw Rice - 1 cup [not heaped , measure it flat on the cup]
Urad dal -  1/4 cup or a fistful of dal. [Oru pudi]
Salt - to taste
Oil - for deep frying

For Adjustments

Milk - as per need [max 1/4 cup needed]
Idli Batter - as per need [max 1/3 cup needed]


Method

Soak the rice and dal together in water for 2 hours and not more. Drain the water from the soaked rice-dal and keep aside and use little by little for grinding. Grind the dal and rice together in your mixer to a smooth paste, the consistency of the batter should neither be as thick as idli batter nor as thin as dosa batter. The consistency needs to be in between the two. So while grinding, be careful of the amount of water your are adding.

Add salt to the ground batter and keep aside.

Heat oil in a flat kadai. The temperature of the oil must be medium, so that the paniyaram gets cooked inside as well.Take a small ladle full of batter and drop it into oil. The paniyaram will puff up and come above in a few seconds. Within a minute turn it upside down and allow it to cook for 1 more minute and remove it from oil.Drain on tissue paper.It shouldn't take more than a minute or 2 to get the paniyaram done.The paniyarams will be a little thick in the middle and thin around the edges.

Now taste the paniyaram. The correct texture of these paniyarams are such that they are slightly thick in the middle. If you feel that it is too thick, then add about 2 tbsp of milk, on the other hand if you feel that it is not soft enough then add 4-5 tbsp of idli batter. After making the adjustments, try making the paniyarams again. Repeat the process until you reach the correct thickness and softness.

With the above measurements of rice and dal, we had to add milk + idli batter 3 times.So make the paniyaram one by one, taste it, add milk [2 Tbsp] and idli batter [4-5 Tbsp]  each at a time, and stop when you think the density and softness of the paniyaram is apt. Then you can continue making the rest of the paniyarams with the proper batter.

Serve warm with milagai chutney

Notes

1. Recipes of idli batter and dosa batter will soon be up. :)

2.  If you are worried batter might become runny after addition of milk only since you feel the paniyaram is thick, then add idli batter to correct the consistency. With the above measurements i had to add idli batter and milk , 3 times, so my batter was of the right consistency.

3. Do not add more than 1/4 cup urad dal. If you add more urad dal, the paniyarams will drink oil and you may have to add rice flour to correct it.


Print this Post

Continue Reading >>

Friday, June 22, 2012

Mushroom Peas Masala

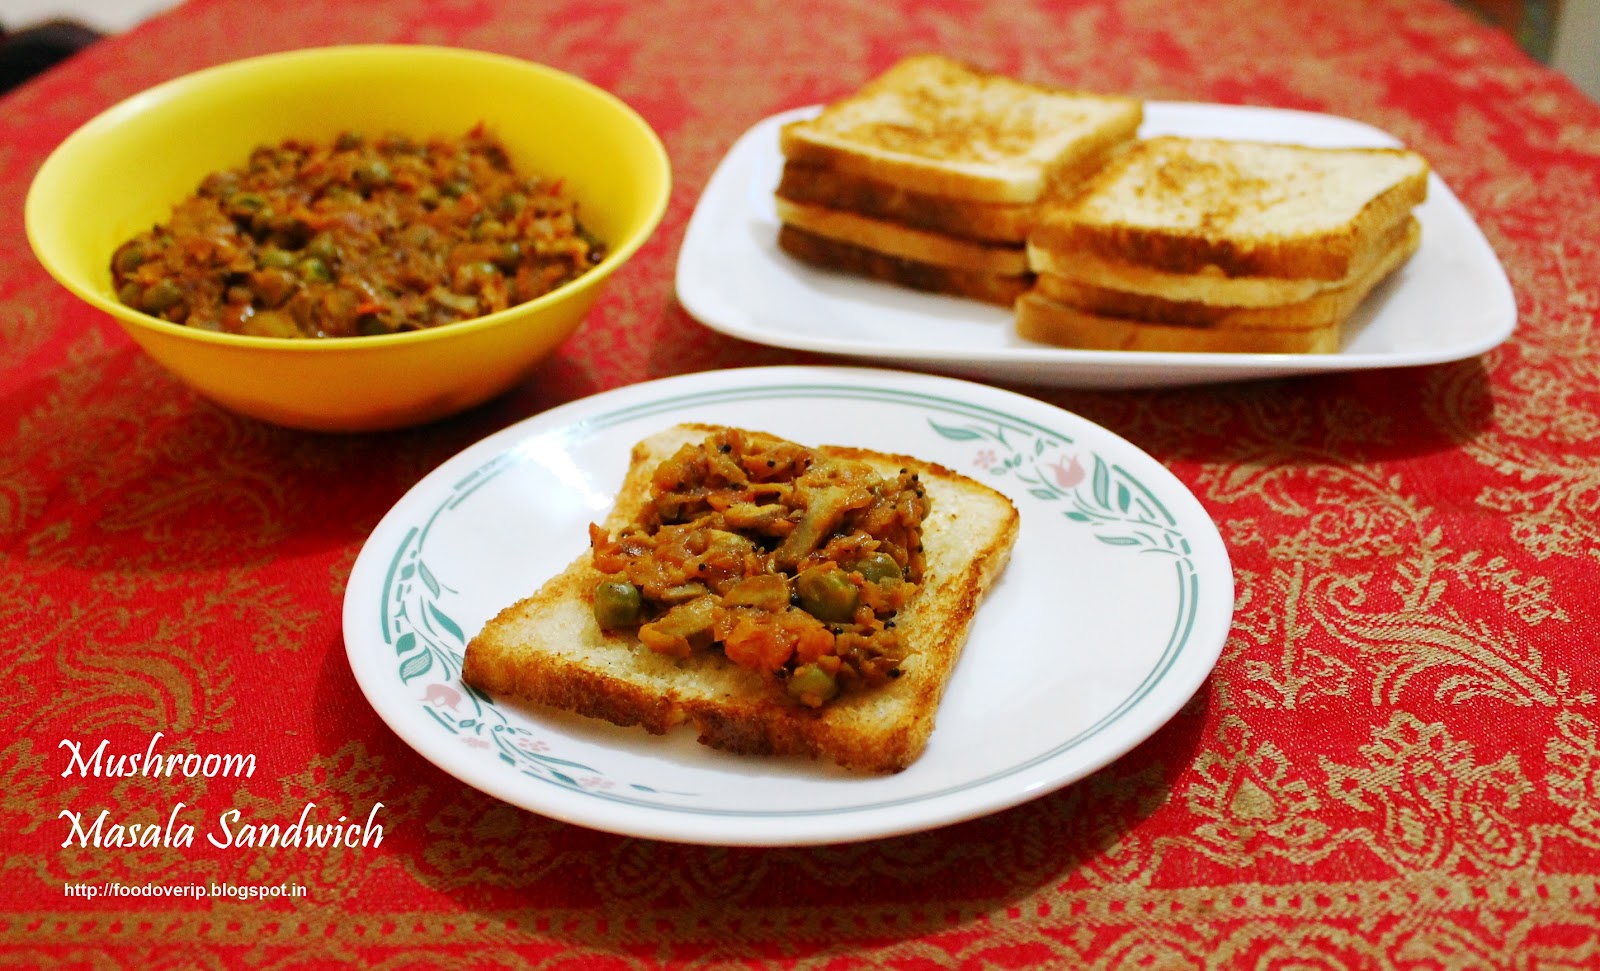
Making somebody like a veggie that they are not fond of  is easy, just cook it in a tasty manner. :). S used to strictly avoid eating mushroom/spinach/adai/beans/ before our wedding.I had to persuade him the first time to try all of these at least once and later decide for himself if he wanted a second serving or not. And good for me, he likes all of these veggies now. :)

I clearly remember the first time I made this dish, way back in 2009,one month into my wedding. Nice spicy mushroom masala served with ghee toasted bread for breakfast. It was so yummy, we ended up packing the same for lunch. Since then , this dish has been a hit at my home. :). One small change in 2012 - we stopped using ghee for toasting bread, you know why!  ;)

Mushroom Peas Masala


Ingredients

Serves - 4
Spice Level - Quite Spicy
Prep Time - 20 Min
Cook time - 20 Min


Mushroom - 200 gms, cleaned and chopped well
Frozen peas - 1/2 cup.
Onion - 1 Large, chopped well
Tomato - 2 and half large ones, chopped
Ginger-garlic paste - 1 Tbspn
Turmeric powder - 1/2 Tsp
Chilli/Curry/Masala Powder - 2 Tbspn
Salt - as per taste.
Oil - 2 Tbspn
Jeera - 1 tbspn
Hing - a pinch

Method

Boil a cup of water, simmer flame and add the frozen peas to it. Let the peas get cooked for about 5 minutes.Switch off flame once peas is cooked. Drain the water and keep the peas aside  If using fresh peas, cook it as you would usually do.

Heat oil in a kadai. Add hing. Add jeera, and let it roast, giving a nice aroma.Add onions, ginger garlic paste and saute well until the onions are cooked well. Add tomatoes, half the quantity of salt needed, turmeric powder, and saute well. Cover the kadai with a lid for few minutes. Let the tomato get mashed well, it should let out the juice and be soft. At this stage add the masala powder and saute for a minute. Wait for the raw smell of the masala to vanish. Add the chopped mushrooms now, and wrap well with the masala. Add 1/2 cup water. Simmer the flame and close the lid. Wait for the mushrooms to get cooked. This would take about 15 minutes. Mid-way, when the mushrooms are half done, add in the cooked peas and combine well. Stir once, add remaining salt and cook in open flame. Wait for most of the water content to evaporate and a nice thick gravy is formed.Switch off flame.

Serve as a side dish for toast, or with roti's, or with rice. Goes well with just about anything. :)


Print this Post

Continue Reading >>

Wednesday, May 16, 2012

Bread Upma

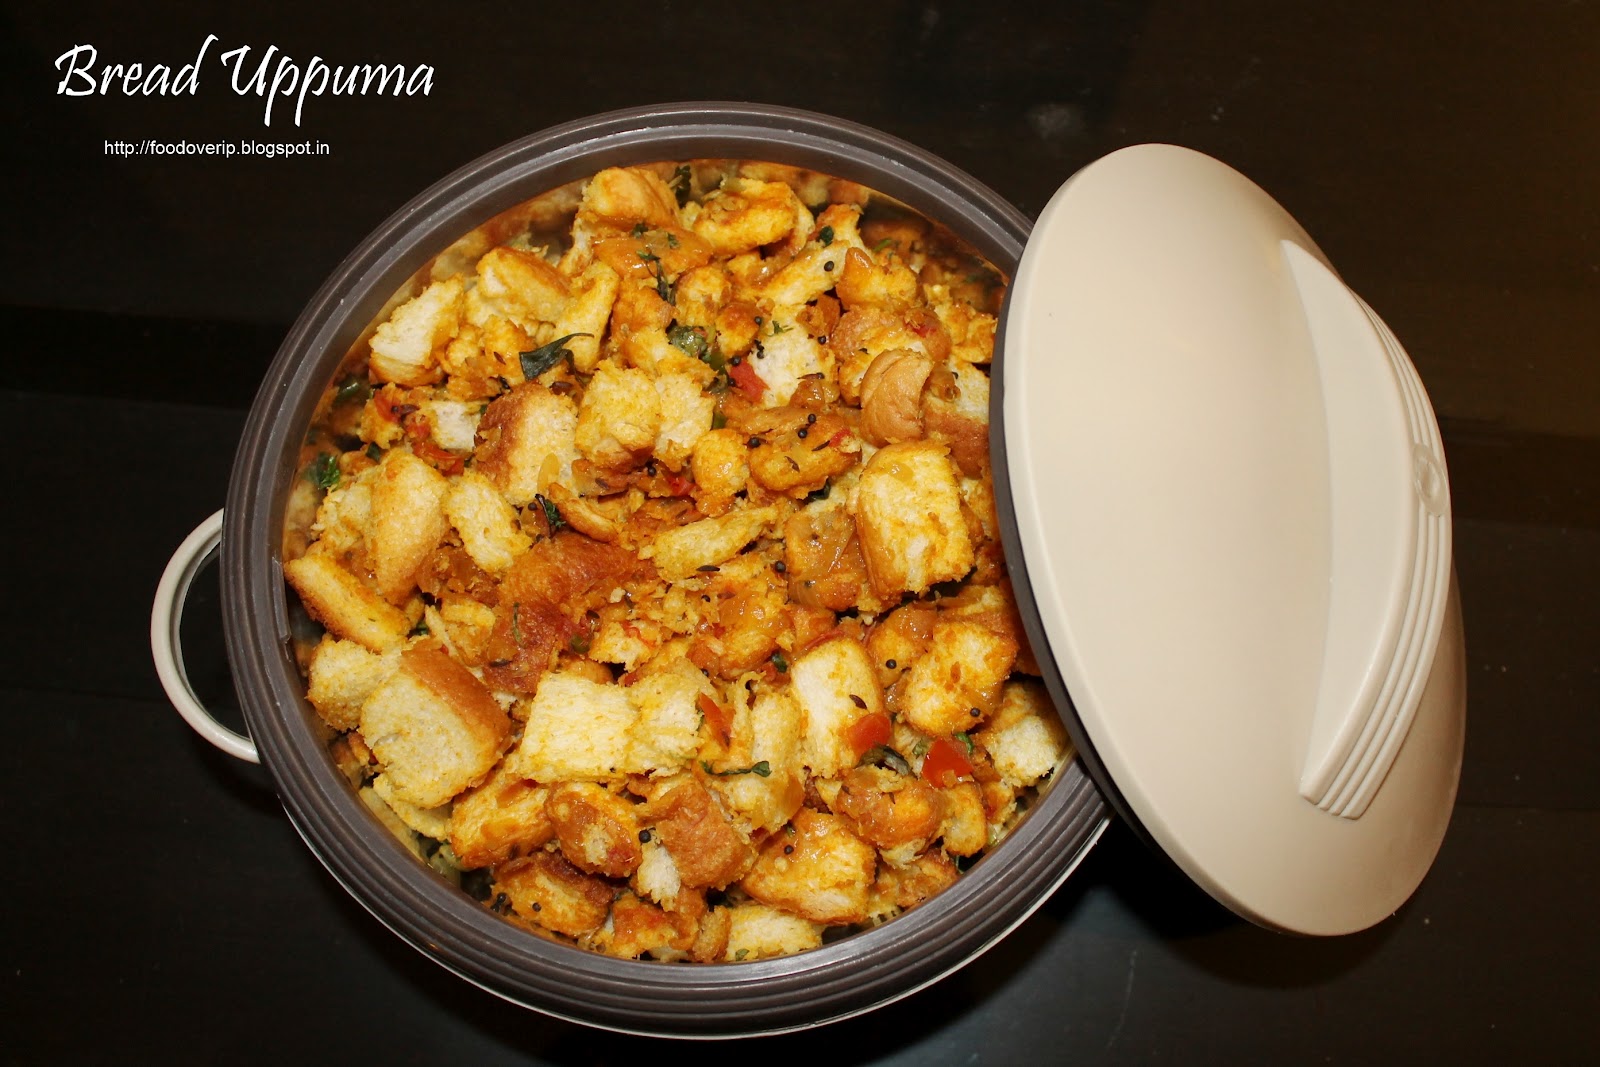
I had a packet of bread that had to be finished or it would get expired by then. So ended up making bread upma for dinner :). Easy one this is , ideal for breakfast though :).

Bread Upma


Ingredients

Serves - 2
Spice Level - Moderately Spicy


Bread slices - 10, cut into small squares
Onion - 2 Large , chopped finely
Tomato - 1 + 1/2, chopped
Green chilli - 4, chopped finely
curry leaves - 2 sprig
Ginger-garlic paste - 1 Tsp
Curry/chilli powder - 2 Tbspn
Turmeric - 1/2 Tspn
Salt - as per taste

Oil - 2 Tbspn
Mustard - 1 Tspn
Jeera - 1 Tspn


Method

Heat oil in a kadai. Add in mustard, let it splutter, add jeera - let it roast. Add curry leaves, chopped onion, green chilli, ginger-garlic paste and saute well until onions turn a shade of glossy pink. Add in tomato pieces, salt, and turmeric and saute it till the tomato pieces are cooked mad mashed well.Add the chilli powder now, and saute till the raw smell of powder vanishes. Add about 2 Tbs of water to the masala mix and  stir well. Add in the bread pieces now and mix well with the masala. Make sure all the bread pieces are wrapped well with the spices.Taste and see if more salt is required and add accordingly.Mix in the chopped coriander leaves, saute for a couple of more minutes. Switch off flame.

Serve this bread upma with a glass of orange juice for breakfast or as an evening snack. :)


Print this Post

Continue Reading >>

Monday, April 16, 2012

Medhu vadai / Lentil Fritters

Wishing you all a very happy belated Tamil New year. So on to some festival food. :)
Medhu vadai or Ulundu vadai is a standard item in all South Indian breakfast specials. It is the absolute favorite of most Indians I have come across. I hardly know people who don't like vadai. If I am having breakfast in any restaurant in south India, this is sure to be one of my orders. In my household, this is sure to make an appearance in almost all special occasions . I made this a couple of days back for Tamil New year. :)

This is one of the special items that took me some time to get the hang of it. I still cannot say I have mastered it. :) . It needs practice to get the round shape with the hole , you should also know what consistency the batter has to be and a few other pain points.

Medhu Vadai


Ingredients

Makes roughly around 20 vadais

Urad dal - 1 cup
Raw Rice - 2 Tbspn
Toor Dal - 1 tbspn
Salt - as per taste

Onion - 1 Large finely chopped
Green chilli - 5 finely chopped
Curry leaves - 2 Sprigs , crushed well
Coriander leaves - 2 Tbspn , chopped well.

Oil - for deep frying - 2 cups

Method

Soak the urad dal, raw rice, toor dal in water for 45 minutes, water level must be well above the dal in the container. Drain excess water and grind it in your mixer with as little water as possible. This step is very important, add as much water as needed for your mixer blade to rotate well  without getting jammed. if you are able to grind without any water - great!. Max you can add maybe 2 -3 Tbspn of water.Grind till you get a smooth fluffy texture of the dal.

Transfer to a container. Add salt, and the chopped onions,green chilli,curry leaves and coriander leaves to it. Mix well.Now the dough is ready for the vadais.

Heat oil in the kadai to fry the vadais.Now take a polythene sheet and wipe it with water. Have a bowl of water by your side - jus to dip you hands to get rid of the dough in between frying and making the vadai shape.

Pinch a medium sized ball of the dough, and place it on the polythene sheet. With you index finger , make a hole in the center of the dough and get the shape as in the picture above.Once done transfer the dough from the polythene sheet [must retain the shape you have made and must not collapse] to your right hand and drop in hot oil.The oil must be moderately hot. Let the vadais fry for a couple of minutes in medium heat, then turn it over to get the other side done. Drain on absorbent paper.

Serve hot with chutney/sambar. Idly sambar and vadai is the perfect Tamil breakfast. Nothing can beat this classic trio. :)


Notes

1. If you are not able to shape the dough as said , and it collapses, you might have used excess water while grinding. The dough needs to be tight for vadais to hold the shape.If you run into this, dont worry, just drop them like bondas, it will still taste good. :). The first time I attempted vadais, thats what I did. ;). As a remedy, you can try freezing the batter for a couple of hours and then try to shape it [This works, i have tried this]. Another fix might be to powder 2 tbspn of aval [poha/flattened rice] and mix it along with the dough, freeze it for 2 hours and try again. [My Paati's suggestion]

2. If your vadais are absorbing too much oil, again the reason is , you may have used excess water while grinding. Adding a couple of tbspn of rice flour might help in this case. I have already added raw rice to the ingredient list due to this.

3. So the key point is to make sure to use as little water as possible while grinding.


Print this Post

Continue Reading >>

Monday, April 9, 2012

Rosemary Garlic Potato wedges

Did you guys miss me? ;). I am back from an awesome-super-duper trip to the Swiss - so overwhelmingly beautiful that words and pictures cannot do justice to it. I will be dedicating a separate post to that very soon though. :)

Now back to these potato wedges. I looove potatoes, I can eat them any time of the day and in any quantity and in any cooked form.Potatoes really remind me of my childhood, where my mom used to scare me saying, if  I eat too much of these, I would develop cramps and calf/knee pain. :). Even now, whenever I get calf pain, I think "maybe I had too many potatoes" :P. People who know me well
know that I never share pomm frites [some eurooopean touch!!] with anybody :)

Potato wedges are an easy, yummy starter to make.You should definitely try to make them if you haven't yet.Just before my trip last week, I had to finish up some rosemary and potatoes.So got on to making some rosemary-garlic flavored potato wedges which we had along with veg fried rice.

Rosemary-Garlic Potato Wedges


Ingredients


Serves - 2
Spice Level - Not Spicy but flavorful

Potatoes - 5 large, cut into wedges
Fresh Rosemary - 4 stems
Garlic cloves - 4, finely minced
Turmeric powder - 1/2 Tsp
Salt/pepper - as per taste
Olive oil - 5 Tbsp

Method

Wash and cut the potatoes into wedges. In a bowl, add in olive oil,  minced garlic,  rosemary leaves,turmeric powder, salt and pepper and mix well.Toss in the potato wedges inside the bowl and marinate it well with the mixture. Let it stay for 10 minutes.

Meanwhile, preheat you oven for 10 minutes at 200 deg C. Line a baking tray with aluminum foil and spray it with non-stick cooking spray. Arrange the potato wedges in rows on top of the foil.

Now bake these wedges at 200 deg C for 40 minutes in toast mode [both bottom and top rod of oven is heated]. After 25 minutes, turn the potato wedges over so the other side also gets cooked and let it bake/toast for remaining time

Remove the tray out of the oven , serve it warm with tomato ketchup. Very easy and impressive starter. :)

Notes

1. You can para-boil potatoes and then follow the recipe to reduce the baking/toasting time.


Print this Post

Continue Reading >>

Sunday, March 25, 2012

Beetroot Vadai

This is one of  the deep fried snack which is probably healthy as beetroot can be sold in this way for sure :).You can sneak in other veggies like snake gourd,cabbage,or anything remaining that you might want to finish. And it goes without saying that any shallow/deep fried snack is always a hit :). Now off to the recipe.

Beetroot Vadai


Ingredients

Serves - Makes around 25 vadais
Spice Level - Quite Spicy

Beetroot - 2 medium, grated.
Toor dal - 1/2 cup
Channa dal - 1/2 cup
Onion - 1 big, finely chopped
Dry Red chilli - 7
Curry Leaves - 3 sprig
Ginger-Garlic paste - 1 Tspn
Hing - a pinch
Turmeric - a pinch
Salt - as per taste
Cumin - 1 Tspn
Saunf - 1 Tspn
Oil for shallow frying.


Method

Soak toor dal, channa dal,red chilli, jeera and saunf in 1 cup of water for 20 minutes. Drain the water and grind it to a paste.It shouldn't be too coarse or either too smooth,somewhere midway. Use only 4-5 Tbspn of water while grinding. Using too much water will result in the vadais absorbing too much oil.It is fine if a few pieces of dal are not fully ground.Now add the grated beetroot, chopped onion, hing, curry leaves,turmeric and salt with this paste and mix well.

Heat about 1/2 to 1 cup oil in a kadai. Once the oil is quite hot, move the flame to sim. Pinch small lemon sized balls of the mix, flatten them on your palm and drop in oil.Fry it for two minutes on low flame and move the flame to medium.Fry until both sides are done well.

Server hot with green chutney as a snack with masala chai. Nothing can beat this kind of snack. :)

Notes


1.While frying make sure,both the insides and outsides of the vadai are done well. If the oil is too hot, the outsides will brown faster,but it will still be undercooked inside.On the other hand if the flame is too low, the vadai will absorb too much oil.So take care while frying.


Print this Post

Continue Reading >>
Related Posts Plugin for WordPress, Blogger...

A la carte!

Along with idli/dosai (13) Along with rice (32) Along with rotis (21) asparagus (1) baby potatoes (4) bajji (1) baking (9) banana (1) basil (1) basmati (2) beans (1) beetroot (5) bhindi (3) biryani (1) Black eyed beans (2) blueberry (1) bok choy (1) bottle gourd (1) bread (3) breakfast (4) brinjal (4) brocolli (1) buttermilk (1) butternut-squash (1) cabbage (2) cakes (7) carrot (1) carrots (3) cashews (1) cauliflower (8) cheescake (2) chettinadu (24) chettinadu delicacy (23) Chicken (7) chilli (1) Chineese (3) chinese (1) chocolate (1) chole (2) chutney (6) coconut (5) coconut milk (1) coriander (4) corn (1) cow-peas (1) cream-cheese (2) curry leaves (1) dal (3) dates (1) desserts (14) diwali 2013 (1) dosai (1) drink (1) drumstick (2) dry field bean (1) Easy (44) egg (3) fenugreek (1) fish (1) Food and Travel review (1) garlic (9) ginger (1) gobi (1) green gram (1) How To (5) Indian Flat Breads (4) indian sweets (3) International (5) ivy gourd (2) jeera (3) kootu (1) kovakkai (1) lemon (3) lentils (11) lobia (1) malai (1) mango (2) masoor dal (1) Methi (2) mint (2) mix veg (9) mochai (1) moong dal (4) mushroom (10) mutton (1) non-veg (2) onion (2) orange (1) paneer (11) parathas (1) pasta (2) peas (7) pepper (1) pickles (1) plantain (1) poriyal (1) potato (14) potatoes (2) quinoa (1) Rajma (1) rasam (1) rice flour (1) rosemary (2) shallots (1) snack (18) soup (7) soy chunks (1) spinach (6) stir-fry (1) strawberry (1) sweet potatoes (1) tamarind (5) tomato (7) toor dal (1) val bean (1) Variety Rice (13) walnut (1) wheat (2) yoghurt (1) yuuum!! (1) zucchini (2)

Latest on Food Over IP

Copyrights

All rights reserved @2012.

Unless otherwise mentioned, the text and images included in FoodOverIP blog belongs to the author. The blog author’s permission is required before any content is reproduced in any form.

  © Blogger templates The Professional Template by Ourblogtemplates.com 2008

Back to TOP  

Blogging tips