Showing posts with label Variety Rice. Show all posts

Monday, February 3, 2014

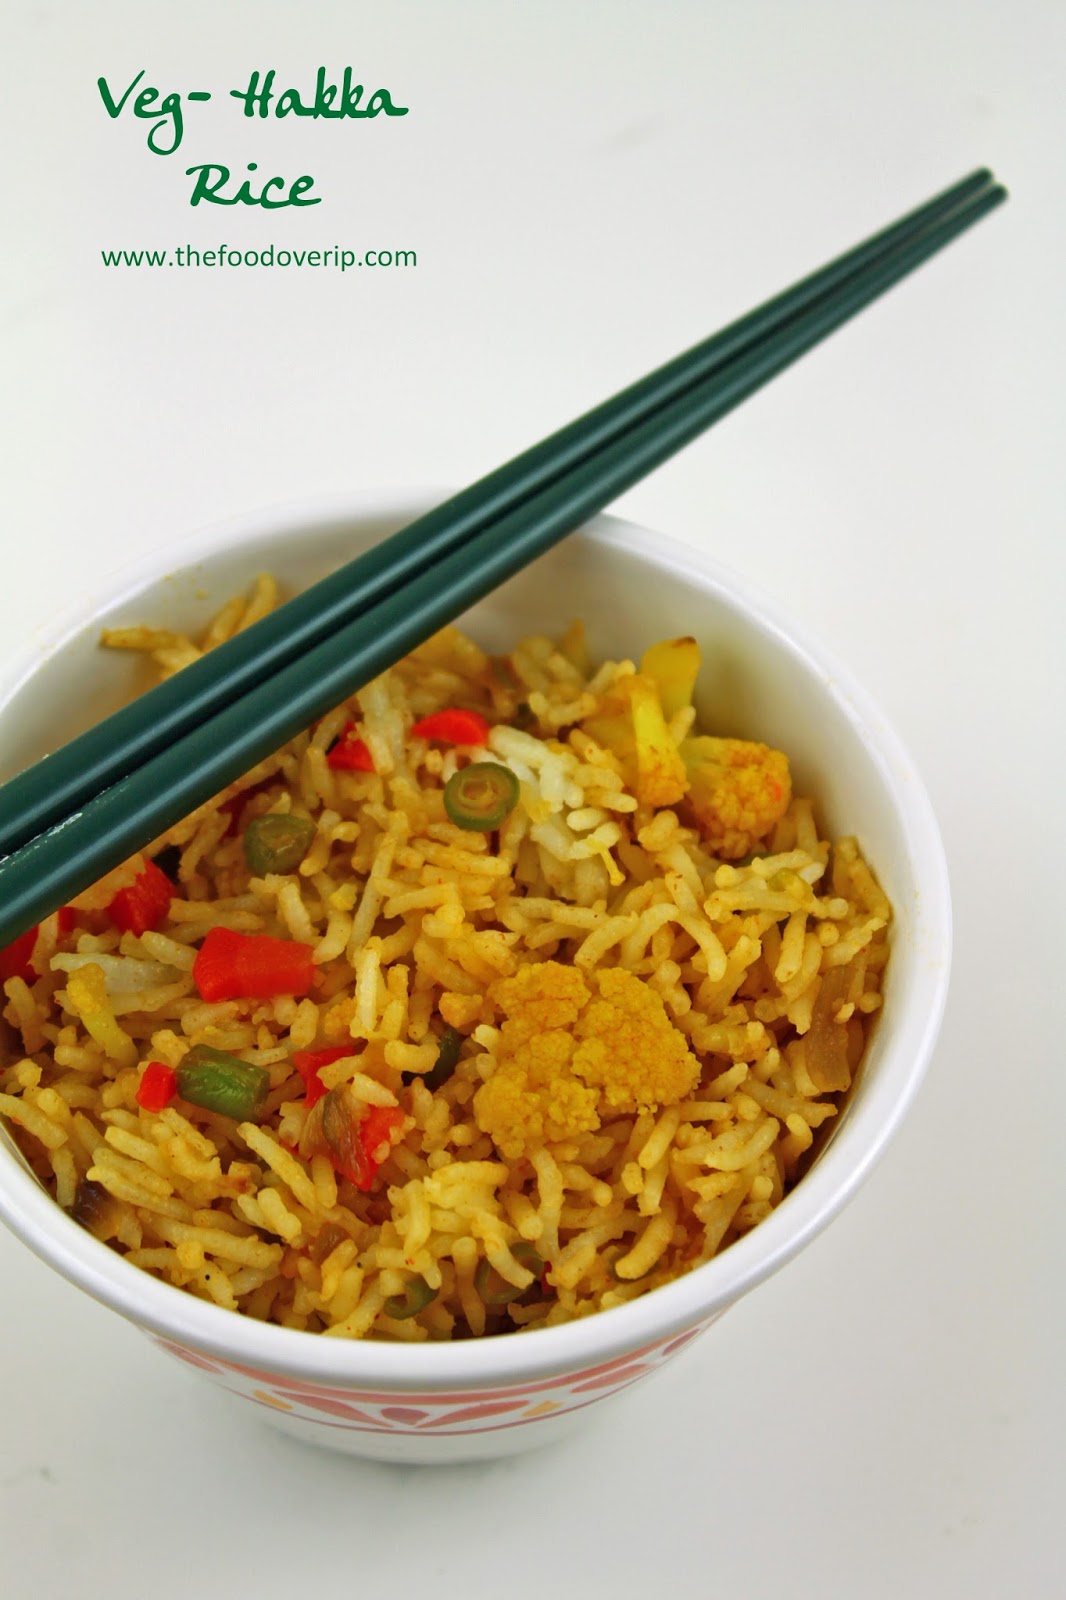
Veg Hakka Rice


One of my favorite experiments when it comes to cooking is to try different kinds of variety rice. Variety rice according to me is the easiest lunch box food without having to skip the inclusion of all kinds of veggies. So this veg hakka rice was from one such experiment which became a good hit at home. This is similar to the recipe of Veg Hakka Noodles that I have posted here, but much simpler, quicker and delicious.

Ingredients

Serves - 2
Spice Level - Moderate
Prep Time - 15 min
Cook time 10 min

Basmati Rice - 1 cup, washed well and soaked for 15 min.
Spring onion white part - 4 bulbs
Spring onion greens - 1 Tbsp
Garlic - 4-5 cloves, chopped finely
Green chilli - 2 chopped finely
Carrot - 1, diced finely
Capsicum - 1/2 diced finely
Cauliflower - 5-7 florets, cut into medium sized pieces
Green Beans - 6-7. chopped finely
Soy Sauce - 3/4 Tbsp
White Vinegar - 3/4 Tbsp
Tomato Ketchup - 1 Tbsp
Ground Cayenne pepper - 1.5 Tsp
Sweet paprika powder - 1 Tsp
Salt - as per need or 4 Tsp
Oil - 1/2 Tsp + 2 Tbsp


How do you do it

1. First cook the basmati rice with 1.5 cups of water, 1/2 tsp oil and 3 Tsp salt. Once cooked, spread the rice on a plate, mix well and cool. The rice has to be cooled before mixing with the veggies for it to not get mashed up.

2. Whisk together the say sauce, vinegar, paprika powder and ground cayenne pepper in a small bowl and keep aside.

3. Heat 2 Tbsp oil in a wok. Add garlic and saute until lightly browned. Add the spring onion white part and green chillies and saute for 3-4 minutes. Now add all the veggies, 1 Tsp salt and mix well, saute in high flame until the veggies are 3/4 cooked yet crunchy. This should take about 10 minutes.

3. Now add the sauce mix from step 2 into the wok and mix well. Saute for a minute. Lower flame completely and add the prepared white rice slowly and mix well.

4. Switch off flame, add spring onion greens and mix the rice and veggies well and make sure they are wrapped well.

Serve this yummy veg hakka rice with a favorite side dish of yours.

Continue Reading >>

Wednesday, April 17, 2013

Kovakkai Masala Biryani | Tindora [Ivy Gourd] Biryani


S : I have decided to work from home tomorrow
Me: Yay! Super.

Me: I don't have to hurry up for lunch then! Do you have anything in mind for lunch?
S : Hmmm, How about that Kovakai [Ivy Gourd, Tindora] Rice you made the other day?

Me: What?!! you want that? Since when did you start liking kovakai? :)

If you are not a fan of the vegetable Ivy Gourd yet, I am going to tempt you to try this recipe and I am confident of converting you into a Tindora fan ;). This is a really flavorful Variety Rice that doesnt take too much time to put together and all you need is the raitha to serve it up with for a splendid meal. The roasted Ivy gourd and potatoes added to the masala coated rice is just finger licking good. I usually make this yummy and healthy Kovakkai Kootu, but decided to experiment using this vegetable in a variety Rice and it turned out to be a big hit at home :).

Ingredients

Serves - 2 
Spice Level - Moderate
Prep Time - 15 min
Cook time - 20 min

Ivy Gourd - 20 pieces, cut into think roundels , its called tindora in Hindi and Kovakai in Tamil
Potato - one, peeled, washed and chopped into thin tooth shaped pieces or cubed into small pieces
Oil - 1 Tbsp
Turmeric - 1 pinch + 1 pinch
Masala/Red chilli Powder - 2 Tsp
Salt - as per need
Tomato - 1 and half tomatoes pureed
Onion - 1 Large, sliced thinly
Ginger Garlic Paste - 1.5 Tsp
Green Chilli - 2 , slit lengthwise and cut in half
Oil - 2 Tsp
Garam Masala - 1/2 Tsp
Kitchen King Msala - 1 Tsp
Basmati Rice - 1.25 cups
Lemon juice - of half a lemon
Water - 2 cups

How do you do it

1. Wash the basmati Rice well and soak in water for 15-30 minutes. Drain and keep aside. In a large pan, bring to boil 2 cups of water along with 2 Tsp of salt. Once it starts boiling, add in the rice and simmer flame and close with a tight lid. Cook for 12-15 minutes or until all the water is absorbed and the rice is cooked. Switch off flame and fluff the rice well with a fork. Keep aside.

2. Heat 1 Tbsp oil in a kadai, add the chopped Ivy gourd and potatoes, 1/2 Tsp salt, and a pinch of turmeric and the Masala Powder. Cook for 10-15 minutes on medium - high flame for the Ivy gourd and potatoes to crispen. Do not close the lid while cooking this. If you close the kadai with a lid, you will get a more boiled veggie texture and not a crispy one. Once they crisp/brown, remove from flame and keep aside.

3. Heat 2 Tsp oil in the same pan. Add the onions and saute for a couple of minutes. Add the green chilli and ginger garlic paste and cook until the raw smell of the ginger garlic paste fades and the onions are cooked well.

4. Add the tomato puree, 1 tsp salt, a pinch of turmeric and cook on low flame for 5 minutes.

5. Add the garam masala and kitchen king masala powder and cook for a couple of more minutes.

6. Now add the in cooked rice and sauteed veggies and mix everything together on low flame. Once mixed well, switch off flame.

7. Keep the pan with closed lid for 10 minutes so all the flavours are absorbed well into the rice.

8. Open the lid, add in the lemon juice, mix well and transfer to a serving bowl.

Seve this different and delicious Tindora Biryani with Raitha and Pappad.


Continue Reading >>

Monday, March 25, 2013

Mochai Masala Rice | Field Bean Masla Rice


Channa [Chickpea] Pulao has been on the "to cook" list for long, but since it requires pre-soaking, I almost always forget to get the pre-soaking done and it would get postponed. So on one of those usual chai sipping times when I decide on the lunch menu for the next day, I decided to make channa pulao and rushed immediately to soak a cup of chole. I hadn't emptied the channa from its packet into a container whereas the mochai [ dry field beans] that was neatly stored in my brand new air-tight box caught my eye. A moments laziness and I substitued field beans for channa in my mind and there it was - Mochai Masala Rice! :)

Very Easy to prepare for a lunch, along with some raita and papad it tastes super delicious. I would recommend you to use kitchen king masala and not substitute with any other curry powder. This Kitchen king masala powder along with field beans is the hero of the dish. I sometimes combine kitchen king masala with garam masala for variety rice recipes and they work well too. In this dish though, the kitchen king masala and the green chilli flavor is unbeatable.

Ingredients

Serves - 3
Spice Level - Moderate
Prep Time - 10 min + 8 hrs soak time
Cook Time - 15 min

Field Beans/Mochai - a little less than 1/2 cup [ I used dry variety, Its called Val Dal in Hindi]
Basmati Rice - 1 cup
Onions - 1 sliced thinly
Tomato - 1 pureed
Green Chilli - 1
Ginger - 1 inch piece
Garlic - 2 cloves
Jeera/Cumin - 1 Tsp
Kitchen King Masala - 1.5 Tsp
Turmeric - a pinch
Salt - as per need
Hing/Asafoetida - a pinch
Dry Bay Leaf - 1
Cloves - 2
Chopped Coriander Leaves - 2 Tbsp
Oil - 1 Tbsp


How do you do it

1. Soak the field beans for 6-8 hrs in enough water. Pressure cook the soaked field beans for 1-2 whistles until they are soft but firm. Make sure they are not too soft that they get mashed later. Retain 1/4 cup water used to pressure cook the mochai, drain the rest.

2. Cook 1 cup basmati rice in 1.5 cups of water with 1 tsp salt. Spread the cooked rice on a plate to cool and drizzle a few drops of oil on it.

3. Grind coarsely without any water - ginger, garlic and green chilli. Keep aside.

4. Heat oil in a kadai/wok, add the hing, bay leaf, cloves and jeera. Let them roast and give out a nice smell. Add the onions and saute till translucent.

5. Add the ginger-garlic-green chilli paste and cook for a minute until the raw smell vanishes.

6. Add the tomato puree now and let it cook for 3-4 minutes.

7. Add the turmeric, kitchen king masala and 1 Tsp salt and stir well , saute for a minute.

8. Reduce to low flame. Add the cooked field beans now along with the 1/4 cup retained water and stir well so that its wrapped well with the masala.

9. Now add the rice and coriander leaves and mix well so the rice and field beans masala mixture combines well. Saute for a minute more. Switch off flame.

Yummy Mochai Masala Rice is ready! Enjoy!

Continue Reading >>

Sunday, March 10, 2013

Mushroom Egg Fried Rice - the Indo-Chinese way


One of my top easy recipes to pack for a weekday lunch would be some Indo-Chinese based Rice variety. On days when I feel lazy or forget to get some prep work done for the next day lunch, this is what I would do, chop up some veggies like mushroom, bell-pepper, carrot, throw in some sauces, mix it with basmati rice, and there my lunch is ready in minutes. So this Egg-Mushroom Fried rice happened on a day when I had to finish up the packet of mushroom in my stock and a red bell-pepper. Immediately the image of white rice with mushroom, red bell-pepper, scrambled egg and some greens popped into my head and I started wondering how colorful it would look to capture this on a photo :). It does look pretty doesn't it? Trust me, it tastes great too! So lets learn how to make this simple yet tasty Mushroom-Egg Fried Rice.

Ingredients

Serves - 2
Spice Level - Moderate
Prep Time - 15 Min
Cook time - 15 Min

Basmati Rice - 1 Cup
Eggs - 1
Mushroom - 10 button mushroom , sliced into medium sized pieces
Red Bell-pepper - 1/2 a piece,sliced thinly
Spring onion greens - 2 Tbsp
Onion [yellow/white] - 1 , sliced thinly
Ginger-garlic Paste - 1.5 Tsp
Green chilli - 1 , slit length-wise
Light Soy Sauce - 1 tsp
Green chilli sauce - 1 Tsp
Salt and pepper to season
Oil - 2 Tbsp


How do you do it.

1. Soak Basmati Rice in water for 15 min. Drain and cook with 2 Tsp salt and 1.5 cups of water. Once cooked, spread the rice on a plate and drizzle some oil on it, mix well and cool. The rice has to be cooled before mixing with the veggies for it to not get mashed up.

2. Meanwhile, heat a pan, drizzle some oil on it, break and egg into it. Add some salt and pepper on to it, scramble it well with a wooden spatula and cook until its done, about 2 minutes. Keep this scrambled egg aside.

3. Heat oil in a kadai, add the onions and saute well until they are cooked. Add the ginger-garlic paste and green chilli and saute for a couple of more minutes.

4. Add the chopped mushroom and bell pepper now and increase flame and cook until the veggies are half cooked and are crunchy.

5. Decrease flame now and add in the soy sauce and green chilli sauce and mix well. Also add a little salt, remember we have cooked the rice with salt already.

6. Add the rice now to the kadai, and mix well to combine everything . Saute on low flame for a minute or two, add some pepper powder, check for seasoning, add more salt if required and mix well.

7. Switch off flame now, add the spring onion greens and the scrambled eggs and give it a good mix with the rice.

Serve with any side dish of you choice or just with some tomato ketchup and chips.

Continue Reading >>

Friday, November 2, 2012

Baby Potato Biryani


I love baby potato and I love biryani, so pairing these two is like a match made in heaven ;). In my initial cooking days, most of my one pot meals used to pretty much taste the same, maybe just a little change in flavor, veggies etc but nothing too drastically. I am very pleased with my variety rice trials off-late as no two of them taste the same.

This baby potato biryani is quite an elaborate procedure, but don't get thrown away by it, because its absolutely worth it for a weekend lunch and would completely put you in good spirits afterwards. So go ahead, do it and let me know how you liked it :).

Ingredients

Recipe Source - Easy Cooking

Serves - 2
Spice Level - High
Prep Time - 45 minutes
Cook time - 15 minute
s

For the Rice
Basmati Rice - 1 cup [heaped]
Ghee - 1 Tsp
Tomato - 2 medium , pureed [3/4 cup]
Salt - 2 tsp

Paste 1
Coriander leaves - 1 cup loosely packed
Curd - 1/4 cup

Paste 2
Coriander seeds - 1 tsp
Red chillies - 2
Grated dry coconut -  2 tbsp
Green chillies - 2
Fresh Ginger - 1 inch piece
Oil - 1/2 tsp

Other spices and necessary items
Onion - 2, sliced thinly
Baby Potato - 200 gm [ 13-15 nos.]
Garam Masala - 1/4 tsp
Chopped coriander leaves - for garnish
Juice of 1/2 a lemon
Chilli powder - 1/2 Tsp
Turmeric - a pinch
Salt - as per need
Oil - 2 Tbsp + 1 Tbsp


How do you do it

1. Preparing the rice - Soak basmati rice in water for 15 minutes. Drain and cook it in 3/4 cup water and 3/4 cup tomato puree with 2 tsp salt. I use my electric pressure cooker and cooked it for 12 minutes. Once done, you will get a mildly red colored rice, add a tsp of ghee mix well with a spoon and spread on a plate.

2. Preparing Paste 1 - Blend coriander leaves with some water into a smooth puree. Beat the 1/4 cup curd well and mix it with this coriander puree. Keep aside.

3. Preparing Paste 2 - Heat 1/2 tsp oil in a kadai. Add coriander seeds,red chillies and fry until they change their color. Add grated coconut and fry slightly. Cool these ingredients and grind along with green chillies and chopped ginger with some water to a fine paste. Keep aside.

4. Preparing the baby potatoes - Wash and Pressure cook the baby potatoes for 1 whistle or microwave for 5 minutes. Cool and peel them. The baby potatoes should be cooked but firm. It should not get mashed when finally added to rice. Add 2 Tbsp of oil in a pan and add the baby potatoes , 1/2 Tsp salt, 1/2 Tsp chilli powder, a pinch of turmeric and saute/shallow fry them until they form a crispy golden outer layer. Drain on tissue paper and keep aside.

5. Preparing the crispy onions - In the remaining oil from previous step, add the onions and keep sauteing them in medium heat until they are crispy and brown in color. Remove and keep aside.

6. Assembling the rice - Heat 1 Tbsp oil in a wide kadai. Add the ground paste 2 and saute till the raw smell completely vanishes - about 4-5 minutes.Add the baby potatoes and half of the fried onions and mix well until they are coated well with the masala. Simmer flame, add paste 1, cooked rice , mix well and close the kadai with a lid. Let it cook like this for 5-6 minutes giving a dum to the rice to take in all the flavors. Remove the lid, add garam masala powder and more salt if needed and mix well and switch off the flame.

In the serving bowl, add the prepared biryani, mix in the lemon juice well and top with remaining fried onions and coriander leaves. Serve with onion raitha and your favorite chilled drink. Heaven ! :)

Notes

The red chillies that I got this time around seem to be super spicy, and for me 2 red + 2 green chilli seemed perfect. This recipe leans towards the more spicy side, if you like it to be less hot, use 1 red chilli instead of two.

Make sure you cook the rice perfectly, it should not stick to each other. The ratio that works for basmathi rice is 1 cup rice for 1.5 cups of water. Once the rice is cooked, remove the cooker lid to let the steam out, after a couple of minutes trasnfer the rice on to a plate, spread and mix well. If you leave the rice in the rice cooker vessel , it will clog and will take ages to separate later.


Print this Post

Continue Reading >>

Wednesday, October 10, 2012

Jeera Rice 2 | Revisiting Jeera Rice | Cumin flavored Rice

I almost always plan my lunch menu the previous day to make sure I dont spend my morning time standing half-asleep in front of an open refregirator thinking about various options. On those lazy days, when i dont think about the lunch box , I have noticed it becomes a rush routine. But there are also those "bulb glowing behind your head" days when you come up with a super delicious lunch combo in no time. Introducing the 30 minute Jeera Rice and Hurry Burry Paneer lunch combo. :).

I had already posted a recipe for Jeera Rice, where you just have to dump everything into the pressure cooker. I recently tried a variation by mixing the separately cooked rice with the Jeera/Cumin tempering which looks super fresh and inviting than the pressure cooker method. It is also a quicker recipe as there is almost no chopping involved.

Hurry Burry Paneer Curry - coming soon!

Jeera Rice


Ingredients

Serves - 2
Spice Level - Mild
Cook time - 15 min


Basmati Rice - 1 cup
ghee - 1 Tbsp
Water - 1.5 cups
Salt -2 Tsp

Oil - 1 Tbsp
Jeera - 3 Tbsp
Green chilli - 2 , slit length-wise and cut in half
Coriander Leaves - 2 Tsp, chopped well

How do you do it

1. Soak the basmati rice for 15 minutes in water. Go ahead and do the other stuff you need to do on your morning routine. Come back drain the water and keep aside.

2. Heat 1 Tbsp ghee in a kadai, add the basmati rice and saute for 2 minutes until you get a nice aroma. Transfer to rice cooker vessel , add 2 tsp salt , 1.5 cups of water, cook for 12 minutes. Once cooked, take the rice out immediately and spread on a plate.

3. Heat oil in a kadai. Add the jeera and let it roast well - 1 minute. Add the green chillies and saute for a minute more. Now add the cooked rice and coriander leaves and mix well. Check for salt, if required add more and mix.

There you go, jeera rice is ready to be served.


Print this Post

Continue Reading >>

Thursday, October 4, 2012

Cauliflower Biryani

Whenever I hear the biryani word, I start expecting a lot from the dish, it has to have that biryani magic. The rice has to have that subtle yet rich flavor, it should just look very pretty and appetizing. I have tried many biryani recipes, but wasn't really satisfied with the outcome and I kept delaying the posting of a biryani recipe on this blog. I made this cauliflower biryani recently and for me this is a winner. S absolutely loved it, and he mentioned he couldn't wait for me to make the same with mutton. A couple of weeks later and we still talk about how great that cauliflower biryani was. This recipe has almost become a benchmark for me to grade the other biryanis I eat at restaurants, and I can confidently say this one is truly worthy of the word "Biryani".

I don't mind saying it over and over again, I absolutely love one pot meals and dishes like these only makes the bond grow stronger. The best part about variety rice dishes are that they can be made in a jiffy and you can get away by serving it with some raitha and paapad. So when a recipe calls for an elaborate process of making the masala separately, rice separately and then mixing them I eye them quite suspiciously. But this time I shed my laziness and decided to spend some extra time for the briyani , when i tasted the final dish I was overjoyed. 


Cauliflower Biryani


Ingredients

 Adapted from Easy cooking

Serves - 2
Spice Level - Moderately spicy and very flavorful
Prep Time - 40 min
Cook time  - 15 min


Cauliflower - 1 medium sized , cut into medium sized florets
Turmeric - 1/2 Tsp
Oil - 1 Tbsp
Salt - 1 Tsp + 1 Tsp
Red chilli powder - 1 Tsp
Frozen Peas - 1/4 cup

Oil - 1 tbsp
Jeera/Cumin - 1 tsp
Onion - 1 Large,sliced thinly
Tomato - 1 very Large, pureed
Green chilly - 2
Garlic - 4 small cloves
Ginger - 1 small piece
Cardamom,clove,cinnamon - 1 piece each
Masala/Curry powder - 1 tsp
Turmeric  - 1/4 tsp
Garam Masala - 1 tsp
Salt to taste

Ghee - 1 Tbsp
Basmathi Rice - 1 cup
Cashews - 7 broken in medium pieces
Water - 1.5 cups
Salt - 2 Tsp

How do you do it

Preparing the rice

Soak the basmati rice in water for 20 minutes and then drain. Heat 1 Tbsp ghee in a kadai, add the broken cashews and saute till brown. Add the rice now and mix well with the ghee and cashews. Saute for 2-3 minutes and switch off flame. Cook the rice in 1.5 cups of water with 2 tsp salt for 12 minutes. Spread the cooked rice on a plate and cool it.

Preparing the cauliflower and Peas

Boil 2 cups of water, add a tsp of salt and 1/2 Tsp turmeric and add the cauliflower florets. Let it boil for 2-3 minutes. Drain the cauliflower and dry them. This is to remove the worms if any from the cauliflower. Now heat 1 Tbsp oil in a kadai. Add the cauliflower florets, salt and red chilli powder and saute them in medium-high flame, until the cauliflower becomes slightly roasted and crispy. When you start to do this, the cauliflower will let out water and then slowly it will turn crispy. This step takes about 15-20 minutes. So be patient. Keep this cauliflower aside.

Also thaw/cook the frozen peas, and keep aside. I microwaved the frozen peas in 1/2 cup water for 4 minutes.

Preparing the masala and mixing with rice

Make a paste of the garlic, ginger, green chilli, cardamom, clove, cinnamon together and keep aside.

Heat oil in a kadai. Add jeera and let it roast. Add in the onions and saute till translucent. Add the paste made in previous step and saute till the raw smell vanishes. Add the tomato puree now and cook for 2-3 minutes. Add the turmeric, red chilli powder, garam masala , little salt and saute for few more minutes . When adding salt be cautious, the roasted cauliflower has salt in it, we have also cooked the rice with salt. Add the peas and roasted cauliflower and give it a quick stir. Now add the cooked rice and mix well with the masala on low flame. Check for salt and add more if needed. Cook the rice in low flame for a couple of more minutes and switch off flame.

Serve warm with raitha and paapad.

Notes

1. The cauliflower needs to be half cooked only and must be firm when finally added to the masala. It should not be mushy.

2. The magic of the dish lies in the ghee-cashew rice, so ensure to use cashews. Also the rice should not be over-cooked. I use my electric pressure cooker, and it takes 12 minutes for me. Use the ratio of 1:1.5 for rice:water for basmati rice.

3. The original recipe skips roasting the cauliflower , but cauliflower by itself is quite bland and if using only boiled cauliflower, you would need to give the rice a few hours of resting time so the cauliflower can soak up the flavors from the masla and rice. I would suggest you to roast the cauliflower for better results.

4. You can leave out the cinnamon, clove, cardamom  while making the paste and add them as whole spices and roast them along with the jeera/cumin.


Print this Post

Continue Reading >>

Thursday, September 6, 2012

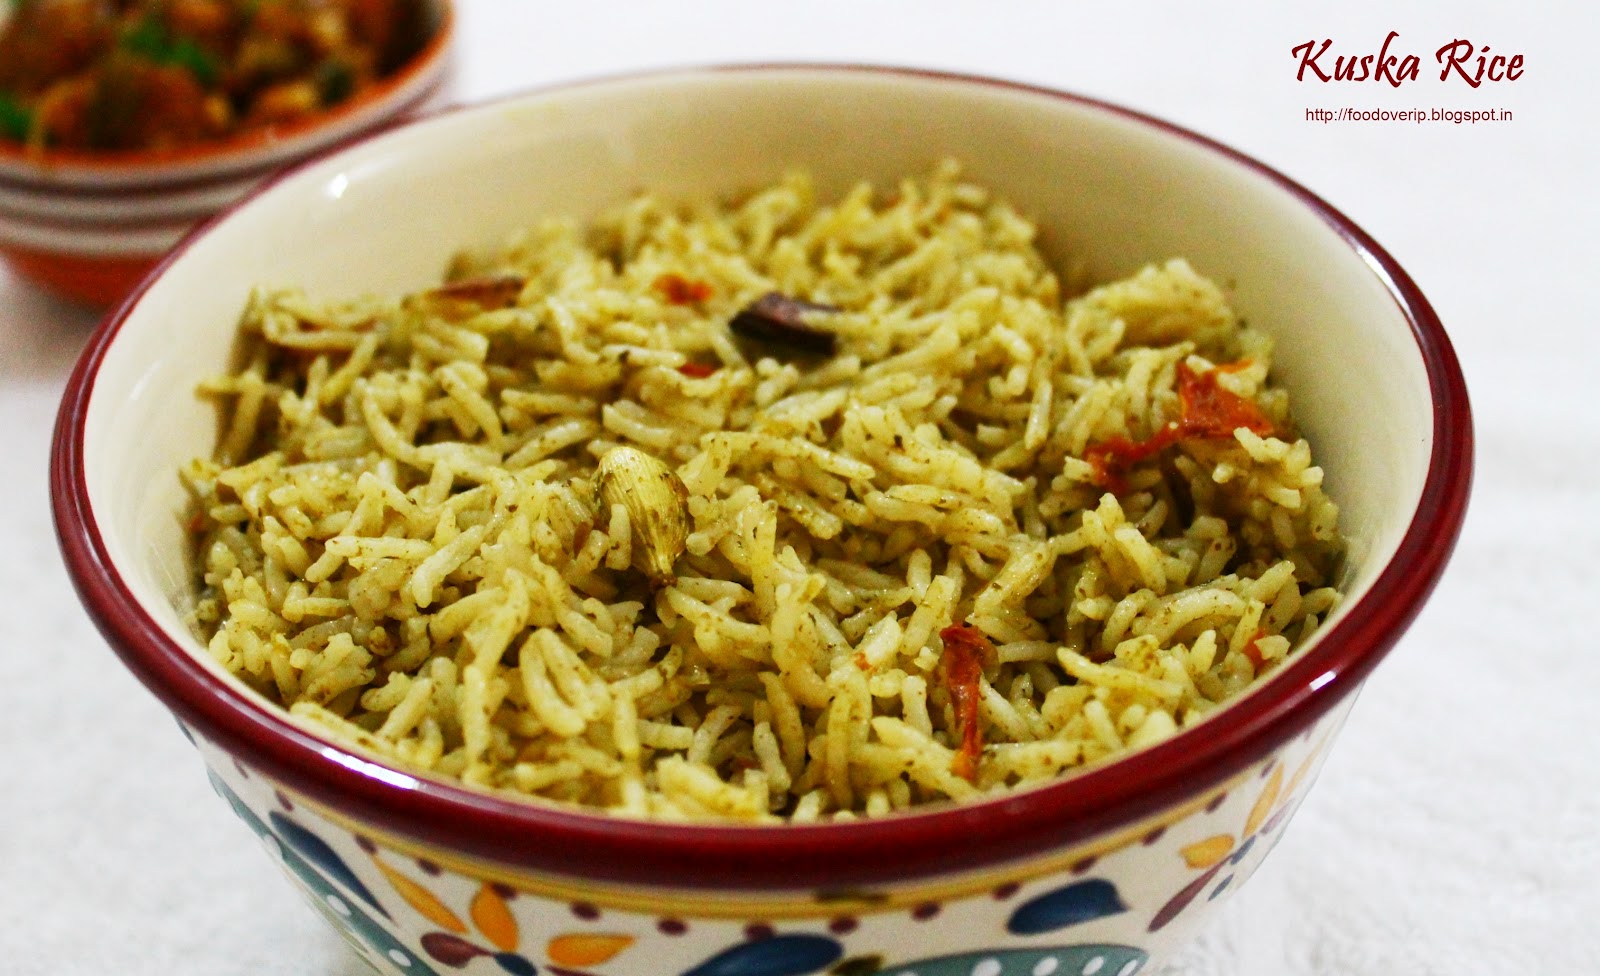
Kuska Rice

Do you run out of vegetables once in a while and wonder what you could do to ruffle up for a quick lunch?  This happens now and then in my kitchen, I would not have any veggies and be in a dilemma on what to cook. So here is something that is easy, quick and very comforting. Kuska Rice is a mildly flavored biryani rice made with just onions, tomatoes, some herbs and coconut milk. This is traditional Muslim Ramadan food, and they add the chicken mix to this kuska rice to make chicken biryani.

Kuska Rice


Ingredients

Recipe modified from here
 
Serves - 2
Spice Level - Mild and Flavorful
Prep Time - 15 min
Cook time - 15 min


Basmati Rice - 1 cup
Water - 1.25 cups
Coconut milk - 1/4 cup
Ghee - 1 Tbsp
Cardamom - 2
Cloves - 2
Bay leaf - 1
Cinnamon - 1 inch stick
Oil - 1 Tbsp
Onion - 1 , chopped finely
Tomato - 1 , chopped finely
Ginger-Garlic paste - 1 Tsp
Salt - as per need

To grind to a paste

Mint Leaves - a handful
Coriander Leaves - a handful
Green chilli -2


How do you do it

1. Firstly soak the biryani rice in water for 10 minutes. Once done, drain and keep aside.

2. Grind the ingredients under "to grind to a paste"  with little water and keep aside.

3. Heat ghee in a kadai, add bay-leaf,cardamom,cloves,cinnamon and saute for 30 sec. Add the rice now and saute until you get a nice aroma, for 2 minutes. Once done transfer to the rice cooker vessel.

4. Heat oil in a kadai. Add the chopped onion , GG paste and saute till onions are translucent. Add tomatoes now and saute until they become mushy and are cooked well. Now add in the ground paste, little salt and saute for few minutes until the raw smell of the paste vanishes. Transfer this to the rice cooker vessel and mix well with rice.

5. Add 1.25 cups of water and 1/4 cup coconut milk to the rice vessel, add required salt and mix well. The correct amount of salt needed while cooking any variety rice is such that you should be able to taste the salt in the water a little more than the proper level. Cook this rice for 12-15 minutes. Flavourful Kuska rice is ready.

We had kuska rice with a gobi manchurian and cucumber raitha.


Print this Post

Continue Reading >>

Thursday, August 23, 2012

Jeera Rice

It just cant get any simpler than Jeera rice :-) . Jeera rice is a very humble north Indian rice dish packed with jeera flavor that just needs 5 minutes of your time and it goes best with dal which is another easy accompaniment. First few months after my wedding, if you have had food at my place, theres no way you could have missed this . So if your newly married , beginner in cooking or just another person who is in need of a quick fix lunch/dinner menu try this - jeera rice, dal, potato roast , raitha ,a good drink - all in 1 hours time!  Its called the "Just Married" menu  ;).

Jeera Rice


Ingredients

Serves - 2
Spice Level - Not spicy but flavorful
Prep Time - 5 min
Cook time - 15 min


Basmati Rice - 1 cup [washed and soaked in water for 10 min, drain and keep aside]
Jeera - 4 Tbsp
Onion - 1 , chopped well
Green chilli - 1 , slit lengthwise and cut in half
Ginger-Garlic [GG] paste - 1/2 Tsp
Coriander leaves -  a handful, chopped
Salt - as per need
Oil - 2 Tbsp
Water - 1.5 cups

How do you do it

Heat oil in a kadai. Add jeera and let it roast and give a nice aroma - few seconds. Add in the chopped onions and green chilli, GG paste and saute till onions are translucent. Now add in the coriander leaves, basmati rice and saute well for a few 1-2 minutes. Now empty the contents into your rice cooker , add 1.5 cups of water, required salt and cook for 12-15 minutes.

Serve warm with yellow dal tadka

Notes

You might also cook the rice separately for 12 minutes and cool it and mix well with the tempering to retain white color of the dish , but the rice cooker method is quicker.


Print this Post

Continue Reading >>

Wednesday, August 8, 2012

Mushroom Fried Rice

I have taken a big liking to variety rice recently. I love the fact that they are one pot meals that get ready in minutes and makes for a good and quick to pack lunch. So I experiment with different kinds of flavor for variety rice quite often.One such trail was this simple mushroom fried rice which turned out to be quite delicious. Nothing fancy about the method/ingredients used but once again a reminder that simple food/flavors tastes so awesome.

Mushroom Fried Rice


Ingredients

Serves - 2
Spice Level - Moderately Spicy
Prep Time - 15 min
Cook time - 15 min


Basmati Rice - 1 cup
Oil - 2 Tbsp
Cinnamon - 1 inch piece
Bay leaf - 1
Cloves - 2
Jeera - 1 tsp
Onion - 2 medium ,chopped finely
Ginger Garlic [GG] paste - 1 Tsp
Green chilli - 2 , slit length wise
Button Mushroom - 200 gm pack, cleaned and chopped into medium sized pieces
Garam Masala - 1/2 Tsp
Curry powder - 1/2 tsp
Turmeric - a pinch [optional]
Salt - as per need
Pepper powder - 1/2 Tsp [optional]
Coriander Leaves - handful, washed and chopped

How do you do it

Cook the rice in 1.5 cups of water with 2 Tsp salt for 12-15 minutes and immediately transfer to a plate. Spread the rice on the plate, and drizzle a few drops of oil and stir it lightly and cool it. The rice should not be mushy, cook it like you would do for biryanis.

Next, heat 2 Tbsp oil in  a kadai, add bay leaf, cinnamon and cloves , jeera and let it roast for a few seconds. Add the chopped onion and GG paste. Saute till onions are translucent. Add in the green chilli now and give it a stir and saute for a couple of more minutes. Add in the chopped mushrooms now and saute till they give a shiny look - should take 3-5 minutes. Add in the turmeric [if using] , garam masala ,curry powder  and  salt now and saute till the raw smell of the powder vanishes.Now lower the flame, add in the cooked rice and toss it gently to wrap well with the mushroom mix in the kadai. Also add in the coriander leaves now and wrap well until the rice is completely mixed well with the mushroom mix taking care not to mash up the rice.Check for seasoning , add more salt and pepper [optional] if you like to.

Serve with raita and chips.

Note

1.You can skip the turmeric if you want the rice to take on a brownish shade. Turmeric lends the yellow color to the rice. I intended not to use it , but out of habit added a pinch and it resulted in the yellow color of the rice. :)

2. We have already added salt while cooking the rice, so be cautious while adding salt later.


Print this Post

Continue Reading >>

Monday, May 28, 2012

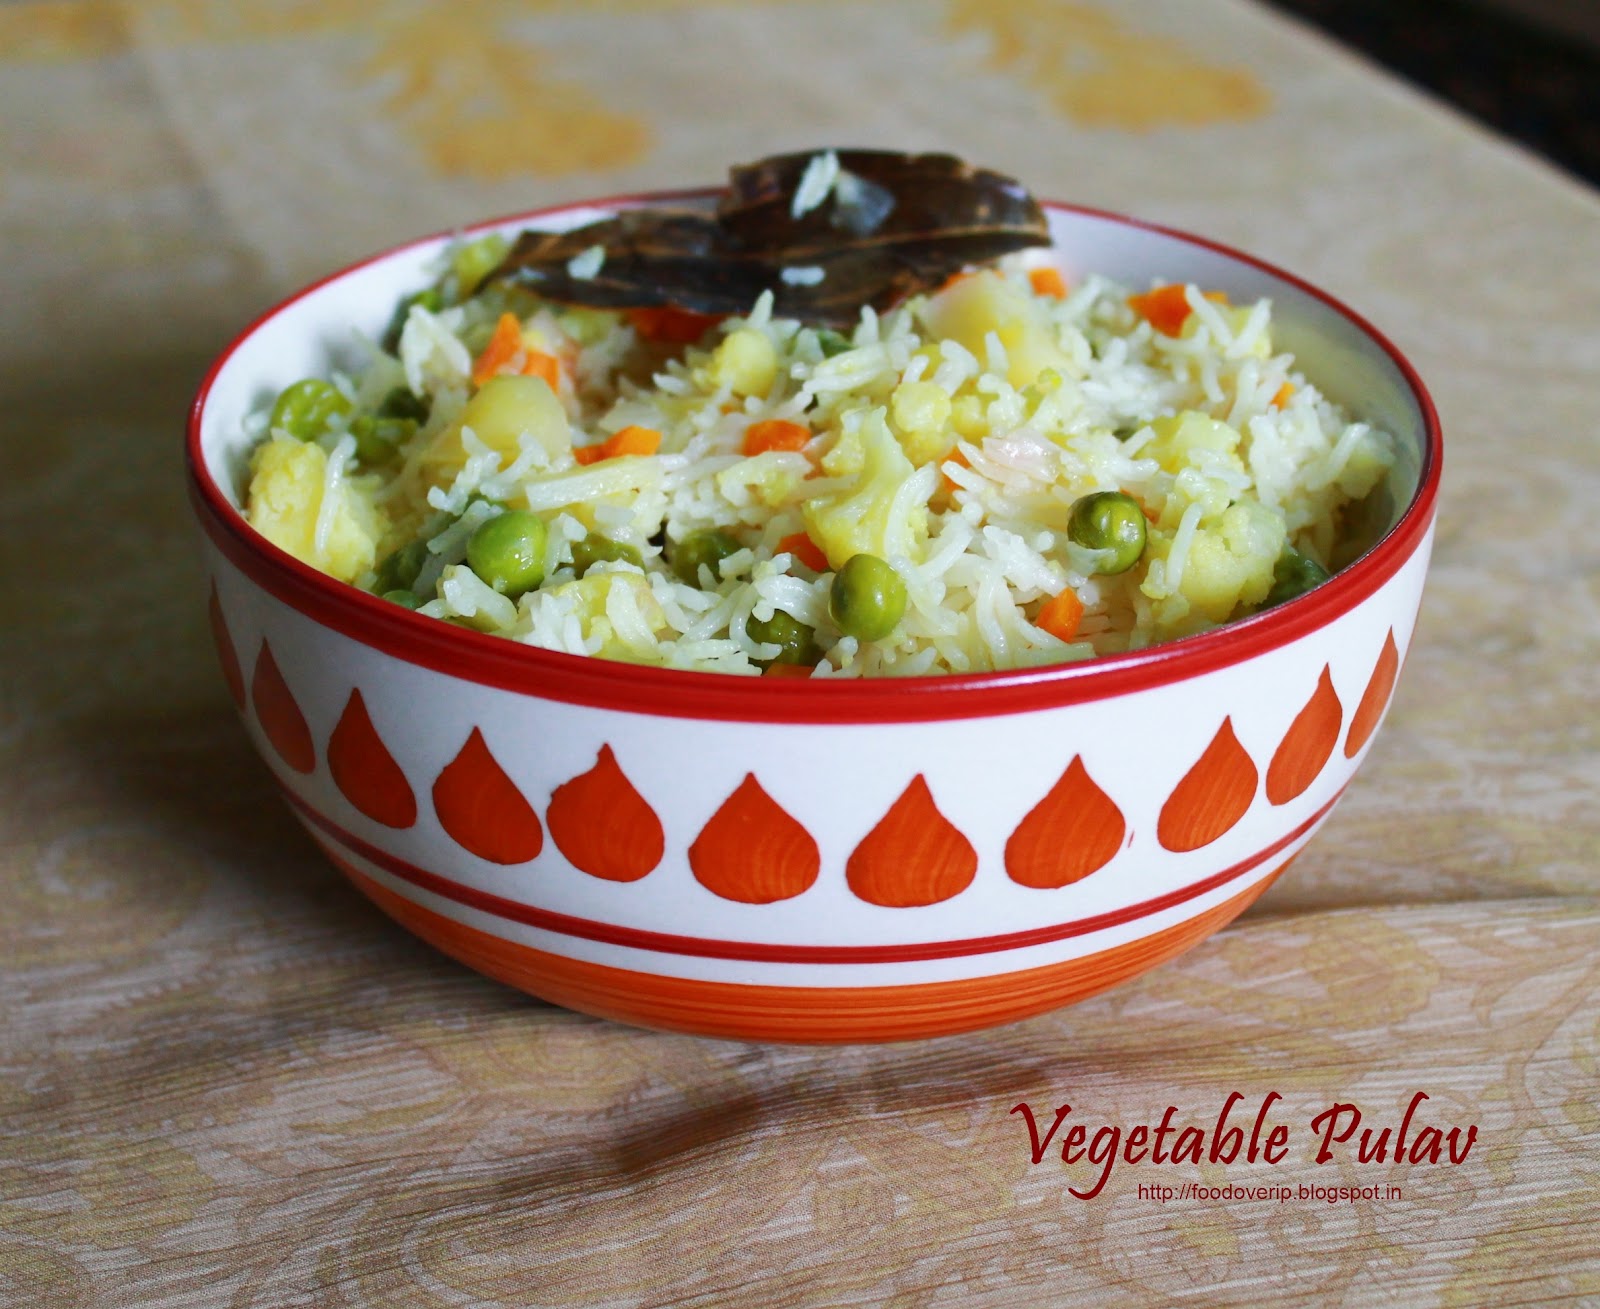
Vegetable Pulao

Vegetable pulao is a quick and simple stir fry of veggies which is then pressure cooked along with rice. As simple as that. If you like very simple flavors without too much drama in them , this is for you. I am not a big fan of vegetable pulao, but S likes this very much. Also a quick lunch box preparation menu.

Vegetable Pulao


Ingredients

 Serves - 2
 Spice Level - Mild
 
Fresh/Frozen peas - 1/2 cup
Carrot - 2 chopped well
Potato - 1 large, chopped into small pieces
Cauliflower - 5 large florets, chopped into small pieces
Green chilli - 4, slit lengthwise
Ginger-garlic [GG] paste 1 Tbsp
Onion - 1 Large , chopped finely
Bay leaf - 1
cloves - 2
Cinnamon - 1 inch stick - 1
Oil - 2 Tbsp
Salt - as per taste
Basmati rice - 1.5 cups soaked in water for 10 minutes and drained.
Water - 2.25 cups


Method

Heat a kadai with oil. Add bay-leaf, cloves , cinnamon. Let it roast. Add onions, GG paste,and green chilli. Saute till the onions are done.Add the veggies now and saute well. After 2-3 minutes,add salt and stir. Continues sauteing until the veggies are half done. Now add in the rice and stir for a minute or two.Switch off flame.

Empty the rice and veggies into the pressure cooker. Add 2.25 cups of water. Add enough salt into the cooker vessel and mix well. You should be able to taste the salt a  tiny bit more than the normal salt taste needed. That is the right amount.

Pressure cook for 12-15 minutes. Serve with a nice roasted eggplant/potato curry and raitha. :)


Print this Post

Continue Reading >>

Friday, March 23, 2012

Vegetable Fried Rice

Vegetable fried Rice is somewhere near the top of the list when it comes to S favorite food.I have tried this a couple of times before, but wasn't able to nail the flavor and color exactly.We wanted the flavor to be mild, the rice to retain its white color. Yesterday's try was a winner. :)


Vegetable Fried Rice


Ingredients


Serves - 2
Spice Level - Mild [Keep it that way please ! ;)]

Cabbage - 1/3 cup, sliced thinly
Carrot - 1 Medium, Julienne cut
Green Capsicum - 1/2, sliced thinly lengthwise
Beans - 15 , sliced thinly.
Spring Onion white part - 3 bulbs, sliced thinly
Spring onion greens - 3 Tbspn, chopped finely , to garnish
Garlic cloves - 5 , finely chopped
Basmati Rice - 1.5 cups

Soya Sauce [Preferably Light soy if you have] - 1 Tspn
Green Chilli Sauce - 3 Tspn
Salt - as per taste [2-3 Tspn approxm]
Olive oil - 4 Tbspn

White Pepper powder - 1 Tspn [optional]

Method

Firstly, cook the rice in 2.25 cups of water for 15 minutes. Once the rice is done, spread the rice on a large plate/bowl and cool it completely. It needs to be cooled, so when you add rice to the veggie mix in the wok and saute it, the rice will not get mashed.

Heat a deep wok with olive oil.Add the spring onion white parts and garlic. Saute for 2 minutes. Add all the vegetables -cabbage,capsicum,carrot,beans and 2 tspn salt.Increase the flame to high.Saute for 3 minutes on high flame. Switch the flame to medium now. Add soya sauce, green chilli sauce and saute till the veggies are half cooked [slightly crunchy]. Now sim the flame and add the cooked rice into the wok and add one more Tsp of salt. Mix the rice with the veggies well to incorporate all the flavor into the rice. Be careful not to mash up the rice when you do this.Once the rice is well mixed, taste to see if there is enough salt. Add more salt and mix if necessary.You can add 1tsp of white pepper powder at this point if needed and mix well with rice. Saute the rice for 2 more minutes and switch off fame.Add 2 Tbsp of spring onion greens and mix well.

Transfer rice to a serving bowl .Sprinkle 1 Tbsp of spring onion greens on top. We had this rice with paneer masala curry and a glass of cold Pepsi. We absolutely loved it. :)

Notes

1.Once the rice is cooked, within 5 minutes , remove it from the bowl, and spread on a large plate.If you leave the rice to cool in the cooker vessel, the rice will clamp up, and you will have difficulty in getting to separate the rice while adding to the wok.

2.While trying to mix the rice with veggies, you may switch off flame,take a few extra minutes to ensure the rice is mixed well, and then saute on high flame later.

3.If you are using dark soy sauce, be cautious. Dark soy has a strong flavor and color and can spoil the appearance of the dish. Hence use anywhere between 1/2 tsp to 1 tspn dark soy for 1.5 cups of rice, adjust according to flavor/color.


Print this Post

Continue Reading >>

Monday, February 20, 2012

Tomato Rice

Tomato rice is my back-up lunch on saturdays when i wake up and see its 11 AM. ;). And i must say thats a regular too. :P. So tomato rice, papad, raita and TV figures in our lazy saturdays.

I must give credit to S since i learnt this simple recipe from him and there was never turning back for another recipe.It always amazes me that something this simple and easy can taste so wonderful. This is also a quick lunch box item that can be made in minutes. My version uses regular ingredients and none of those extra stuff like coconut milk/curd , peanuts, mint etc is needed.


Tomato Rice


Ingredients

Serves - 2-3
Spice Level - Medium

Tomatoes - 3 large ones [chopped]
Onion - 1 large finely chopped
Green chill - 2 slit lengthwise
Masala/curry/Chilli powder - 2.5 tbspn
Salt - as per taste
Turmeric powder -  a pinch
Coriander leaves - a handful, washed/chopped well

bay leaves - 1
Cloves - 2
Cinnamon - 1 inch stick
Cumin - 1 tspn
ginger-garlic paste - 1 tspn

Long grain Basmati rice  - 1.5 cups
water - 2.25 cups


Method

First wash the rice and soak in water and proceed with the following.

Heat oil in a pan. Add bayleaves , cinnamon, cloves and jeera, let them roast. Add in the onions and green chillis. Give it a stir for a minute or two. Now add the ginger-garlic paste. Saute till onions are translucent. Now throw in the tomatoes, stir it, add little salt and a pinch of turmeric powder. Stir it well for a minute and close the lid. Wait till the tomatoes are soft and  let out juices and it should be mashed well. This will take 10-12 minutes. Now add in the curry powder and saute till the raw smell of curry powder vanishes. This will take a minute. Now add in the corainder leaves, drain the water from the soaked rice, and add the rice too to the kadai and stir well for two minutes. Switch off flame.

Now empty the contents of the kadai in to the electric-pressure-cooker vessel, add 2.25 cups of water and salt. Add enough salt till you can taste the salt slightly in the water. That would be the right amount.Cook for 15 minutes.

Serve with papad and raita. Yumm! :)

Notes

1. Dont forget to soak the rice in water for atleast 15-20 minutes , and ensure to saute the rice along with curry mixture. This will help in  rice standing separately from each other.

2. The ratio of basmati rice to water is always 1:1.5 and not 1:2. I initially used to make it with 1:2 ratio, and ended up with rice sticking to each other or it being a tad overcooked.

3. You can skip  the bayleaf/cinnamon/cloves if you dont have them, it will pretty much be the same.

4. Adding little salt and turmeric to the tomatoes, helps them cook more easily and faster. So whenever you add tomatoes to the kadai , in any recipe, follow it up with little salt, a pinch of turmeric and stir it well to make it cook faster.


Print this Post

Continue Reading >>
Related Posts Plugin for WordPress, Blogger...

A la carte!

Along with idli/dosai (13) Along with rice (32) Along with rotis (21) asparagus (1) baby potatoes (4) bajji (1) baking (9) banana (1) basil (1) basmati (2) beans (1) beetroot (5) bhindi (3) biryani (1) Black eyed beans (2) blueberry (1) bok choy (1) bottle gourd (1) bread (3) breakfast (4) brinjal (4) brocolli (1) buttermilk (1) butternut-squash (1) cabbage (2) cakes (7) carrot (1) carrots (3) cashews (1) cauliflower (8) cheescake (2) chettinadu (24) chettinadu delicacy (23) Chicken (7) chilli (1) Chineese (3) chinese (1) chocolate (1) chole (2) chutney (6) coconut (5) coconut milk (1) coriander (4) corn (1) cow-peas (1) cream-cheese (2) curry leaves (1) dal (3) dates (1) desserts (14) diwali 2013 (1) dosai (1) drink (1) drumstick (2) dry field bean (1) Easy (44) egg (3) fenugreek (1) fish (1) Food and Travel review (1) garlic (9) ginger (1) gobi (1) green gram (1) How To (5) Indian Flat Breads (4) indian sweets (3) International (5) ivy gourd (2) jeera (3) kootu (1) kovakkai (1) lemon (3) lentils (11) lobia (1) malai (1) mango (2) masoor dal (1) Methi (2) mint (2) mix veg (9) mochai (1) moong dal (4) mushroom (10) mutton (1) non-veg (2) onion (2) orange (1) paneer (11) parathas (1) pasta (2) peas (7) pepper (1) pickles (1) plantain (1) poriyal (1) potato (14) potatoes (2) quinoa (1) Rajma (1) rasam (1) rice flour (1) rosemary (2) shallots (1) snack (18) soup (7) soy chunks (1) spinach (6) stir-fry (1) strawberry (1) sweet potatoes (1) tamarind (5) tomato (7) toor dal (1) val bean (1) Variety Rice (13) walnut (1) wheat (2) yoghurt (1) yuuum!! (1) zucchini (2)

Latest on Food Over IP

Copyrights

All rights reserved @2012.

Unless otherwise mentioned, the text and images included in FoodOverIP blog belongs to the author. The blog author’s permission is required before any content is reproduced in any form.

  © Blogger templates The Professional Template by Ourblogtemplates.com 2008

Back to TOP  

Blogging tips