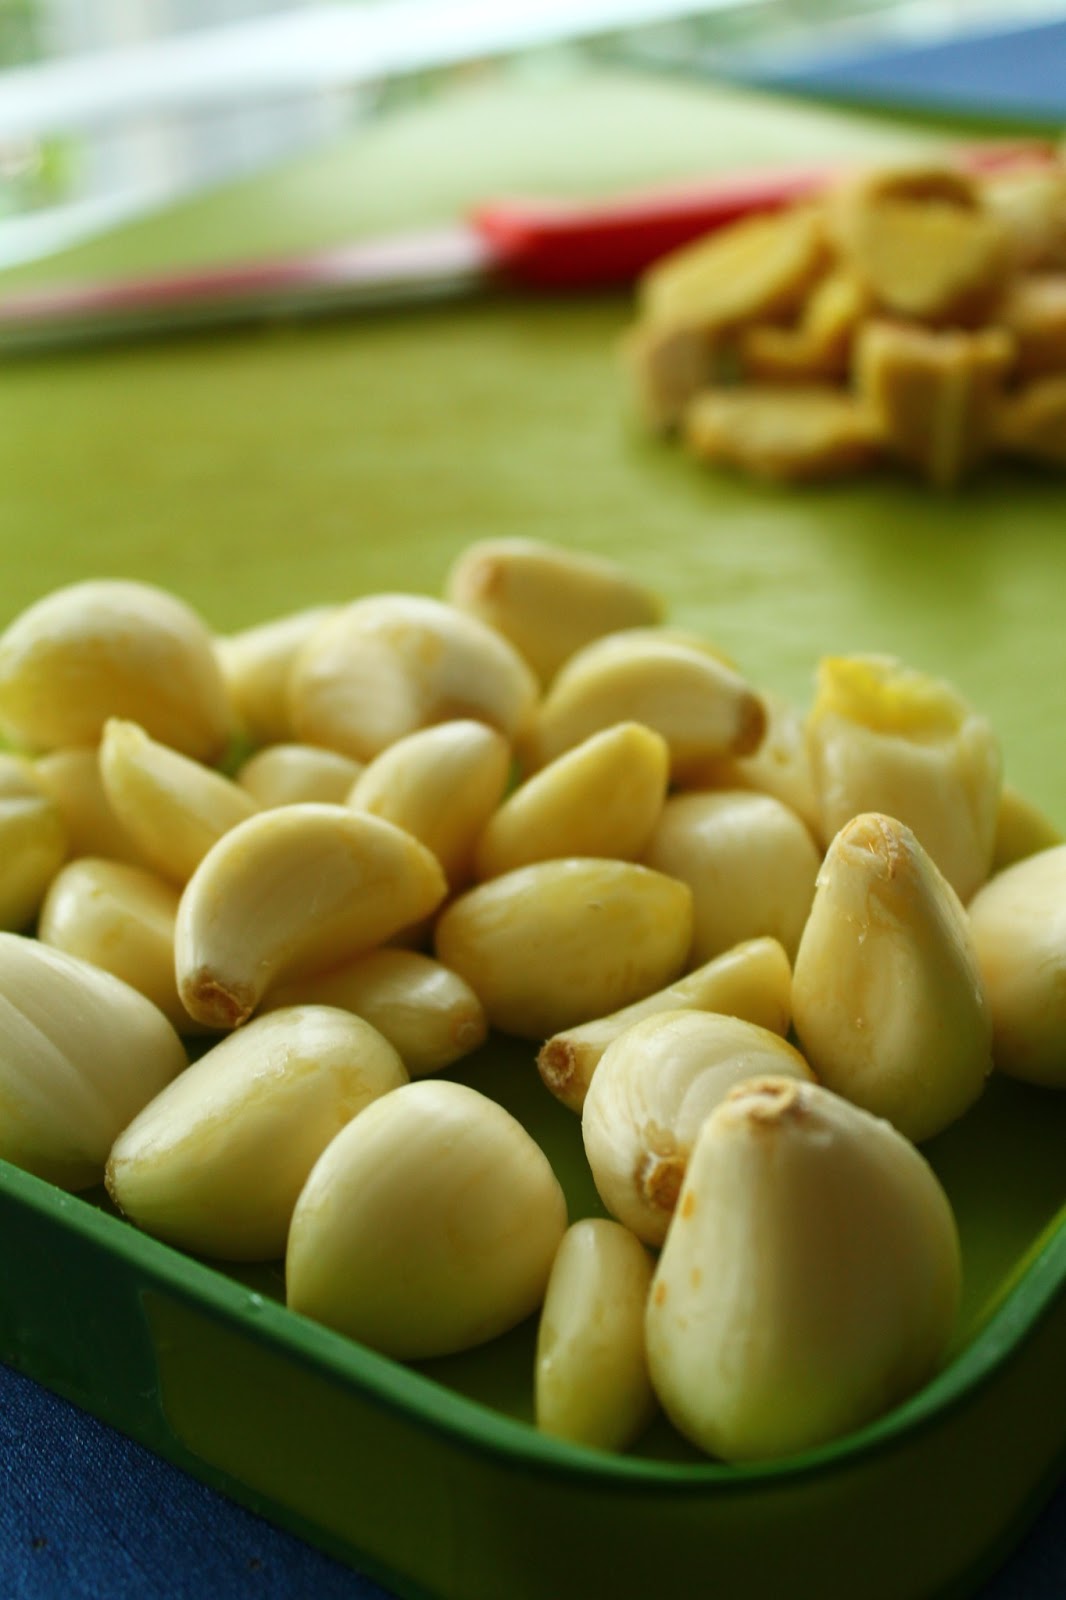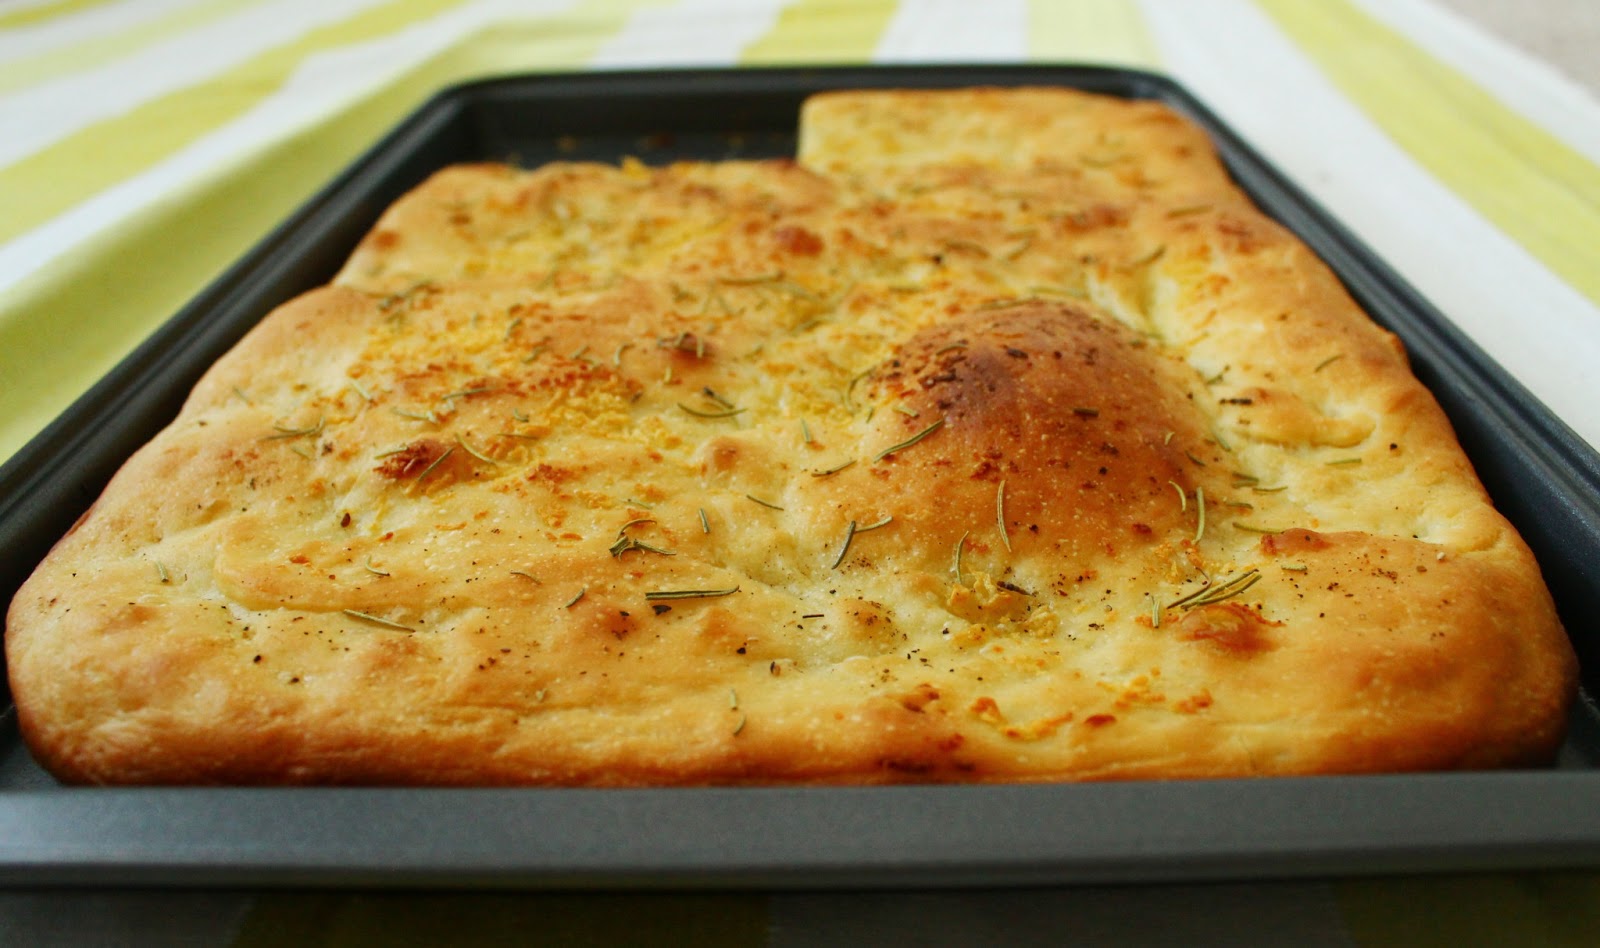
Showing posts with label garlic. Show all posts

Friday, June 13, 2014

Garlic Herb Grilled Chicken


I have been away from this blog for a really long time, but couldnt help it, I had to be silent. I am glad to be back with a post now :). I dont think I can be very regular like how I used to be with the frequency of posting but I promise I will try very hard to post atleast 1-2 times a week.

This dish is something I made for S without actually a recipe plan in mind and he loved it so much. Simple flavoured grilled chicken served along with fresh carrots and mashed potatoes. S loves this combination of grilled chicken with mashed potatoes and had been requesting me to replicate at it home. I think after almost a year I made this, took me so long!!

Ingredients

Serves - 2
Spice Level - Low
Prep Time - 10 min
Cook time - 10 min
Marination time - 4 hrs atleast

Chicken breast Pieces - 4
Garlic cloves - 4, finely minced
Parsely - 3 Tbsp, finely chopped
Cilantro - 3 Tbsp, finely chopped
Lemon zest - 1 Tbsp
Salt and fresh ground pepper - as per need/adjust to taste
Olive oil - 4-5 tbsp or enough to soak all the chicken pieces


How do you do it

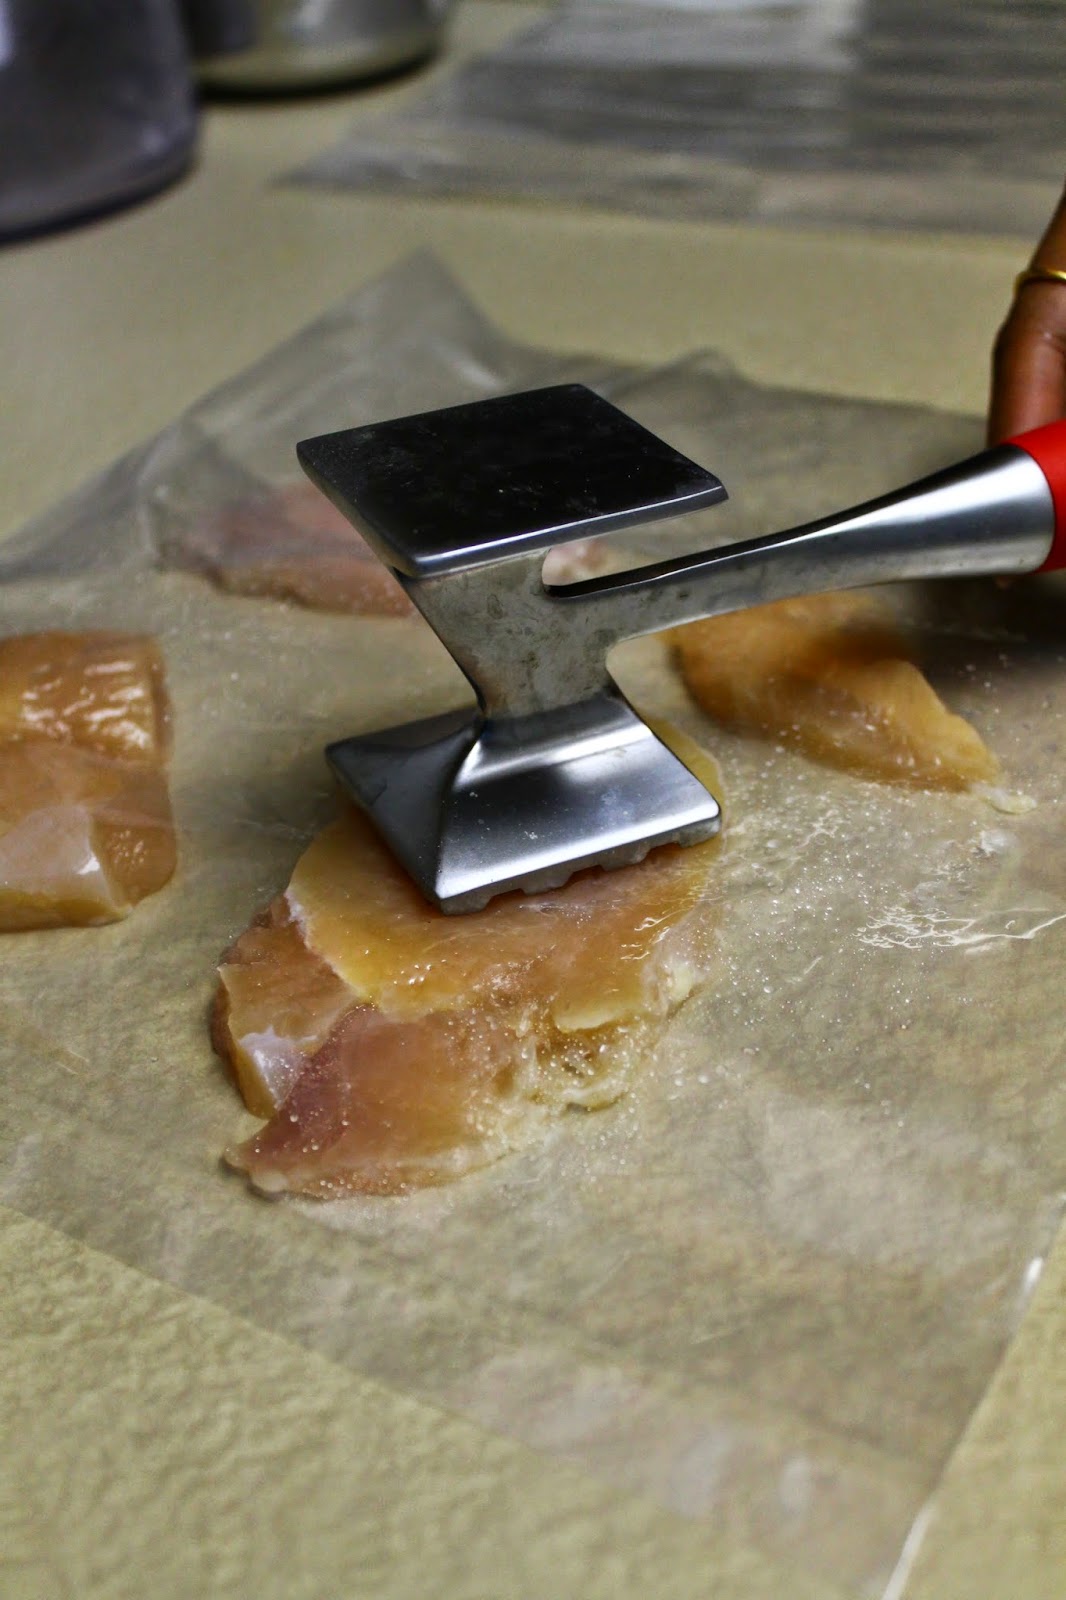
1. First take a plastic transparent sheet like below and places chicken pieces on them and cover. Use a meat mallet and pound the pieces to an even 1/2 inch thickness. Pounding the meat tenderizes the meat and helps cook evenly when grilled.


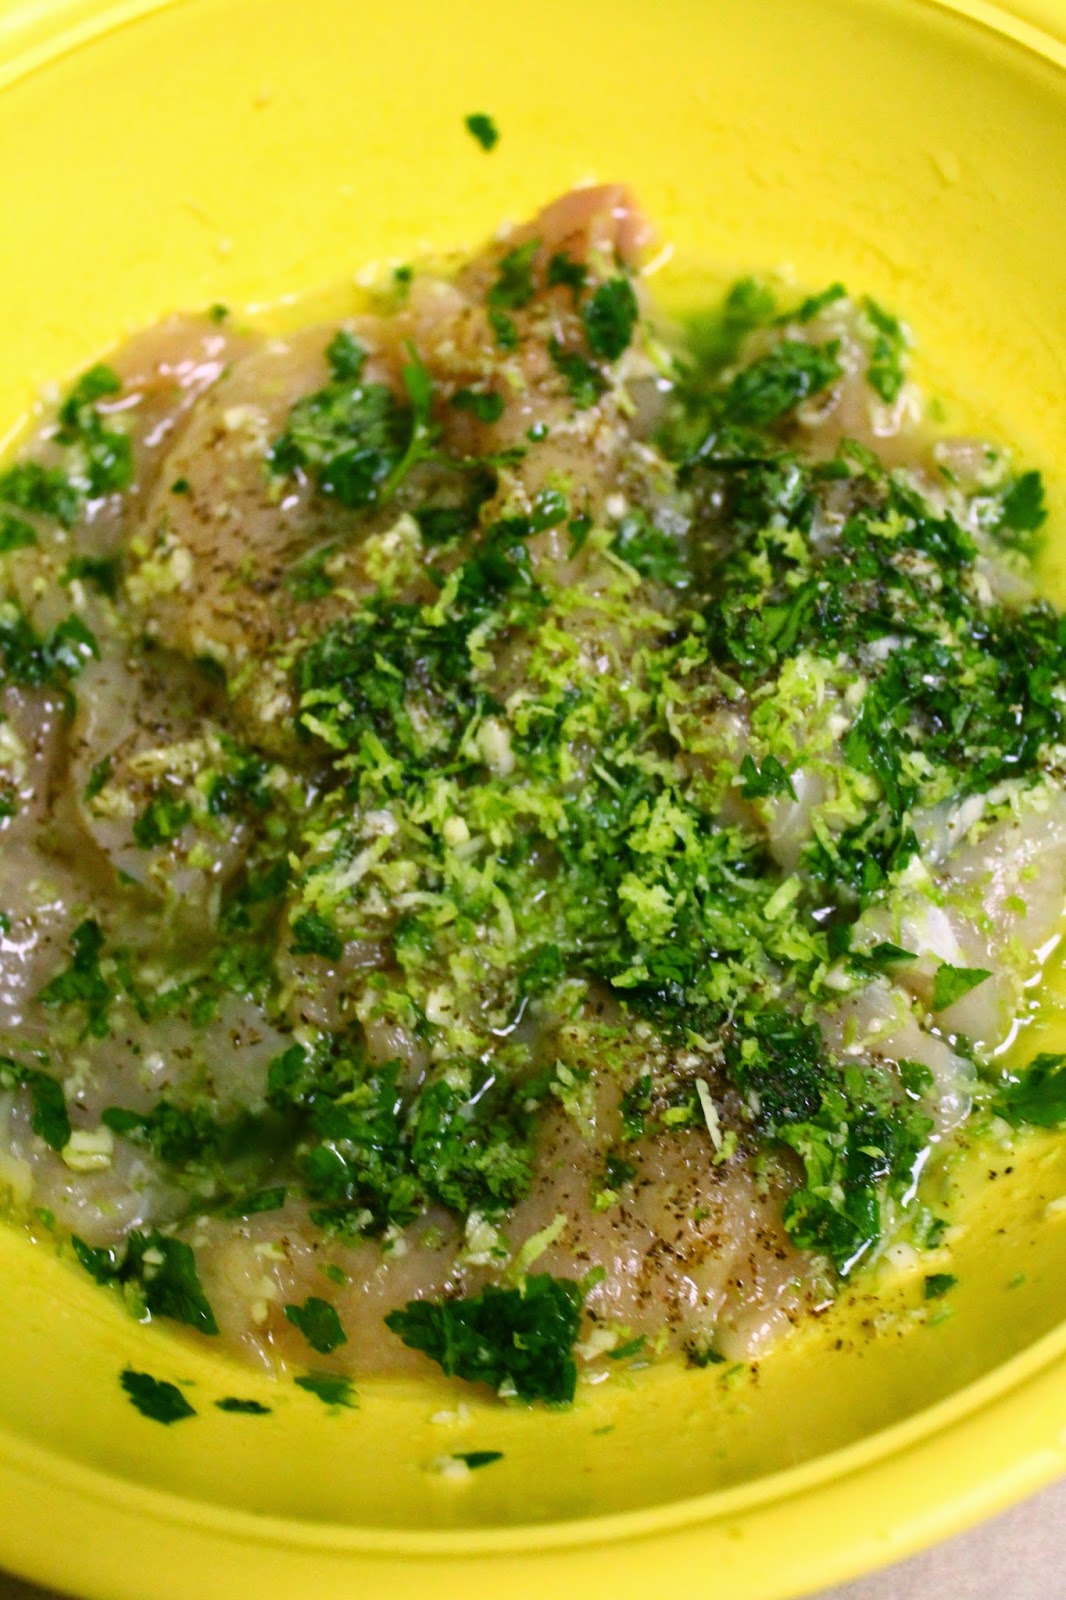
2. Now add all the ingredients in a bowl, add the chicken pieces and coat well.  Set aside for 4 hrs.


3. Heat a pan/grill pan and place the pieces and cook covered for 2-3 minutes on each side. Make sure the chicken is marinated well with garlic, lemon zest and the herbs to ensure the flavor is intact.

4. Once the chicken is done, serve them with salad and mashed potatoes for a delicious lunch/dinner

Continue Reading >>

Friday, December 20, 2013

Lasooni Palak Dal \ Garlic flavored Lentils with Spinach


I make a very simple style dal which is the quickest dish that I can make to go along with chapathis/jeera rice etc and that is one of the main reason I make it so often too. Apart from that the taste of dal fry is so soothing and comforting. Sometimes when I want to make some really nice subji for rotis but do not have the mood to spend so much time in the the kitchen, I make more complicated varieties of Dal like palak dal, methi dal, panchratan dal etc. Palak Dal has been on my to-blog list for long and finally we are here. Though palak dal may not seem very different from the South India Keerai Kootu, taste-wise it is very different and the special tempering of garlic to this dal makes it absolutely delicious.

I would strongly recommend pairing this with either Jeera Rice or rotis :)

Ingredients

Serves - 4
Prep Time - 15 min
Cook time - 20 min
Spice Level - Moderate

Toor Dal - 3/4 cup
Spinach - 250 gm, 1 bunch, washed well, stems removed, and chopped well
Turmeric - 1/4 tsp
Green chillies - 4
Onion - 1 small sized, chopped well
Tomato - 1 , chopped well
Ginger - 1 small piece, chopped well
Garlic - 2 cloves, chopped well
Jeera seeds - 1 tsp
Red chilli powder - 1 Tsp
Garam Masala - 1/2 Tsp
Oil - 2 Tsp

For seasoning

Oil - 2 Tsp
Hing - a pinch
Mustard seeds - 1 Tsp
Garlic cloves - 4 , finely chopped
Dry red chilli - 1


How do you do it

1. Pressure cook dal with turmeric and 2 green chillies well. Once done, mash the dal well and keep aside.

2. Heat oil in a pan. Add jeera seeds, ginger and garlic. Saute well until they are slightly browned. Add the onion and remaining two chopped green chillies and saute until the onions are cooked. Next, add the chopped tomatoes and cook well. Once they become soft and pulpy add the red chilli powder and garam masala and cook for a minute.

3. Add the spinach and salt now and saute well until the leaves wilt. About 5-7 minutes. Once the spinach is cooked well, add in the cooked dal and mix well. Bring to slow boil and let all the flavours blend.

4. In another pan, bring 2 tsp oil to heat. Add hing, mustard seeds to pop. Add the garlic cloves, dry red chilli and cook until the garlic pieces are browned. Dont let these over brown, that will result in a bitter taste in the dish. Burnt garlic is something that we dont want here :). Once done, pour this tempering into the dal and mix well. Let it sit like that for 10-15 minutes.

5. Serve hot with rotis or Jeera Rice.

Continue Reading >>

Thursday, July 25, 2013

Tomato Pepper-Garlic Rasam


Rasam always tops my list of "easy and quick" dishes to make. This particular variety of tomato-garlic-pepper-cumin mix rasam is my favorite. I use the exact same recipe that my mom uses but I always end up feeling that I am not able to replicate the taste of amma's. Maybe that's what they call "kai pakuvam" :)
I always grind a fresh mix for rasam and do not prefer the rasam powder, that makes this an instant rasam recipe. Just a few ingredients and your rasam is ready to slurp off the plate ;)

Ingredients

Serves - 4
Spice Level - Moderate
Prep Time - 10 min
Cook time - 10 min

Oil - 2 Tsp
Curry leaves - 1 sprig
Tomato - 1 small, chopped roughly
Tamarind extract - 1 Tbsp (thick)
Water - 2-3 cups
Mustard seeds - 1 Tsp
Urad dal - 1 Tsp
Hing - a generous pinch
Cumin/Jeera seeds - 1 Tsp
Dry Red chilli - 1
Turmeric powder a pinch
Salt - as per need
Cumin-pepper powder mix - 1 Tsp
Coriander leaves - 1/4 cup loosely packed

To grind to a puree

Tomato - 2 medium sized
Garlic - 3 cloves
Jeera/Cumin - 2 Tsp
Pepper - 1/2 Tbsp

How do you do it

1. Make a puree of the give items under "To puree". Transfer the puree to the bowl, mix in the tamarind extract, 1 cup of water and curry leaves to it. Keep aside.

2. Heat oil in a kadai. Add hing and then mustard seeds to pop, add urad dal, cumin seeds and let them brown. Break the dry red chilli and add it in.

3. Add the tomatoes now and the turmeric powder. Wait till the tomato pieces soften a little, then add the puree mix prepared in step one. Mix well

4. Add 1.5 cups of water more, and let it come to slow boil. Let the rasam boil for a few minutes until the raw taste disappears and all the flavors are soaked in. I let it boil for about 5 minutes. Add coriander leaves to the rasam and switch off stove.

5. Set aside a bowl with required salt [2 tsp], and add the pepper-cumin powder to this. Take the pot with rasam off the heat and directly pour in this bowl and mix well.

Serve this hot and soothing rasam with rice, potato curry and appalam which is our favorite combo.

Continue Reading >>

Friday, April 12, 2013

Home-made Ginger Garlic Paste


Coming to think of it, I have never made ginger-garlic paste at home, 5 years of cooking and I have always bought the ready-made paste :|. I did a recent survey of my pantry and realized I don't use a lot of ready-made products :), one of the few things I have gotten used to are the ginger-garlic paste and I wanted to cut it out. Another significant advantage is the super flavor and smell it adds to the dishes as there is a huge difference between the store bought paste and the home-made one. I have decided that I am never going back to buying the paste from stores after making this last month. You could make it in bulk, refrigerate it and this would keep well for a month. If you haven't thought about making your own paste, go ahead and try it and I am sure you would not go back to buying the ready-made version :).

Ingredients

Makes about 1 cup
Prep Time - 20 min

Garlic - 1 cup, peeled and washed, chopped roughly
Ginger - 1 cup, peeled and washed, chopped roughly
Turmeric - 1 Tsp
Oil - 1 Tbsp


How do you do it

1. Add ginger, garlic pieces, turmeric in your mixer grinder and grind. Add the 1 tbsp oil in shots so the mixer can grind easily. Do not add water - this will spoil the fridge-life of the ginger garlic paste. Grind until you get a paste consistency, transfer it to a dry bottle and refrigerate.

2. Always use a dry spoon when you need the paste, so that it doesn't go bad. Turmeric and oil are preservatives here. This quantity lasts for about a month in my kitchen and then I make another batch for the next month.  You could vary the quantities based on your needs.

Continue Reading >>

Sunday, March 17, 2013

Poondu Karuvepillai Thokku/ Garlic-Curry Leaves Paste for Steamed Rice


I am extremely fond of traditional South Indian recipes, my love for them just grows with each new dish I uncover. Garlic and curry leaves are two of my most favorite ingredients and surprisingly I have never made anything with curry leaves as the hero of the dish until now. I use curry leaves quite extensively, but just as a tempering element in all the dishes. When I stumbled on this video of Chef Damu making a Poondu Karuvepillai Kuzhambu [Garlic-Curry Leaves Paste], I wanted to try it almost immediately. And that is exactly what I did. All the ingredients mentioned in the recipe are a staple in an Indian Kitchen and you can make this thokku [Paste] as soon as you have finished reading this here on FoodOverIP :). The curry leaves puree added in the dish gives that brilliant thickness and unique flavor to the dish and along with Garlic, you have something very healthy!

If you are sighing about peeling garlic - use this tip on how to peel garlic within seconds and I am sure you will not put away of making Garlic based dishes anymore ;).

Other Garlic based dishes on FoodOverIP

Garlic Rosemary Focaccia
Garlic Shallots Curry
Garlic Rosemary Potato Wedges

Ingredients

Recipe Source - Chef Damu
Serves - 3
Prep Time - 15 min
Cook time - 15 min
Spice Level - Moderate

Garlic - 12-15 cloves peeled
Curry Leaves - 1 Handful
Tomatoes - 2 small or 1 Large, pureed
Onion - 1, medium sized, sliced thinly
Tamarind Paste - 1 Tbsp mixed with 1 cup water
Ginger-Garlic Paste - 1/2 Tsp
Red Chilli Powder - 4 tsp [adjust according to spice level]
Coriander Powder [Dhaniya] - 3 Tsp
Turmeric Powder - 1/4 Tsp
Dry Red Chilli - 2
Green Chillies - 2, slit lengthwise
Mustard - 1 Tsp
Urad Dal - 1 Tsp
Curry Leaves - 2 sprigs to temper
Oil - 2 Tbsp
Salt - as per taste

How do you do it

1. Saute the curry leaves in about a tsp of oil in a pan for a couple of minutes until they start to crisp. Cool and blend with 1/4 cup water in your food processor/mixer-grinder. Keep aside

2. Heat 2 Tbsp oil in a pan/kadai. Add the mustard and let them pop. Add the urad dal and let it roast. Add in the whole red chillies [ don't break them] and curry leaves and saute for a minute.

3. Add in the sliced onions and saute for 2 minutes. Add in the garlic, ginger-garlic paste and saute until the onions and garlic are cooked - about 3-4 minutes.

4. Add the tomato puree now, turmeric powder and let it boil for a couple of minutes. Add in the curry leaves paste made in step 1 along with the tamarind paste mixed with water and boil for 3-4 minutes on low-medium flame.

5. Add the red chilli powder, coriander powder, green chillies, salt and mix well. Cook until a thick consistency is formed and oil starts to float above the curry.

6. You can add water if you like a thinner consistency and boil for a few more minutes. Switch off flame.

This goes very well with Dosai, Idli and Steamed Rice. Enjoy.

Continue Reading >>

Monday, February 11, 2013

Garlic Rosemary Focaccia Bread


Focaccia is a flat oven-baked Italian bread which maybe topped with any kind of herbs that you like. Its like a herb flavored bread - an olive oil based one, its cheese-free and also guilt-free ;). I had bookmarked this recipe almost a year back, every-time I would want to do a pizza or any flat-bread, my plans got postponed, something or the other came up. Looks like the time for the focaccia to happen came last weekend.

We had this super delicious garlic-rosemary focaccia with tomato soup for our Sunday lunch. Its a really easy one to make, but its time consuming because it has a resting time of 2 hrs in total. This would definitely be one of my top choices to make when guests visit home and you want them to be super impressed :). You could easily serve this up as an appetizer along with a tasty dip, just get all the prep-work done and before you have your party arriving, push them into the oven for 15 minutes and they would be ready to get into their belly.


Ingredients

 Serves - makes about 10 medium sized slices
 Prep Time - 2.5 hrs
 Bake time - 15 min

Recipe Source - Laura Vitale

All Purpose Flour - 3 1/4 to 3 1/2 cups
Sugar - 2 Tbsp
Active Dry yeast - 2 1/4 tsp
Warm water - 1 cup
Salt - 2 Tsp dissolved in 2 Tbsp water
Olive oil - 1/4 cup
Garlic cloves - 4
Dry/Fresh Rosemary - 1Tbsp
EV olive oil for drizzling
Salt and pepper for seasoning on top of the flat-bread

How do you do it

1. Take a large bowl and add in the sugar, yeast and warm water. Let it stand for 3-5 minutes until it froths. This means that the yeast has been activated.

2. Give it a stir with your spatula and add in 3 cups of flour at first along with 1/4 cup olive oil and the salt-water mix.

3. Mix well with your spatula and then use your hand and knead for 10-15 minutes until it forms a smooth elastic dough. This is the time when you can add the extra 1/2 cup flour little by little to get a non-sticky smooth dough. I needed only a little more than 3 1/4 cups of flour in total, so just add as much needed to get a non sticky dough. Use your kitchen counter surface to press and bring the dough together with the heel of your palm. Below is a picture of the dough before doubling.


4. Put the dough back to the bowl. Add about a tbsp of olive oil and wrap the entire dough with olive oil. Cover with a cling film. Leave it to rest in a warm place for about 1.5 hr until the dough doubles.

5. Meanwhile,  prepare a big rectangular baking sheet pan with some olive oil smeared on its surface. Once the dough doubles, move it to the baking sheet and spread into a rectangle [taking the shape of the pan] with your hand, about 1/2 inch thick. This is very easy and since the dough is so elastic and soft, it will spread easily. It should be of even thickness all over.

6. Cover this sheet with cling film and rest it for 20 minutes. Now lets prepare the garlic spread, grate the garlic into a bowl, add 1-2 Tbsp of olive oil, mix well and keep ready. Also Pre-heat oven to 400 deg F at this stage.

7. Remove the cling film and keep aside. Drizzle some olive oil on top and spread evenly. Spread the garlic-olive oil mix on the surface of the flattened dough. Sprinkle rosemary all over along with salt and pepper. Cover again with cling film and rest for 30 minutes. A picture of the flattened dough all ready to go into the oven.


8. After 30 minutes, bake on the bottom rack for 15-17 minutes or until its golden brown. I coundn t resist the temptation and I took a bite of the bread before clicking :)


Serve this really flavorful focaccia with a soup or a dip of your favorite choice.

Continue Reading >>

Wednesday, May 23, 2012

Vengaya-Poondu Kuzhambu/Onion-garlic Kuzhambu

Many a times I get bored with the dal based sambar and long for kara kuzhambu. Especially when I make some poriyal/paruppu usili or dal based sides I long for this one. So here is the recipe of a spicy vengayam-poondu [Onion-garlic] Kara Kuzhambu. I made some modifications to my basic chettinadu kara kuzhambu recipe and it turned out very yum. :)


Vengaya Poondu Kara Kuzhambu


Ingredients

Serves - 3
Spice Level - quite spicy

Small onion/shallots/sambar onion - 15
Garlic cloves - 15
Tomato - 1 chopped into small pieces
Tamarind - 1 big lemon sized ball
Curry leaves - 2 sprig
Mustard seeds - 1 Tspn
Sambar/Kuzhmabu powder - 3 Tbsp
Turmeric powder - 1/4 tspn
Salt - as per taste.
Fenugreek - 1 tspn
Jeera - 1 tspn
Hing - 1/2 Tspn
Oil - 4 tbspn

To roast and grind

Oil - 1 tspn
Cumin/Jeera - 1 Tspn
Coriander seeds - 1 Tbspn
Dry Red chilli - 3
Khus Khus - 1 Tspn
Coconut grated - 2 Tbspn


Method


Firstly heat a kadai with 1 tsp oil and roast the ingredients in the same order as given under "To roast and grind". Cool it and blend with little water to a fine paste and keep aside.

Extract thick tamarind juice out of the tamarind piece, add 2.5 cups of water to the extract. Add 3 Tbsp of sambar/Kuzhambu powder to the tamarind-water mix and dissolve well and keep aside.

Now heat a pan with 4 Tbsp oil. Add hing, mustard - let it roast. Add cumin seeds, fenugreek and let it roast. Add curry leaves, shallots and garlic and saute well till the shallots and garlic are cooked well. The raw smell of the garlic has to vanish and shallots must turn pink.Now add the chopped tomatoes, a pinch of salt and turmeric powder and let the tomatoes get cooked well.Once the tomatoes are mashed well, add the tamarind-water-powder solution to the kadai , add remaining salt, the ground paste and mix well. Add more salt/kuzhambu powder if needed at this stage. Close the kadai with a lid, move flame to low and let it boil in low heat. Once the kuzhmabu thickens, or is reduced to 1/3rd of initial quantity , or when the oil starts floating on top, remove from flame. This will take 15-20 minutes.Be patient.

Serve with hot steamed rice and some poriyal of your choice. A very satisfying lunch indeed. :)


Print this Post

Continue Reading >>

Monday, April 9, 2012

Rosemary Garlic Potato wedges

Did you guys miss me? ;). I am back from an awesome-super-duper trip to the Swiss - so overwhelmingly beautiful that words and pictures cannot do justice to it. I will be dedicating a separate post to that very soon though. :)

Now back to these potato wedges. I looove potatoes, I can eat them any time of the day and in any quantity and in any cooked form.Potatoes really remind me of my childhood, where my mom used to scare me saying, if  I eat too much of these, I would develop cramps and calf/knee pain. :). Even now, whenever I get calf pain, I think "maybe I had too many potatoes" :P. People who know me well
know that I never share pomm frites [some eurooopean touch!!] with anybody :)

Potato wedges are an easy, yummy starter to make.You should definitely try to make them if you haven't yet.Just before my trip last week, I had to finish up some rosemary and potatoes.So got on to making some rosemary-garlic flavored potato wedges which we had along with veg fried rice.

Rosemary-Garlic Potato Wedges


Ingredients


Serves - 2
Spice Level - Not Spicy but flavorful

Potatoes - 5 large, cut into wedges
Fresh Rosemary - 4 stems
Garlic cloves - 4, finely minced
Turmeric powder - 1/2 Tsp
Salt/pepper - as per taste
Olive oil - 5 Tbsp

Method

Wash and cut the potatoes into wedges. In a bowl, add in olive oil,  minced garlic,  rosemary leaves,turmeric powder, salt and pepper and mix well.Toss in the potato wedges inside the bowl and marinate it well with the mixture. Let it stay for 10 minutes.

Meanwhile, preheat you oven for 10 minutes at 200 deg C. Line a baking tray with aluminum foil and spray it with non-stick cooking spray. Arrange the potato wedges in rows on top of the foil.

Now bake these wedges at 200 deg C for 40 minutes in toast mode [both bottom and top rod of oven is heated]. After 25 minutes, turn the potato wedges over so the other side also gets cooked and let it bake/toast for remaining time

Remove the tray out of the oven , serve it warm with tomato ketchup. Very easy and impressive starter. :)

Notes

1. You can para-boil potatoes and then follow the recipe to reduce the baking/toasting time.


Print this Post

Continue Reading >>

Monday, February 20, 2012

Anjappar Hotel Keerai Masiyal

I try to make sure that Keerai masiyal is once a week appreance in my kitchen.Picking the leaves is the most boring job when it comes to keerai and i am instantly reminded of my paati, who used to ask us to help her with this. She always ended up complaining i dont notice the leaves which has the holes in them and discard them, eventually she will let me go and she will do it herself ;).

I once had vegetarian meals in anjappar and they served  keerai masiyal, which i liked so much, that i had more than 3-4 servings. I wanted to replicate it and this is what i had done. Until then i was making keerai in a much more simpler way with less ingredients , the way my mom makes ,which is also tasty.

But once we made this version , we loved it and this recpie is a keeper. Also this recipe has made S like keerai too, who never used to like spinach in any form before.
So if you dont like keerai, try this - it might end up becoming one of your favourite! :)

Keerai Masiyal


Ingredients

Spinach - 2 bunches [picked/washed/chopped]
moong dal - 1/3 cup [Pressure cooked well with a pinch of turmeric]
Green chill - 2 small, slit length-wise
Tomato - 1 finely chopped
Onion - 1 Finely chopped
Garlic cloves - 5 chopped finely
2 cups water

Cumin - 1 tspn
Mustard - 1 tspn
Hing - a pinch
Oil - 2 tspn
Salt - as per taste

Method

Heat a kadai with oil. Add hing ,mustard - let it crackle, add jeera - let it roast. Now throw in the onions , green chilli, and garlic. Saute till the onions are translucent.Add the chopped tomatoes, little salt, cover the kadai, and stir ocassionally till the tomato becomes soft and let out juice.Now add in the spinach leaves and saute them, add in 1 cup water, stir well and close the kadai with a  lid, and let them get cooked well.This should take about 15-20 minutes. After the spinach is cooked well, add in cooked moong dal - dal should be of mashable consistency, add 1/2 cup of water, salt and stir well. Let this boil for another 5 minutes. switch off stove.

Server hot with rice-ghee and Urulaikilangu [potato] masala. That's one satisfying and healthy meal. :)

Notes

1. Never pressure cook spinach, as it will loose all its nutrients. Always cook them in the kadai along with other ingredients in which ever way you make them.

2. Be careful while picking the leaves from the spinach bunch, and make sure to discard the ones which have holes in them.

3. Wash the spinach leaves well with water 2-3 times as it contains a lot of mud particles and dirt.

4. I have tried this preparation with 3 kinds of spinach - palak/methi and paruppu keerai  and its worked well for me. If you try out with any other and comes out good, please do let me know. :)

Print this Post

Continue Reading >>
Related Posts Plugin for WordPress, Blogger...

A la carte!

Along with idli/dosai (13) Along with rice (32) Along with rotis (21) asparagus (1) baby potatoes (4) bajji (1) baking (9) banana (1) basil (1) basmati (2) beans (1) beetroot (5) bhindi (3) biryani (1) Black eyed beans (2) blueberry (1) bok choy (1) bottle gourd (1) bread (3) breakfast (4) brinjal (4) brocolli (1) buttermilk (1) butternut-squash (1) cabbage (2) cakes (7) carrot (1) carrots (3) cashews (1) cauliflower (8) cheescake (2) chettinadu (24) chettinadu delicacy (23) Chicken (7) chilli (1) Chineese (3) chinese (1) chocolate (1) chole (2) chutney (6) coconut (5) coconut milk (1) coriander (4) corn (1) cow-peas (1) cream-cheese (2) curry leaves (1) dal (3) dates (1) desserts (14) diwali 2013 (1) dosai (1) drink (1) drumstick (2) dry field bean (1) Easy (44) egg (3) fenugreek (1) fish (1) Food and Travel review (1) garlic (9) ginger (1) gobi (1) green gram (1) How To (5) Indian Flat Breads (4) indian sweets (3) International (5) ivy gourd (2) jeera (3) kootu (1) kovakkai (1) lemon (3) lentils (11) lobia (1) malai (1) mango (2) masoor dal (1) Methi (2) mint (2) mix veg (9) mochai (1) moong dal (4) mushroom (10) mutton (1) non-veg (2) onion (2) orange (1) paneer (11) parathas (1) pasta (2) peas (7) pepper (1) pickles (1) plantain (1) poriyal (1) potato (14) potatoes (2) quinoa (1) Rajma (1) rasam (1) rice flour (1) rosemary (2) shallots (1) snack (18) soup (7) soy chunks (1) spinach (6) stir-fry (1) strawberry (1) sweet potatoes (1) tamarind (5) tomato (7) toor dal (1) val bean (1) Variety Rice (13) walnut (1) wheat (2) yoghurt (1) yuuum!! (1) zucchini (2)

Latest on Food Over IP

Copyrights

All rights reserved @2012.

Unless otherwise mentioned, the text and images included in FoodOverIP blog belongs to the author. The blog author’s permission is required before any content is reproduced in any form.

  © Blogger templates The Professional Template by Ourblogtemplates.com 2008

Back to TOP  

Blogging tips