Showing posts with label Easy. Show all posts

Saturday, November 17, 2012

Masala Fish Fry


Finally the fish has arrived in my kitchen :). I have issues about touching/filleting/cleaning raw meat and hence I haven't really explored non-vegetarian cooking much even though I like eating non-veg food. Poor S, he loves chicken, but I can count the number of times I have cooked it the past few years. Even those few times I offered to cook chicken, it would be on one condition that S cleans and does the basic marination of raw meat until the smell fades off. Finally I managed to get past my fussy attitude, wash, clean, marinate and fry the fish all by myself. So you should be seeing more chicken/fish based posts here soon :)

Masala Fish fry is fish marinated in shallot and spice paste and shallow fried. My favorite non-veg dish, second only to Mutton Kola Urundai is this Fish fry. Spicy and very flavorful. Best served with steamed rice and rasam.


Ingredients 

Serves - 2
Spice Level - High
Prep Time - 10 min
Cook time - 20 min

Fish pieces - 6 [ I used surmai variety]
Curd - 1 Tbsp
Turmeric powder - 1/4 tsp
Red Chilli powder - 2 Tsp
Coriander powder - 1 Tsp
Salt - as per need
Oil - to toast/shall fry
lemon juice of one lemon and little salt - to clean fish

To grind to a coarse paste

Shallots/small onions - 5
Garlic cloves - 3
Pepper - 1 Tsp
Coriander seeds - 1 Tsp
Jeera - 1/2 Tsp
Fennel - 1/2 Tsp

How do you do it

1. Grind the items mentioned into a semi-coarse paste, I used a mortar-pestle to grind it. Keep aside. Don't add any water while grinding this.

2. Clean the fish pieces in water first, rub some salt and lemon juice on the fish pieces. Keep aside for 5 minutes. Wash it again and set aside.

3. Take the ground paste, add curd, turmeric, red chilli powder, coriander powder, salt in a bowl and mix well. Taste this paste to make sure the spice/salt level is according to your taste. Make adjustments if needed. Add the fish pieces to this and wrap them well in the paste and marinate for 1-2 hrs.

4. Heat a kadai with little oil to shallow fry the pieces. Add a fish piece, shallow fry on medium flame till golden brown, until the fish is done. Alternatively you may also toast the fish pieces in a non-stick pan.

Serve with steamed white rice and rasam. Heaven! :)

Continue Reading >>

Wednesday, October 24, 2012

Channa Sundal

I just gone done with cooking and relishing an elaborate meal and I seem to be the right frame of mind to have a really long nap ;). So a quick post this is going to be, a very easy one - Channa Sundal. Channa Sundal makes an appearance only once a year in my kitchen at the time of sarawati pujai. So if I dont click pics of it now and blog about it, we will have to wait a year to see this recipe in this space. :). Enjoy the festival mood, do the dandiya, eat sundal and have fun :)


Ingredients

Serves - 2
Spice Level - moderate
Prep Time - 8 hrs of soaking time.
Cook time - 5 min

Channa/Chole/Chickpeas - 1 cup
Oil - 1 Tbsp
Mustard - 1 Tsp
Dry Red Chilli - 2
Hing - 1 pinch
Curry Leaves - 2 Sprigs
Jeera/Cumin - 1/2 Tsp
Salt - as per need
juice of half a lemon

How do you do it

1. Soak the channa in enough water for 8 hrs or overnight. Pressure cook the soaked channa for 3 whistles. Drain the water and keep the channa aside.

2. Heat oil in a kadai. Add hing, mustard and jeera. Let them splutter and roast. Break the red chilli and toss them in along with curry leaves. Stir for a few seconds. Add the channa now, required salt and mix well until the channa is coated well with the tempering and takes in the flavors well - 3-4 minutes.

3. Switch of flame, mix in the lemon juice and enjoy this easy snack


Print this Post

Continue Reading >>

Tuesday, October 16, 2012

Instant Lemonade using Lemon syrup

A very philosophical take on lemonade for this post, I am so in that mood!. Lemonade over the past week has repeatedly made me think about the saying "when life gives you a lemon make lemonade". I have never thought about this quote as much as I did over the last few weeks. I dont care where it comes from, but it oozes optimism and thats what matters. There is really no point in cribbing about certain things that are beyond your grasp and do not go your way, the best thing to do is to move on with a positive mind-set and make the best of the current situation.

Another positive thought that I heard recently and it couples together well with the lemonade saying - "Don't look for a solution to a problem, turn the problem into a solution". I have been doing precisely that and it works like a charm. So when things that are not in your control get messy, don't sweat it, make sure its a blessing in disguise! :)

Now coming to this instant lemonade, its a very easy one. Its basically mixing sugar syrup with lemon juice to make lemon syrup. The best part is that the lemon syrup keeps well for a month, so you can make huge quantities of this lemon syrup to store. Then its as easy as rubbing your magic lamp to get your instant lemonade. :)


Ingredients

Serves - Makes 10 glasses of lemonade

Lemon - 8
Sugar - 3/4 cup
Water - 1 cup

How do you do it

1. Take a pan and add the sugar and water in it and bring to boil. It will bubble up and start to thicken - 15-20 minutes. When the quantity is reduced to half, switch off flame. Cool the sugar syrup completely

2. Squeeze the lemon juice from the lemons and keep aside. Take care not to squeeze too much to avoid the final lemon syrup having traces of bitterness.

3. Once the sugar syrup is cooled completely, mix it with the lemon juice. This is the lemon syrup that you can use later to make lemonade by mixing water to it. Store the lemon syrup in refrigerator, it will keep good for up-to a month.

4. To make lemon juice, fill 1/4 of a cup with this lemon syrup, and remaining 3/4 with cold water to make a glass of lemonade [adjust proportions according to your taste]. Top it up with few ice-cubes/mint leaves while serving.


Print this Post

Continue Reading >>
Friday, October 12, 2012

Hurry Burry Paneer Curry

Hurry Burry Paneer Curry being very loyal to its name and also rhyming at the same time, can be made in less than 15 minutes :-). Now thats a good reason for you to try this one. I wouldn't say its over the top delicious, but for something that takes no time at all, its definitely a tasty one to keep in my drafts.And talking about rhyming reminds me of the poems - if it can be called that, that I had attempted when I was 7-8 years old with the only rule that it has to rhyme. Now you can go ahead and have a hearty laugh at my expense by reading one such poem that I can recall. There are so many more that I had written like this, but will spare you from all of them ;).

"Birds can fly
Far into the sky,
The grass is green,
But the Ants are mean"

So on that light note, lets move on :-)


Ingredients

Adapted from Easycooking

Serves - 3
Spice Level - Mild
Prep Time - 2 min
Cook time - 15 min

Paneer - 150 gm , cubed
Salt - as per need
Chilli powder - 1 Tbsp
Turmeric - a pinch
Kasoori methi - 1 Tsp , crushed
Oil - 1 Tbsp + 1 Tsp

To Grind into a paste

Onion - 2 , chopped roughly
Tomato - 2, chopped roughly
Carrot - 1 small
Green chilli - 1
Cashews - 5
Cloves - 2
Cinnamon, cardamom - 1 piece each
Milk - 1/3 cup

How do you do it

1. In a mixer jar, put all the contents under "to grind" and blend into a smooth paste. The milk should be enough to grind everything together. Keep aside.

2. Spread 1 Tsp oil on a heated dosa pan and place the paneer cubes and toast them on both sides until they turn a light shade of brown. Remove and keep aside.

3. Heat 1 Tbsp oil in a kadai. Add the blended paste and close with a lid. Let it boil in medium flame for 10 minutes so that the paste gets cooked completely. Remember to close with a lid, once the paste gets heated it tends to splutter. Adjust consistency of curry by adding water if necessary. Add the chilli powder, salt and boil for another 2-3 minutes. Add the crushed kasoori methi and toasted paneer pieces and mix well. Boil for a minute more. Remove from flame.

Serve with  Jeera Rice  for a delicious lunch


Print this Post

Continue Reading >>

Wednesday, October 10, 2012

Jeera Rice 2 | Revisiting Jeera Rice | Cumin flavored Rice

I almost always plan my lunch menu the previous day to make sure I dont spend my morning time standing half-asleep in front of an open refregirator thinking about various options. On those lazy days, when i dont think about the lunch box , I have noticed it becomes a rush routine. But there are also those "bulb glowing behind your head" days when you come up with a super delicious lunch combo in no time. Introducing the 30 minute Jeera Rice and Hurry Burry Paneer lunch combo. :).

I had already posted a recipe for Jeera Rice, where you just have to dump everything into the pressure cooker. I recently tried a variation by mixing the separately cooked rice with the Jeera/Cumin tempering which looks super fresh and inviting than the pressure cooker method. It is also a quicker recipe as there is almost no chopping involved.

Hurry Burry Paneer Curry - coming soon!

Jeera Rice


Ingredients

Serves - 2
Spice Level - Mild
Cook time - 15 min


Basmati Rice - 1 cup
ghee - 1 Tbsp
Water - 1.5 cups
Salt -2 Tsp

Oil - 1 Tbsp
Jeera - 3 Tbsp
Green chilli - 2 , slit length-wise and cut in half
Coriander Leaves - 2 Tsp, chopped well

How do you do it

1. Soak the basmati rice for 15 minutes in water. Go ahead and do the other stuff you need to do on your morning routine. Come back drain the water and keep aside.

2. Heat 1 Tbsp ghee in a kadai, add the basmati rice and saute for 2 minutes until you get a nice aroma. Transfer to rice cooker vessel , add 2 tsp salt , 1.5 cups of water, cook for 12 minutes. Once cooked, take the rice out immediately and spread on a plate.

3. Heat oil in a kadai. Add the jeera and let it roast well - 1 minute. Add the green chillies and saute for a minute more. Now add the cooked rice and coriander leaves and mix well. Check for salt, if required add more and mix.

There you go, jeera rice is ready to be served.


Print this Post

Continue Reading >>

Thursday, September 6, 2012

Kuska Rice

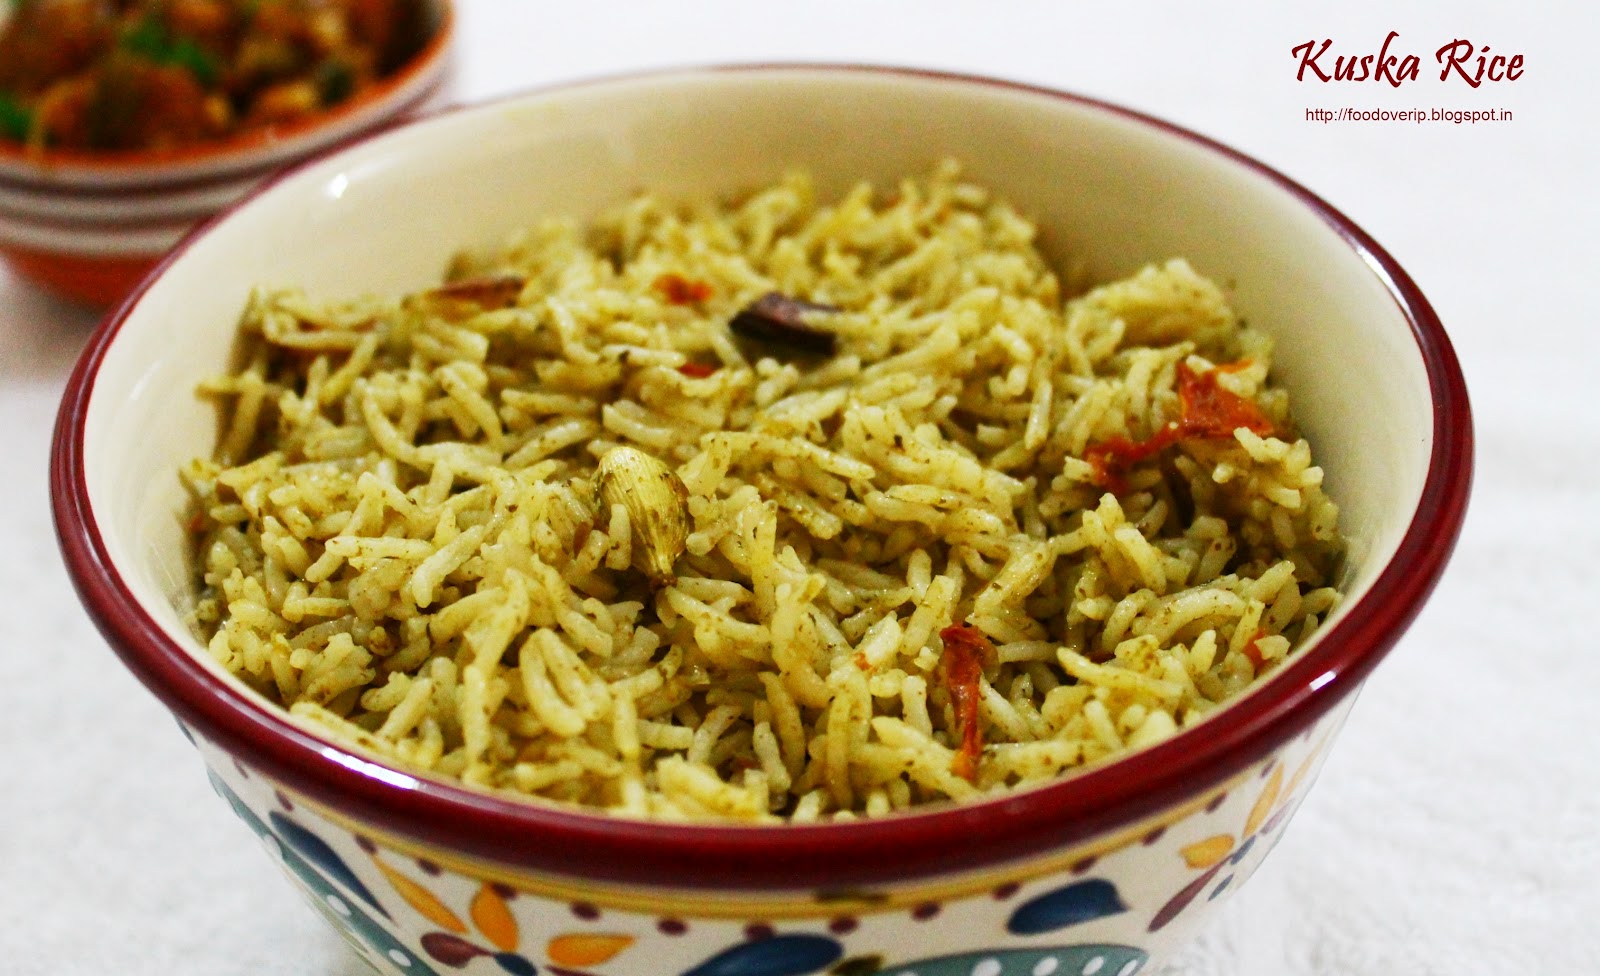
Do you run out of vegetables once in a while and wonder what you could do to ruffle up for a quick lunch?  This happens now and then in my kitchen, I would not have any veggies and be in a dilemma on what to cook. So here is something that is easy, quick and very comforting. Kuska Rice is a mildly flavored biryani rice made with just onions, tomatoes, some herbs and coconut milk. This is traditional Muslim Ramadan food, and they add the chicken mix to this kuska rice to make chicken biryani.

Kuska Rice


Ingredients

Recipe modified from here
 
Serves - 2
Spice Level - Mild and Flavorful
Prep Time - 15 min
Cook time - 15 min


Basmati Rice - 1 cup
Water - 1.25 cups
Coconut milk - 1/4 cup
Ghee - 1 Tbsp
Cardamom - 2
Cloves - 2
Bay leaf - 1
Cinnamon - 1 inch stick
Oil - 1 Tbsp
Onion - 1 , chopped finely
Tomato - 1 , chopped finely
Ginger-Garlic paste - 1 Tsp
Salt - as per need

To grind to a paste

Mint Leaves - a handful
Coriander Leaves - a handful
Green chilli -2


How do you do it

1. Firstly soak the biryani rice in water for 10 minutes. Once done, drain and keep aside.

2. Grind the ingredients under "to grind to a paste"  with little water and keep aside.

3. Heat ghee in a kadai, add bay-leaf,cardamom,cloves,cinnamon and saute for 30 sec. Add the rice now and saute until you get a nice aroma, for 2 minutes. Once done transfer to the rice cooker vessel.

4. Heat oil in a kadai. Add the chopped onion , GG paste and saute till onions are translucent. Add tomatoes now and saute until they become mushy and are cooked well. Now add in the ground paste, little salt and saute for few minutes until the raw smell of the paste vanishes. Transfer this to the rice cooker vessel and mix well with rice.

5. Add 1.25 cups of water and 1/4 cup coconut milk to the rice vessel, add required salt and mix well. The correct amount of salt needed while cooking any variety rice is such that you should be able to taste the salt in the water a little more than the proper level. Cook this rice for 12-15 minutes. Flavourful Kuska rice is ready.

We had kuska rice with a gobi manchurian and cucumber raitha.


Print this Post

Continue Reading >>

Tuesday, September 4, 2012

Bean Paruppu Poriyal | Beans-Moong dal stir fry

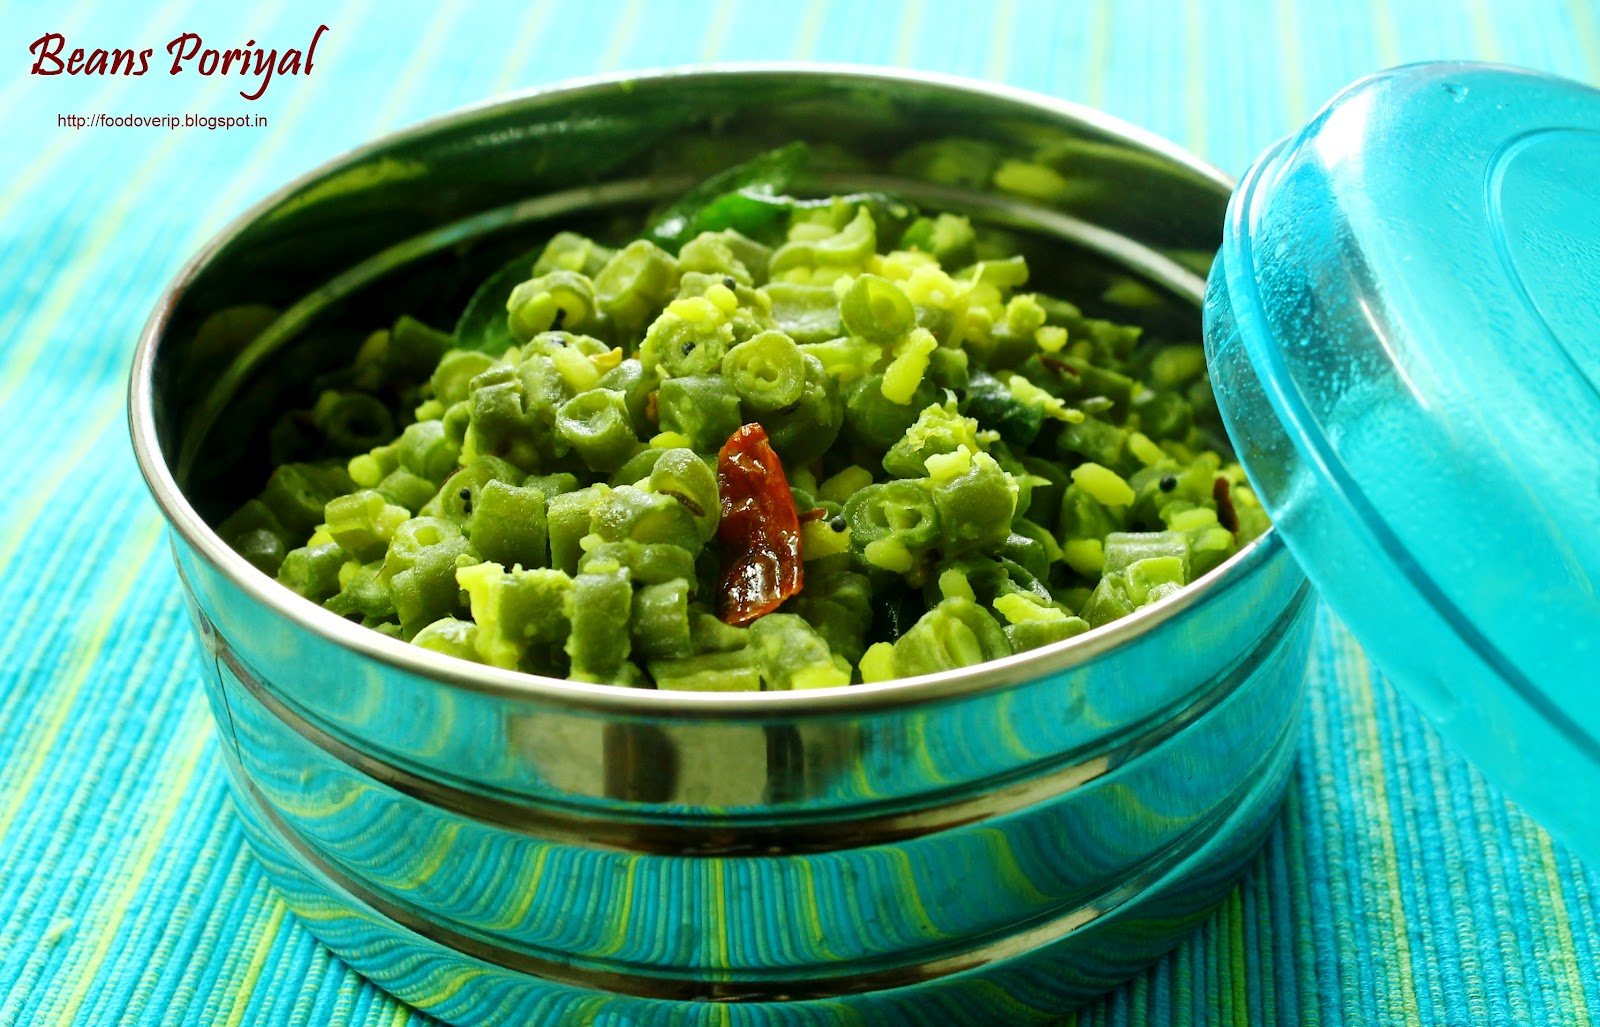
Combine beans and moong dal for a poriyal dish and its the tastiest poriyal ever. I don't prefer making poriyals with grated coconut, I would like a dal to be used instead and this does get many folks to like the poriyal rather than considering them to be quite boring. Try this poriyal and it would become a favorite, trust me!.

Beans Poriyal


Ingredients

Serves - 2
Spice Level - Moderately Spicy
Prep Time - 20 min
Cook time - 10 min


Moon dal - 1/4 cup , pressure cooked with a pinch of turmeric such that its tender but doesn't get mashed when added later
Beans - 250 gm , chopped into small pieces and steamed until tender
Oil - 1 tbsp
Mustard - 1 Tsp
Urad dal - 1 Tsp
Jeera/Cumin  - 1 Tsp
Dry Red chilli - 1
Curry leaves - 1 sprig

How do you do it

Heat oil in a kadai. Add mustard, urad dal, jeera and let it roast. Break the red chilli and add along with curry leaves. Add the boiled beans, half the amount of salt and saute for a 3-4 minutes. Add the boiled moong dal and mix well. Add remaining salt and saute for a couple of more minutes. Remove from flame.

Serve with rice and some spicy gravy/kuzhambu

Notes

I prefer the moong dal being tender but firm such that it doesn't get mashed when added to the beans. But amma boils the moong dal quite well, so that it gets mashed when added later. You may do it either way.


Print this Post

Continue Reading >>

Thursday, August 30, 2012

Kadai Paneer

For a person who wasn't fond of paneer much, the last one year has made such a big change. If I go too long without having paneer curry, I start longing and dreaming for it. But considering the heavy fat content in it, we have to restrict ourselves to only once a month or so.  Kadai Paneer is one of my favorite among the various paneer dishes, I think the mix of freshly grounded spice, capsicum and paneer just sing along so well. I am sharing a quick version of kadai Paneer today, there are a couple of more elaborate methods to make this -- I shall reserve that for another time. :)

Kadai Paneer


Ingredients

Serves - 3
Spice Level - Moderately spicy
Prep time - 15 min
Cook time - 10 min


Paneer -  150 gm , cubed
Onion - 1 sliced thinly
Tomatoes - 1 1/2 [to grind] , 1 chopped well
Capsicum - 1 chopped into medium sized pieces
Coriander seeds - 2 tsp
Dry Red chilli - 1
Green chilli - 1
Cashews - 5-6
Garam Masala - 1 Tsp
Kasoori Methi - 1 Tsp
Red chilli powder - 1 tsp
Oil - 3 Tbsp
Water - 1/3 cup
Fresh Cream - 3 Tbsp [optional] .


How do you do it

Dry roast the coriander seeds and red chilli for a minute or two in low flame until you get a good aroma and grind it into a coarse powder. Take 1 1/2 tomatoes, green chilli , cashews and grind along with this coarse powder to form a puree . Keep aside.

Heat a pan, add a tbsp of oil. Arrange the cubed paneer pieces on the pan and let it roast until it starts to brown, flip the paneer cubes to slightly brown the other side too. Transfer the pieces to a tissue paper, and pat it with another tissue paper to remove the oil. Now put these paneer pieces in about a cup of lukewarm water for 15 minutes [This is done to keep the paneer pieces soft yet firm] . Drain again and remove water with tissue paper and keep aside. We saute the paneer pieces to firm them up and make sure they don't get squashed when finally added into the curry. [This step is optional, you may add in fresh paneer if you like it that way].

Now in the same pan, add 2 Tbsp oil. Add onions , saute till translucent. Add the chopped tomato , little salt and cook till tomatoes become soft . Now add the puree made initially and let it cook for 1-2 minutes. Add in the chilli powder, garam masala,kasoori methi and mix well with puree. Add 1/3 cup water , add the capsicum too now. Let the capsicum cook in the gravy for 2-3 minutes, let it be crunchy. Simmer flame and you can add a few tbsp of cream at this stage for a richer texture and taste, I dint use it though. Add remaining salt and when the gravy starts to thicken ,add paneer pieces and  wrap well with the gravy. Let it cook for a couple of more minutes.Switch off flame.


Serve with pulkas and some lassi on the side. Makes for a delicious dinner. :)

 
Print this Post

Continue Reading >>

Thursday, August 23, 2012

Jeera Rice

It just cant get any simpler than Jeera rice :-) . Jeera rice is a very humble north Indian rice dish packed with jeera flavor that just needs 5 minutes of your time and it goes best with dal which is another easy accompaniment. First few months after my wedding, if you have had food at my place, theres no way you could have missed this . So if your newly married , beginner in cooking or just another person who is in need of a quick fix lunch/dinner menu try this - jeera rice, dal, potato roast , raitha ,a good drink - all in 1 hours time!  Its called the "Just Married" menu  ;).

Jeera Rice


Ingredients

Serves - 2
Spice Level - Not spicy but flavorful
Prep Time - 5 min
Cook time - 15 min


Basmati Rice - 1 cup [washed and soaked in water for 10 min, drain and keep aside]
Jeera - 4 Tbsp
Onion - 1 , chopped well
Green chilli - 1 , slit lengthwise and cut in half
Ginger-Garlic [GG] paste - 1/2 Tsp
Coriander leaves -  a handful, chopped
Salt - as per need
Oil - 2 Tbsp
Water - 1.5 cups

How do you do it

Heat oil in a kadai. Add jeera and let it roast and give a nice aroma - few seconds. Add in the chopped onions and green chilli, GG paste and saute till onions are translucent. Now add in the coriander leaves, basmati rice and saute well for a few 1-2 minutes. Now empty the contents into your rice cooker , add 1.5 cups of water, required salt and cook for 12-15 minutes.

Serve warm with yellow dal tadka

Notes

You might also cook the rice separately for 12 minutes and cool it and mix well with the tempering to retain white color of the dish , but the rice cooker method is quicker.


Print this Post

Continue Reading >>

Sunday, August 19, 2012

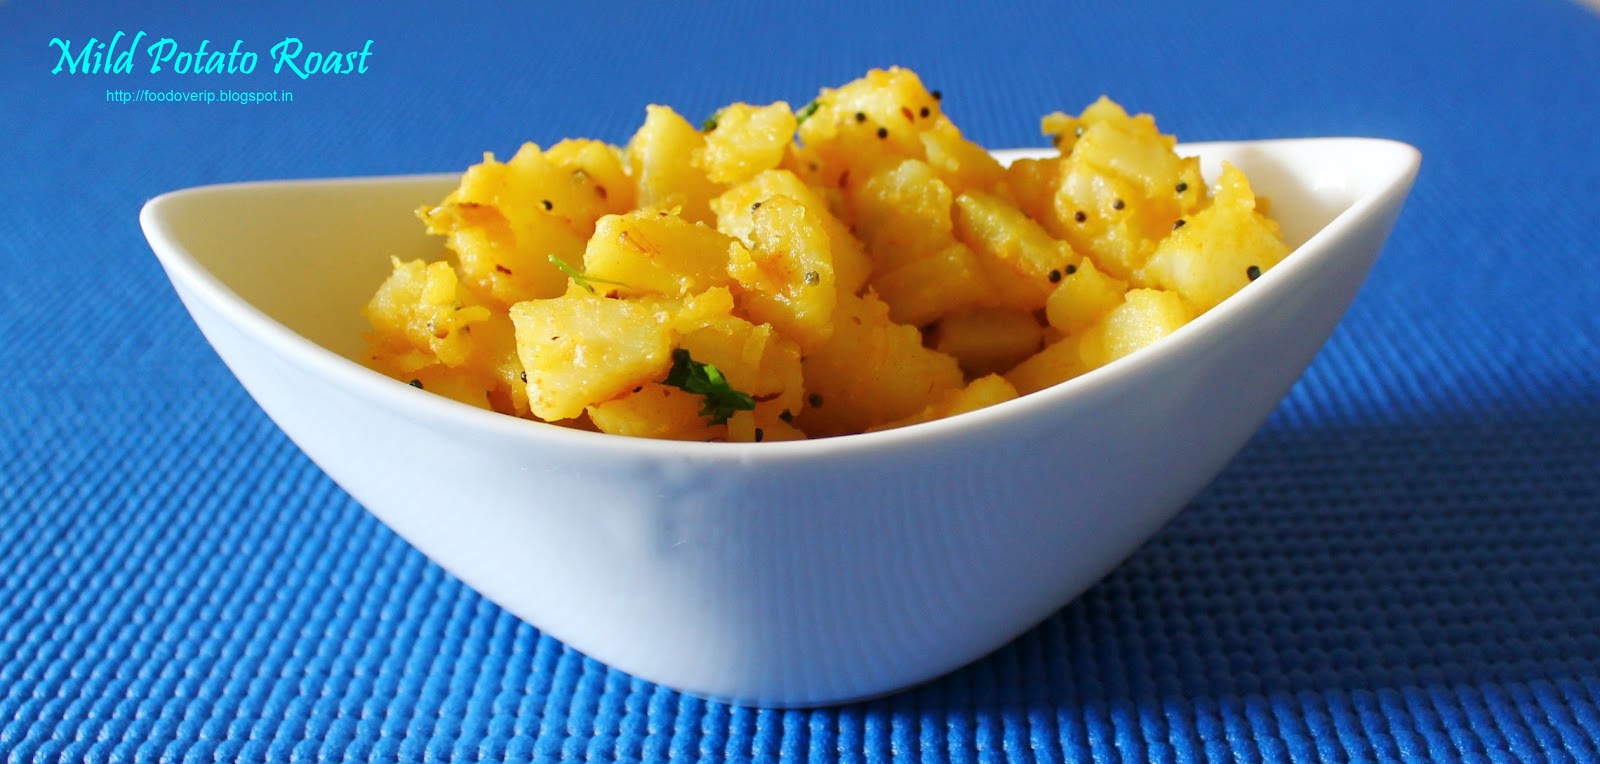
Mildly Spiced Potato stir-fry

Great timing for this post, but not so great for me :|. I have not been keeping well the last couple of days , so its been comfort food all the while and not the usual special cooking on weekends. Whenever me or S is down with throat infection/cold/cough we end up making pepper-garlic-jeera rasam with mildly spiced potato stir fry, its a quick lunch that can be made under 30 minutes and it really comforts you when your sick.

I must definitely add this here, S has been very nice and sweet and has taken over all the household chores for the last two days, and all I have been doing is eating and sleeping. And guess who has been helping him with the recipes - foodoverip :).

Mildly spiced Potato stir fry


Ingredients

Serves - 2
Spice level - Mild
Prep Time - 10 min
Cook time - 5 min


Potato - 5  , peeled and chopped into medium sized pieces and boiled correctly , it needs to be on the softer side [I microwaved it for 4 minutes]
Oil - 1 Tbsp
Mustard - 1 Tsp
Jeera - 1 Tsp
Dry Red chilli - 1
Turmeric - a pinch
Curry leaves - 1 sprig
Hing - a pinch
Salt - as per need

How do you do it

Heat oil in a kadai. Add hing, add mustard and let it splutter. Add jeera and break the dry red chilli and toss it  in too along with curry leaves. Now add in the potato pieces, a pinch of turmeric and salt and wrap well with the tempering. Saute for a couple of minutes. Switch off flame. That simple!

Serve with hot rasam and rice. 


Print this Post

Continue Reading >>

Tuesday, August 14, 2012

Tomato Basil Soup

Soups are comfort food for many of us and nothing can beat that. A rainy season, a cold evening , a day spent on bed feeling sick  - that's exactly when a cup of piping hot soup does not fail to soothe you. Even if it weren't for all these different moods, I love taking in a huge bowl of yummy soup along with my favorite flavored bread for a very healthy and filling dinner.

Aromas cafe in Mumbai is one of my favorite places not for the coffee they serve but for their wide variety of entree and soups. Every time I step in there, I have to order their tomato basil soup and chicken satay ,otherwise they would feel left out. ;) .So I have been wanting to replicate that tomato basil soup for quite sometime. Last weekend was when I got around to it and made the soup along with garlic pull apart rolls for lunch and thoroughly enjoyed them :)

Oh and I almost forgot to mention the argument me and S had before clicking this picture. I don't have a very photogenic soup bowl in my collection yet and we had to really explore crockery options for this. I was strictly for using a white bowl which would really enhance the bright orange color of the soup , but S was quite sure this huge coffee mug would be attractive too. And the verdict? - I don't think this crockery did justice to the soup , and look at that basil tree sitting inside the coffee mug , not my idea people! :). I got my way eventually , we have a click saved with the same soup in a white bowl , but I am saving that pic for when I show you the awesome recipe for garlic pull apart bread.So we shall take a poll then to see whose side you are on OK? ;)

Tomato Basil Soup


Ingredients

Adapted from Sanjeev Kapoors Tomato soup

Serves - 2 [large servings]
Prep Time - 5 min
Cook time - 20 min


Tomatoes - 8 quartered
Basil Leaves - 3-4 + 2 [chopped thinly]
Onion - 1 medium sized , sliced thinly
Carrot - 1 medium length , sliced thinly
Garlic cloves - 4 chopped well
Bay leaf - 1
Pepper corns - 6
Oil - 1/2 Tsp
Butter - 1 Tbsp
Sugar - 1/2 Tsp
Crushed pepper corns - for seasoning
Salt - for  seasoning
Water - 3 cups

How do you do it

Heat a pan with the oil and butter. Once butter melts add bay leaf.After a few seconds add the onions , pepper corns and saute till the onions are translucent [it should not brown]. Add in the garlic cloves and carrot slices and saute for 2-3 more minutes. Add the tomato pieces , basil leaves and saute for a couple of more minutes. Add in 3 cups of water and bring to boil. Cover with lid and let it cook in medium flame for 10-15 minutes. Once done drain the water and reserve it. Discard the peppercorns and bay-leaf. Allow the rest to cool. Once cooled, blend the mixture along with some reserved water into a smooth puree.Pass this through a sieve and press the puree well to get all the liquid from it.

Bring this soup liquid to a boil again and add in the reserved water to adjust consistency of soup.Add 1/2 tsp sugar and chopped basil leaves and stir well. Season with required salt and crushed pepper.

Serve with your favorite starter/choice of bread. :)
 

 Notes

To make it creamy, you can add in 1/4 cup cream or 1/2 cup milk and let it thicken on low flame

If you have added too much reserved water  by mistake, you can mix few tbsp of corn-flour with water and add it to the soup and boil it on low flame until it thickens

You can skip the basil if you don't have them and just follow the same recipe to make tomato soup.
 

Print this Post

Continue Reading >>

Wednesday, August 8, 2012

Mushroom Fried Rice

I have taken a big liking to variety rice recently. I love the fact that they are one pot meals that get ready in minutes and makes for a good and quick to pack lunch. So I experiment with different kinds of flavor for variety rice quite often.One such trail was this simple mushroom fried rice which turned out to be quite delicious. Nothing fancy about the method/ingredients used but once again a reminder that simple food/flavors tastes so awesome.

Mushroom Fried Rice


Ingredients

Serves - 2
Spice Level - Moderately Spicy
Prep Time - 15 min
Cook time - 15 min


Basmati Rice - 1 cup
Oil - 2 Tbsp
Cinnamon - 1 inch piece
Bay leaf - 1
Cloves - 2
Jeera - 1 tsp
Onion - 2 medium ,chopped finely
Ginger Garlic [GG] paste - 1 Tsp
Green chilli - 2 , slit length wise
Button Mushroom - 200 gm pack, cleaned and chopped into medium sized pieces
Garam Masala - 1/2 Tsp
Curry powder - 1/2 tsp
Turmeric - a pinch [optional]
Salt - as per need
Pepper powder - 1/2 Tsp [optional]
Coriander Leaves - handful, washed and chopped

How do you do it

Cook the rice in 1.5 cups of water with 2 Tsp salt for 12-15 minutes and immediately transfer to a plate. Spread the rice on the plate, and drizzle a few drops of oil and stir it lightly and cool it. The rice should not be mushy, cook it like you would do for biryanis.

Next, heat 2 Tbsp oil in  a kadai, add bay leaf, cinnamon and cloves , jeera and let it roast for a few seconds. Add the chopped onion and GG paste. Saute till onions are translucent. Add in the green chilli now and give it a stir and saute for a couple of more minutes. Add in the chopped mushrooms now and saute till they give a shiny look - should take 3-5 minutes. Add in the turmeric [if using] , garam masala ,curry powder  and  salt now and saute till the raw smell of the powder vanishes.Now lower the flame, add in the cooked rice and toss it gently to wrap well with the mushroom mix in the kadai. Also add in the coriander leaves now and wrap well until the rice is completely mixed well with the mushroom mix taking care not to mash up the rice.Check for seasoning , add more salt and pepper [optional] if you like to.

Serve with raita and chips.

Note

1.You can skip the turmeric if you want the rice to take on a brownish shade. Turmeric lends the yellow color to the rice. I intended not to use it , but out of habit added a pinch and it resulted in the yellow color of the rice. :)

2. We have already added salt while cooking the rice, so be cautious while adding salt later.


Print this Post

Continue Reading >>

Thursday, August 2, 2012

Mango Lemonade

One thing I really look forward to during the summer season is the mangoes. And this time, we had that in plenty, almost every other night after dinner, eating mangoes became a routine. I wanted to make some dessert but never got to it :|. I saw this refreshing mango lemonade recipe recently and was tempted to make it before the season got over. I have made this twice now in a span of two weeks time, it was that good :).

Mango Lemonade


Ingredients

Adapted from Red chillies

Serves - 3

Mango pulp - 1/2 cup
Sugar - 1/4 cup
Water - 1/2 cup
Lemon - 1 Large  - remove the juice of this.

Cold water - as per need
Ice cubes - as per need

How do you do it

First step is to make the sugar syrup. Boil 1/2 cup water in a pan, add the sugar into it, and on low flame, keep stirring until sugar dissolves. Switch off flame and cool this syrup completely. Next make the mango pulp by blending the mango pieces without any water. Once the sugar syrup is cooled, add it to the mango pulp along with the lemon juice and blend once again completely. So your mango lemonade concentrate/mix is ready.

Now use this concentrate with chilled water to make the mango lemonade drink. The ratio of the concentrate and chilled water varies as per need. I got about 3-4 glasses of mango lemonade.The concentrate stays good for about 2 days when refrigerated.

I also added extra lemon juice from another half of a lemon, wanted the lemon to dominate more. 

While serving add ice cubes and maybe add some mint leaves if you like it. :)


Print this Post

Continue Reading >>

Friday, July 27, 2012

Idli upma/Thalicha Idli/Mildly Spiced Idli crumbs

I don't make this as often as I would like to. Somehow I make idly upma only when my idlis are a few hours old and need to be finished. This is one of the yummy and preferred breakfast or snack at my place. Don't worry when your idlis are either hard or a day old, go ahead and try this. :)

Idli Upma


Ingredients

Serves - 2
Spice Level - Moderately Spicy
Prep time - 5 min
Cook time - 5 min


Idlis - 10
Onion - 1 , chopped finely
Curry leaves - 1 Sprig
Dry red chilli - 2
Mustard - 1 Tsp
Urad dal - 1 Tsp
Hing - 1/2 Tsp
Jeera/Cumin - 1 Tsp
Oil - 1 Tbsp
Salt - as per need.


How do you do it

Crumble the idlis completely using your hand or the food processor with a few quick pulses.Keep aside. Heat oil in a kadai. Add hing,mustard - let it splutter, add jeera, urad dal, let them roast to a brown. Break the red chillies and drop them into the kadai along with curry leaves. Toss in the chopped onions now and saute till they become translucent. Add the crumbled idli , little salt [ remember idlis already have salt in them, so be cautious] and wrap well with the tempering.Stir well for a couple of minutes and you are done.

Sprinkle some idli podi / gun powder on top while serving. Yum! :)


Print this Post

Continue Reading >>

Tuesday, July 24, 2012

Aglio Olio Pasta with Mushroom and Peas

This is probably one of the easiest pasta that can be made. Aglio Olio basically is wrapping up your favorite pasta in olive oil infused with chilli and garlic and is usually made with spaghetti. Unlike other pasta dishes that are sauce-heavy, here the spaghetti/pasta is the star of the dish.

I don't make Italian dishes much at home , not really fond of them either, but once in a while its a welcome change in my kitchen :). Me and S enjoyed this pasta with mango lemonade on a raining friday evening. :)

Aglio Olio Pasta


Ingredients

Adapted from noobcook

Serves - 2
Spice Level - Moderately spicy
Prep Time - 15 min
Cook time 10 min


Spaghetti - 150 gm  [or any other type of pasta that you like , I used whole wheat semolina durum spaghettini ]
Garlic cloves - 12 small, finely chopped
Fresh/Dry red chilli - 1, remove seeds and break into pieces
Red chilli Flakes - 1 Tsp
Parsley leaves - 3 Tbsp
Button Mushroom - 4 , chopped roughly
Peas - 1/4 cup boiled
Olive oil - 3 Tbsp
Salt as per need


How do you do it

First cook your spaghetti al-dente or as per packet instructions. What I did - Bring water to a rapid boil in a huge pot. Add 1 tsp salt in the water. Drop your spaghetti in and let it cook for 12 minutes in high flame. Drain the water and put the spaghetti under running cold water for a few secs and then spread on a plate and keep aside.

Heat olive oil in low flame. Add in chopped garlic , red chilli and 1/2 tsp red chilli flakes.Let the garlic get cooked completely - 4-5 min. Add in the mushroom and peas now and saute for a couple of minutes till the mushrooms gives that shiny look. Add about half he quantity of salt now and give it a stir. Now toss in the cooked spaghetti , remaining salt , parsley, 1/2 Tsp red chilli flakes and wrap well with the garlic-chilli infused olive oil. Stir for a couple of more minutes and switch off flame.

Serve this aglio olio pasta with your favorite chilled drink.

Notes

1. Make sure not to burn the garlic. Burnt garlic will ruin the entire dish. So if necessary, saute mushroom and peas separately in a Tsp of olive oil for a few minutes and then add that to the oil which is already infused with garlic and chilli and continue as per the above instructions.

2. Also remember we have already added 1 tsp salt when the pasta was cooking, so be careful when you add salt at later stages.


Print this Post

Continue Reading >>

Wednesday, July 18, 2012

Kovakai Kootu | Mildy spiced Ivy Gourd with lentils

Kovakai/Ivy gourd is not a favorite among many, S is no different. Its a very healthy veggie to take in and the only way I could hide its taste was to make a kootu :). If you belong to same category , try this kootu!. Its a very simple , healthy preparation and a really quick one. Me - I can eat this subji in many other preparations as well :).

Kovakai Kootu


Ingredients

Recipe Source - My Mom  ** She is great in tricking you into eating veggies you don't like :) **

Serves - 2
Spice Level - Not spicy
Prep Time - 10 min
Cook time  - 20 min


Ivy Gourd/Kovakai - 300 gm [ chopped into small pieces]
Moon dal - 1/4 cup
Small/Sambar Onion/Shallots - 3
Garlic cloves - 2
Curry leaves - 1 Sprig
Turmeric - 1/2 Tsp
Kuzhambu/Sambar powder - 1/2 Tsp
Jeera - 1 Tsp
Water - 2 cups

To Temper


Oil - 1 Tsp
Mustard - 1 Tsp
Hing - a pinch
Urad dal - 1/2 Tsp

Salt - as per need

How do you make it

Take a pressure cooker, dump all ingredients [except the "To Temper" and salt] and pressure cook for 15-20 minutes. Keep on high flame until the first whistle and then lower flame for the remaining time. Let the cooker cool down. Meanwhile heat 1 Tsp oil in a kadai. Add hing, mustard and urad dal and let them roast. Now open the pressure cooker. Heat the cooker again at low flame , add required salt and let the kootu come to a boil . Adjust consistency of kootu now. Add more water if needed, or if its still in a loose state, let it thicken. When you have the desired consistency, switch off flame and pour in the tempering and mix well.

Serve with rice and some spicy potato curry.

Notes

You can use the same recipe with snake gourd [Podalangai] too, it will be equally yum! :)


Print this Post

Continue Reading >>

Thursday, July 5, 2012

Green Gram Sambar/ Pasi Payar Kuzhambu

Pasi Payar kuzhambu comes to my rescue when I run out of vegetables in my fridge :). This kuzhambu is very easy to make, healthy and tasty. Rice, Payar kuzhmabu and some potato chips make a quick and delicious lunch combination.

Pasi Payar Kuzhambu


Ingredients

 Serves - 4
 Spice Level - Moderately Spicy
 Prep time - 20 minutes
 Cook time - 15 minutes

Green Gram/Pasi Payar - 1 cup
Onion - 1 Large , chopped well
Tomato - 1 Large , chopped
Garlic cloves - 3
Kuzhambu powder/Sambar powder - 3 Tbsp
Turmeric - a pinch
Salt as per taste
Tamarind extract - extract from a lemon sized tamarind
Oil - 1 Tbsp
Mustard - 1 Tsp
Jeera - 1 tsp
Hing - a pinch
Curry leaves - 1 sprig


Method

Wash the green gram well.Heat a kadai and add the washed green gram and dry roast it until you get the aroma of the green gram. Should take 2-3 minutes.Remove from flame and pressure cook for 15-20 minutes. Take care not to over cook the green gram.

Heat oil in a kadai. Add hing, mustard and jeera. Let them splutter.Add chopped onion, garlic and curry leaves. Saute till the onions are done. Add in the tomato,turmeric and half the quantity of salt. Saute till the tomatoes are soft and are mashed well.Now add in the sambar powder and saute till the raw smell of the powder vanishes. Add in the cooked green gram, stir well. Add 3 cups water, tamarind extract, remaining salt and let the kuzhmabu come to a boil. Simmer flame and let it get cooked for 10 more minutes until you get a thick kuzhmabu and all flavors come together.

Serve with rice and any chips of your choice for a great lunch.

Notes

1. While adding tamarind extract, be careful. I usually add half the quantity of tamarind , taste and add more if necessary. So adjust tamarind extract quantity accordingly.


Print this Post

Continue Reading >>

Tuesday, July 3, 2012

Vegetable Clear soup

Its a gloomy and dreamy season here in Mumbai :). Showers everyday all throughout the day.So how about some hot soup for the romantic soul? ;)

Vegetable Clear Soup


Ingredients

Recipe source - Adapted from Tarla Dalal vegetable soup

Serves - 2
Spice Level - Not Spicy but flavorful
Prep Time - 10 minutes
Cook time - 15 minutes


Spring onions bulbs [white parts] - 3, sliced thinly
Spring onion green part - 1 Tbspn chopped well
carrot - 1 Finely chopped
Cauliflower - 3 florets finely chopped
Beans - 4 Finely Chopped
Cabbage - 2 Tbsp finely chopped
Salt - as per taste
Pepper - to season
Pizza Hut Italian Seasoning/Dry herb Italian seasoning - 1 packet/1Tbsp
Corn-flour - 2 Tspn mix with 2 Tbsp water and made into a paste.
Water - 4 cups
Olive oil - 1 Tbsp

How I made it

Heat olive oil in a kadai. Add the spring onions white part. Saute for a couple of  minute.Add all the finely chopped veggies except spring onion green part. Saute for 3 minutes.Add 4 cups of water and bring to boil.Simmer flame and let the veggies get half cooked in the water. Once the veggies are half cooked, add in salt , pepper , pizza hit Italian seasoning and the corn-flour paste and spring onion green part. Boil for 3 more minutes.Switch off flame.

Enjoy this hot vegetable clear soup sitting in your balcony drowning in the beauty of the monsoon showers. :)


Print this Post

Continue Reading >>

Wednesday, June 27, 2012

Masala Egg Bhurji

I don't like eggs - in any form, but S absolutely loves it. Never tried anything new with eggs, but the usual recipes like omelet/scrambled egg, bhurji seem to be delicious enough for a really quick breakfast. My previous team mates at work were all North Indians and they used praise the
combination of masala egg bhurji wih chapathi. :)

Masala Egg Bhurji


Ingredients

Serves - 2
Spice Level - Moderately spicy
Prep time - 10 min
Cook time - 5 min

Eggs - 2
Onion - 1 small, chopped finely
Coriander Leaves - half a handful, chopped well
Green chilli - 1 , chopped finely
Cumin powder - 1 tsp
Pepper Powder - 1 tsp
Turmeric powder - a pinch
Salt - as per taste.
Oil - 1 Tbsp

Method

Beat the eggs well in a bowl. Add in the rest of the ingredients and give it a quick mix.Heat oil in a small pan. Add the prepared egg mix. After a few seconds, using a ladle stir it off. It will look messy at this stage. Keep stirring every few seconds, until you get a dry mixture like in the pic above. Take off the heat when you think its done as per your need.

You can also make an omelet with the prepared egg-mix if you prefer to have it that way. Try eating this with chapathis, toasted bread - I hear its super delicious especially with chapathi.


Print this Post

Continue Reading >>

Friday, June 22, 2012

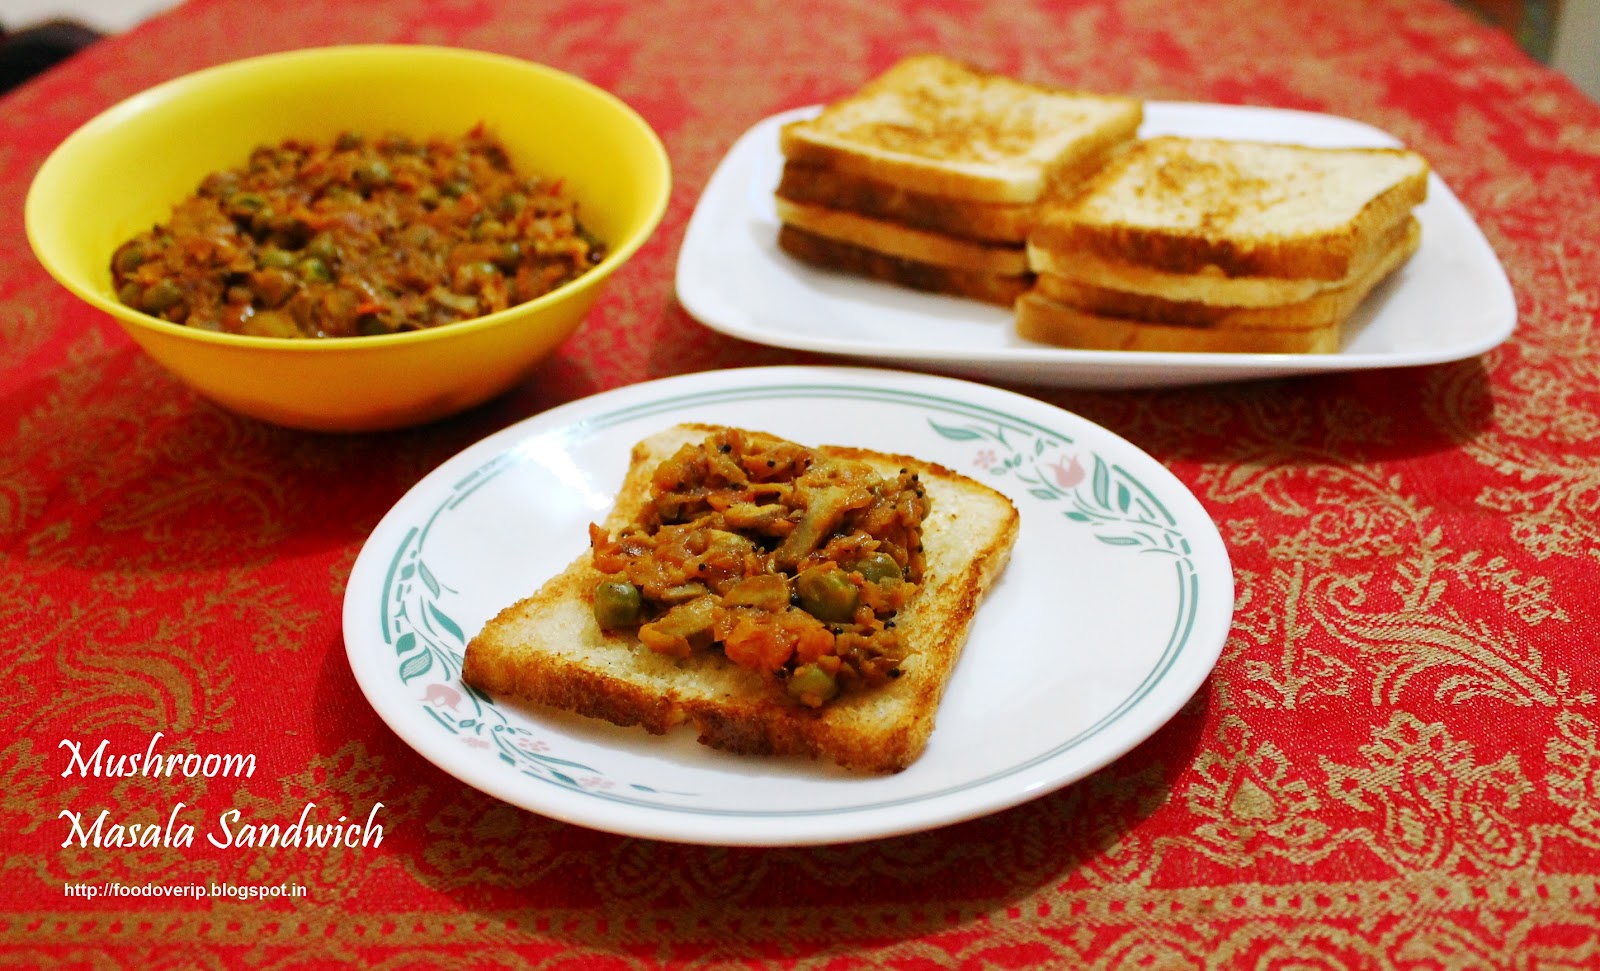
Mushroom Peas Masala

Making somebody like a veggie that they are not fond of  is easy, just cook it in a tasty manner. :). S used to strictly avoid eating mushroom/spinach/adai/beans/ before our wedding.I had to persuade him the first time to try all of these at least once and later decide for himself if he wanted a second serving or not. And good for me, he likes all of these veggies now. :)

I clearly remember the first time I made this dish, way back in 2009,one month into my wedding. Nice spicy mushroom masala served with ghee toasted bread for breakfast. It was so yummy, we ended up packing the same for lunch. Since then , this dish has been a hit at my home. :). One small change in 2012 - we stopped using ghee for toasting bread, you know why!  ;)

Mushroom Peas Masala


Ingredients

Serves - 4
Spice Level - Quite Spicy
Prep Time - 20 Min
Cook time - 20 Min


Mushroom - 200 gms, cleaned and chopped well
Frozen peas - 1/2 cup.
Onion - 1 Large, chopped well
Tomato - 2 and half large ones, chopped
Ginger-garlic paste - 1 Tbspn
Turmeric powder - 1/2 Tsp
Chilli/Curry/Masala Powder - 2 Tbspn
Salt - as per taste.
Oil - 2 Tbspn
Jeera - 1 tbspn
Hing - a pinch

Method

Boil a cup of water, simmer flame and add the frozen peas to it. Let the peas get cooked for about 5 minutes.Switch off flame once peas is cooked. Drain the water and keep the peas aside  If using fresh peas, cook it as you would usually do.

Heat oil in a kadai. Add hing. Add jeera, and let it roast, giving a nice aroma.Add onions, ginger garlic paste and saute well until the onions are cooked well. Add tomatoes, half the quantity of salt needed, turmeric powder, and saute well. Cover the kadai with a lid for few minutes. Let the tomato get mashed well, it should let out the juice and be soft. At this stage add the masala powder and saute for a minute. Wait for the raw smell of the masala to vanish. Add the chopped mushrooms now, and wrap well with the masala. Add 1/2 cup water. Simmer the flame and close the lid. Wait for the mushrooms to get cooked. This would take about 15 minutes. Mid-way, when the mushrooms are half done, add in the cooked peas and combine well. Stir once, add remaining salt and cook in open flame. Wait for most of the water content to evaporate and a nice thick gravy is formed.Switch off flame.

Serve as a side dish for toast, or with roti's, or with rice. Goes well with just about anything. :)


Print this Post

Continue Reading >>
Related Posts Plugin for WordPress, Blogger...

A la carte!

Along with idli/dosai (13) Along with rice (32) Along with rotis (21) asparagus (1) baby potatoes (4) bajji (1) baking (9) banana (1) basil (1) basmati (2) beans (1) beetroot (5) bhindi (3) biryani (1) Black eyed beans (2) blueberry (1) bok choy (1) bottle gourd (1) bread (3) breakfast (4) brinjal (4) brocolli (1) buttermilk (1) butternut-squash (1) cabbage (2) cakes (7) carrot (1) carrots (3) cashews (1) cauliflower (8) cheescake (2) chettinadu (24) chettinadu delicacy (23) Chicken (7) chilli (1) Chineese (3) chinese (1) chocolate (1) chole (2) chutney (6) coconut (5) coconut milk (1) coriander (4) corn (1) cow-peas (1) cream-cheese (2) curry leaves (1) dal (3) dates (1) desserts (14) diwali 2013 (1) dosai (1) drink (1) drumstick (2) dry field bean (1) Easy (44) egg (3) fenugreek (1) fish (1) Food and Travel review (1) garlic (9) ginger (1) gobi (1) green gram (1) How To (5) Indian Flat Breads (4) indian sweets (3) International (5) ivy gourd (2) jeera (3) kootu (1) kovakkai (1) lemon (3) lentils (11) lobia (1) malai (1) mango (2) masoor dal (1) Methi (2) mint (2) mix veg (9) mochai (1) moong dal (4) mushroom (10) mutton (1) non-veg (2) onion (2) orange (1) paneer (11) parathas (1) pasta (2) peas (7) pepper (1) pickles (1) plantain (1) poriyal (1) potato (14) potatoes (2) quinoa (1) Rajma (1) rasam (1) rice flour (1) rosemary (2) shallots (1) snack (18) soup (7) soy chunks (1) spinach (6) stir-fry (1) strawberry (1) sweet potatoes (1) tamarind (5) tomato (7) toor dal (1) val bean (1) Variety Rice (13) walnut (1) wheat (2) yoghurt (1) yuuum!! (1) zucchini (2)

Latest on Food Over IP

Copyrights

All rights reserved @2012.

Unless otherwise mentioned, the text and images included in FoodOverIP blog belongs to the author. The blog author’s permission is required before any content is reproduced in any form.

  © Blogger templates The Professional Template by Ourblogtemplates.com 2008

Back to TOP  

Blogging tips