Showing posts with label breakfast. Show all posts

Saturday, July 13, 2013

How to make the perfect Pooris


Poori Masala is a very special dish in my home and I am sure that is the case in almost all households. If Poori masala is made at home, it means we are celebrating something special and its like we earned it. I remember those days when I was small, my mom would tell me a few days in advance that the coming weekend she is planning to make poori and I would so eagerly wait for that meal. One of the other obvious reason why Poori cant be a regular breakfast is because its a deep fried dish and consumes a large quantity of oil for frying and once pooris are done we have to think of ways of using up that oil in a healthy manner without heating it again. So when I do make Pooris at home which is very very rare, I eat lots of them, more like swallow them ;).

Making Pooris seemed to look very simple to me, but when I initially made them I dint get it right.  I get really disappointed when pooris dont puff up, that's actually one of the joys of making them. Poori is also not something you can keep making it often till you get it right :). So it took me some time to figure out what went wrong each time and I have explained in detail the things to keep in mind at each step. Thanks to my dear friend Raji who showed me how to make these the right way. Whenever I stay at her place, she makes pooris and I love them :). Me and S have such fond memories of our Bangalore years most of which include our close friends K and R. Here is to the lovely Bangalore times, Pooris and K and R.

And when you make pooris, make and eat loads of them like me, you dont know when you are going to be able to make them again at home ;)

Ingredients

Servers - Makes about 18 pooris
Prep Time - 30 min
Cook time - 15 min 

Wheat flour - 2 cups
Water - 3/4 cup
Salt - 1 tsp
oil - 1 tsp
Oil - as required for deep frying


How do you do it.

1. There are a few things to keep in mind while making pooris. The first thing would be that poori dough is less moist and a little tighter than chapathi dough. Second - chapathi dough is rested for 30 minutes before making them , but for pooris its good to roll them out ad fry them immediately without any resting time. If you leave them around for a while, the pooris will soak up oil. Third - Dont place the rolled pooris one on the other, try to spread them out on large plates so that they dont touch each other much. Fourth - don't roll the pooris too thinly, if you do they will break up while deep frying. Fourth - The temperature of the oil needs to be right, too hot and the pooris will become brittle, and if its below the required temperature it will soak up a lot of oil.

2. Mix the wheat flour, 1 tsp oil, salt well. Add in the water slowly and form a smooth non sticky dough. Keep aside. The amount of water varies with the kind of flour you have. I used 3/4 cup of water for ashrivad atta. Use your judgement in this step and use water as required. Make sure the dough is tighter than the chapathi dough and should be less moist as well.

3. Pinch several small lemon sized balls from the dough and keep them ready. Immediately roll the pooris into small circles, dust with flour as necessary. Make sure they are not too thin.  Lay all the rolled out pooris on several plates and try to make sure they dont touch each other much. When you are rolling out the last few balls, heat a kadai with required oil for deep frying.

4. Oil must be very hot, hotter than the usual required for other deep frying items but not smoking hot. To test, drop a small pinch of dough inside it must raise like a bullet to the top. Then the oil is ready.

5. Drop one of the rolled poori [starting with the first one you rolled] gently into the hot oil, within seconds the poori will rise up and when it does use a slotted spoon to gently press down on the puffed poori and roll it over quickly to cook the other side and remove it. Drop into a paper towel lined container. Deep fry all the pooris the same way.The temperature of the oil may go down or up as you keep frying depending on the kind of cooking range you have. Make sure to get the oil to the right temperature each time while you fry.


Serve these puffed up delicious pooris with a yummy side of your choice. Our pick would be the fiery and tasty red potato curry , the recipe of which is coming soon :)

Continue Reading >>

Thursday, September 20, 2012

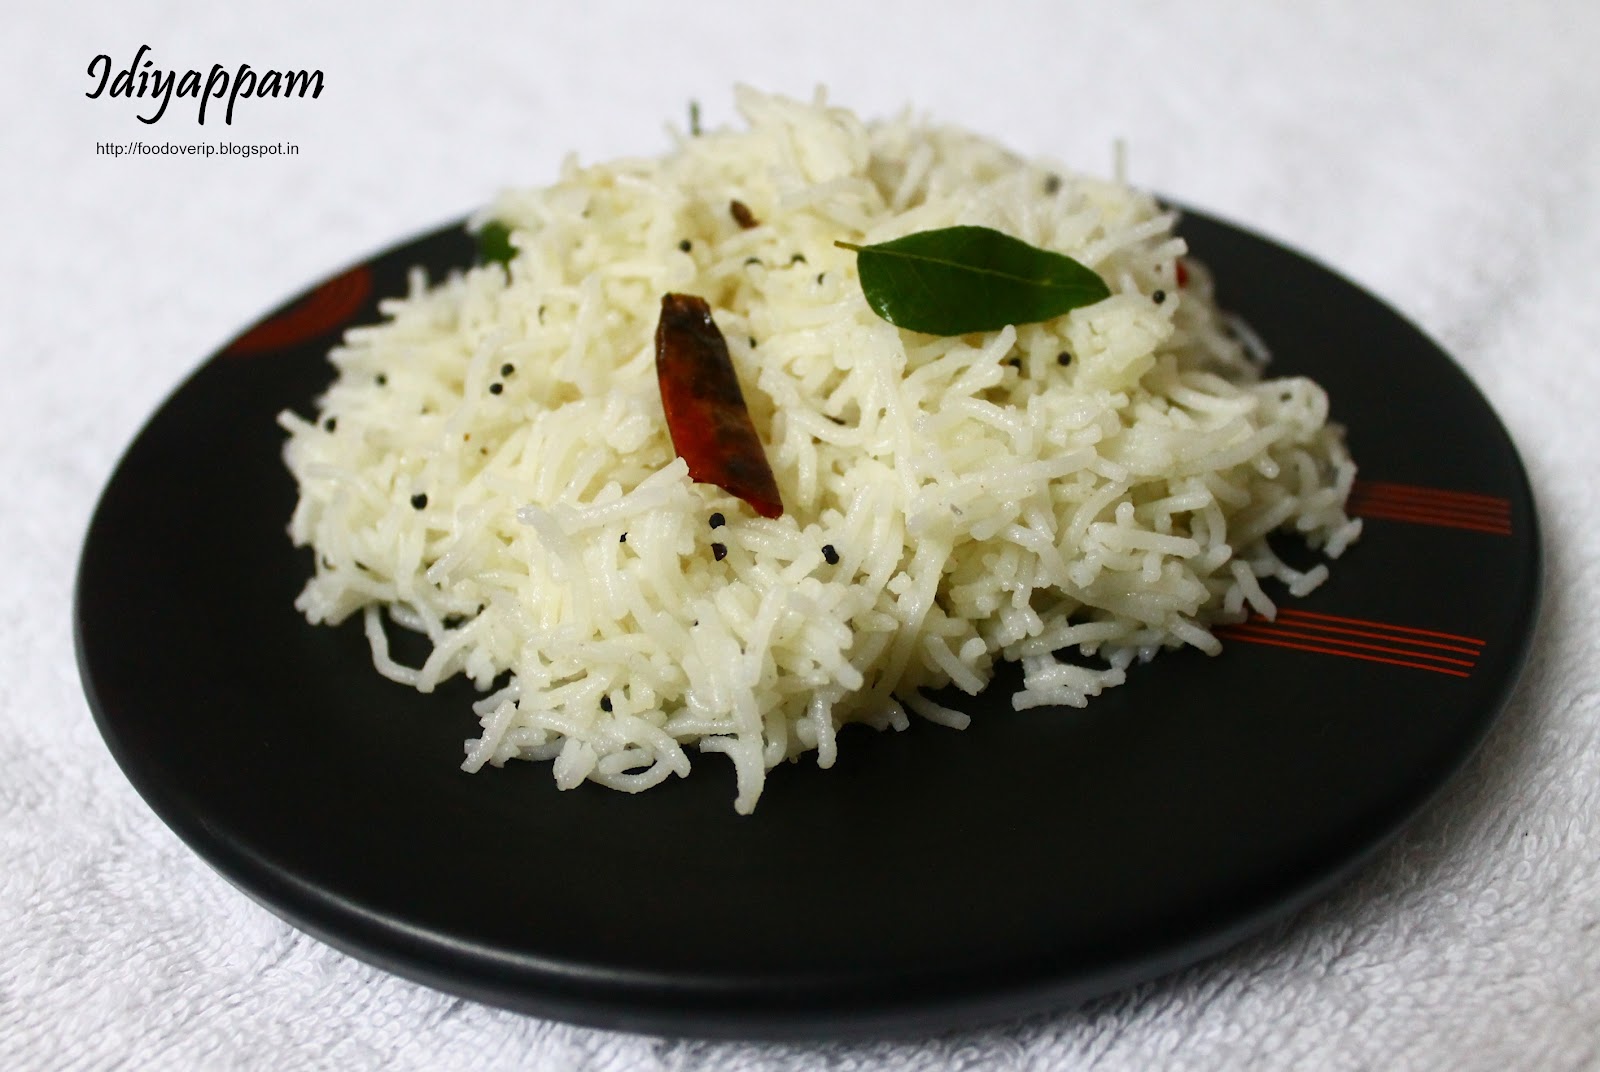
How to make Idiyappam - Step by Step recipe

Hello all! I have been on a good holiday the past week. The longest I have ever been away from this blog but it was a really fun and interesting time at my native place. This is the first time I am being a part of this kind of a function where we offer tribute to our forefathers. It is a 3 day function in total, the first day is the temple-visit day , the entire family tree starting from my father-in-law's great grandfather till the present generation gathered at our kuzha dheivam temple , prayed for good health wealth and happiness and got back to our 100 year old typical chettinadu home. All the ladies then got busy with the prep work for the next day feast that is to be made for around 400-500 people. :). I got to see and also give them a hand in grinding the flour the traditional way [stone method] and cooking at such a huge scale. The cooking continued the second day, making pongal , frying paniyarams in the viragu adupu. I could only help with 4-5 rounds of paniyaram with the viragu adupu, my eyes started burning from the flame, ah I wonder how they used this every other day hose days! :O. That evening we had the pooja and relished on the feast for dinner. :)

The next day was slotted for the auction that took place in our home. A lot of people offer many things such as fruits, silver ware, clothes, toys etc  for the pooja. Once the pooja is over, all these things are sold in an auction. The funds collected from this auction is then given to the temple for its maintainence and upkeep and other related kovil activity. It was fun to see a live auction ;). So all in all it was a very unique holiday experience with the full swing traditional activity and having good food 4 times a day minus the scorching heat we had to put up with! And before you ask, I dont have pictures to share with, I kept cursing myself so much that I forgot to take the camera. :( . And yeah I had paneer soda, I love paneer soda and never miss it when i visit my native town.

So with this update I am going to share a recipe , one that is very close to my heart and that is Idiappam with step-wise pictures.


Ingredients

Serves - 2
Prep time - 30 min
Cook time - 15 min


To make the dough for Idiyappam

Idiyappam flour - 2 cups

*** I get idiyappam flour from my native place where we have our chettinadu shops which sell this. These days there are many brands that sell idiyappam flour , you could use one of them. Anil idiyappam flour is one such brand. ***

Water -  2 cups +/- few tbsp
Salt - 1 Tsp

For tempering

Curd - 1 Tbsp
Water - 1 Cup
Salt - 1 Tsp
Curry Leaves - 2 Sprigs
Dry Red Chilli - 3
Mustard - 1 Tbsp
Urad Dal - 1 Tbsp
Hing - a generous pinch
Oil - 3 Tbsp

How do you do it

To make the dough

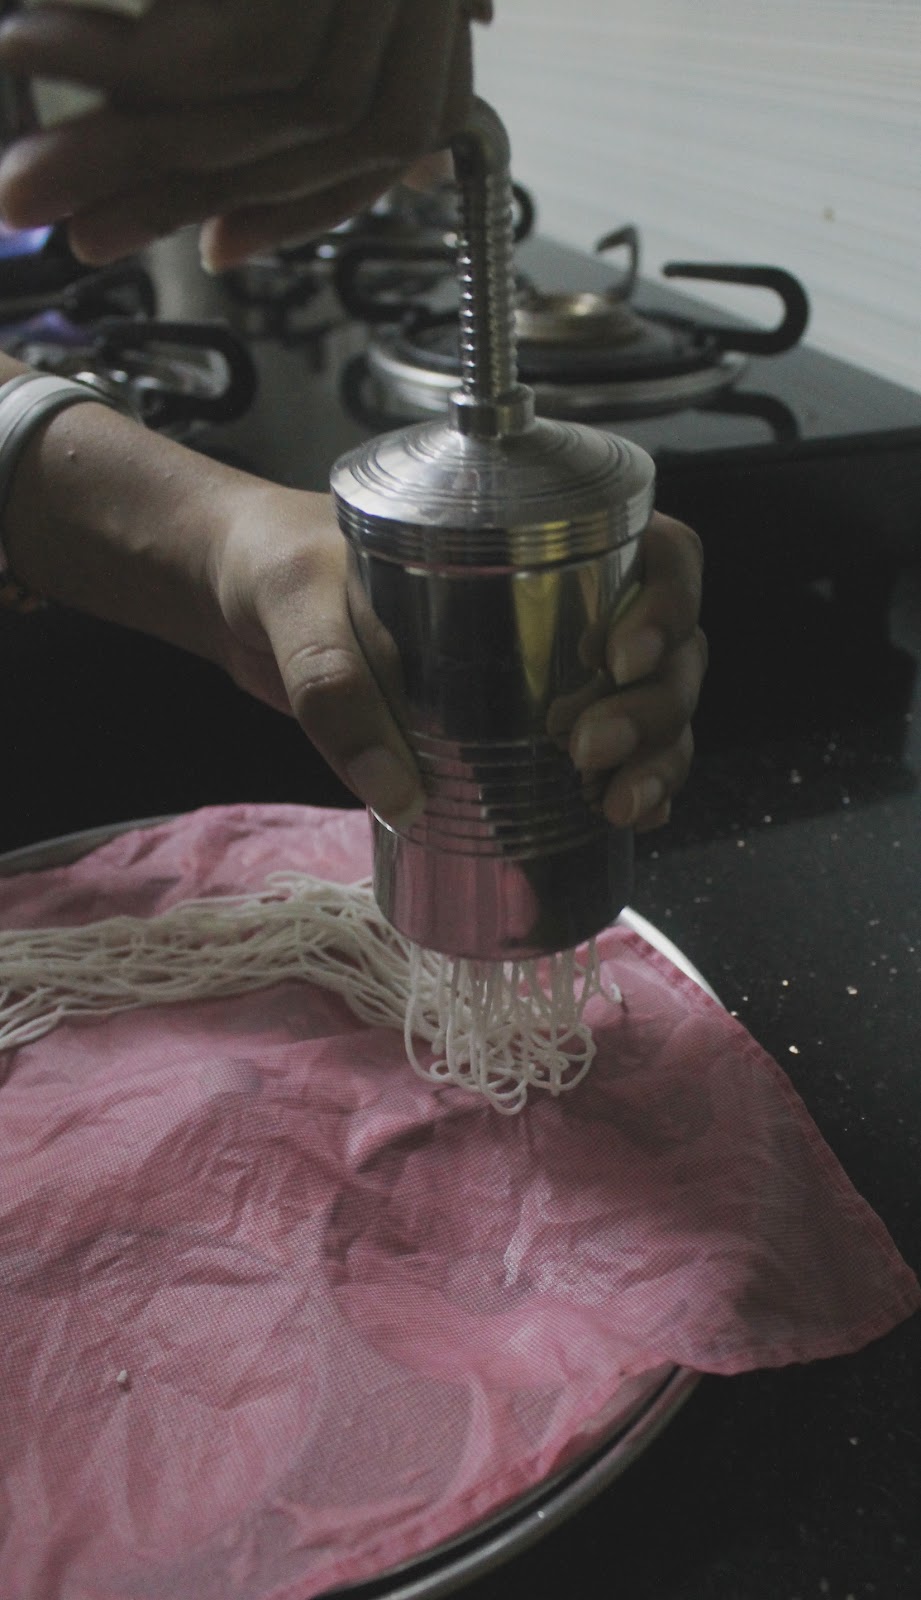
First bring two cups of water with 1 tsp salt to boil and switch of flame. Take the flour in a bowl and add this boiled water slowly and mix with spatula. Bring the flour together and knead to get a slightly sticky soft dough. I needed 2 cups plus few tbsp of water to make the dough. You can see the dough in the picture below. The idiyappam press is also shown, this press is quite easy and not like the traditional wooden kattai where its difficult to press the dough for making the idiyappam.


Next divide the dough into 4 equal parts and shape one part of the dough like a banana and put it inside the steel tumbler and fit the equipment and keep it ready to press the idiyappam.


I use my Idli chatti method to steam idiyappams. I take a wet cloth and line the idli plate with it and press the idiyappam on top of it and steam.Rotate the handle as shown below and see the idiyappam falling out of the press. Do this until all the dough inside the press is over. You can fill the press again with dough and repeat until your idli plate is full. For 2 cups of flour, I had to steam two plates of idiyappam.


Place this plate on top of idli vessel containing boiling water and close the lid. Steam for 3-5 minutes on high flame. Do not over steam, if you do, the idiyappam will not be soft in texture. When you touch and break the idiyappam , it should not be sticky - this means its cooked enough.


This is the steamed idiyappam.


To temper the idiyappam

Tear into medium length the steamed idiyappam and keep ready. Mix 1 tbsp of curd in 1 cup of water, add salt and mix well. Dip all the steamed idiyappam in this curd -water mix, remove it immediately and place it in a colander. [ Don't skip this step, this will ensure your idiyappam is very soft in texture while tempering]. Heat oil in a kadai. Add hing, mustard, urad dal and let it splutter. Add the broken red chilli and curry leaves. Now add the idiyappam , required salt and stir well on low flame until the tempering is mixed well. Switch off flame.

Serve hot with chettinadu sambar :)


Print this Post

Continue Reading >>

Friday, July 27, 2012

Idli upma/Thalicha Idli/Mildly Spiced Idli crumbs

I don't make this as often as I would like to. Somehow I make idly upma only when my idlis are a few hours old and need to be finished. This is one of the yummy and preferred breakfast or snack at my place. Don't worry when your idlis are either hard or a day old, go ahead and try this. :)

Idli Upma


Ingredients

Serves - 2
Spice Level - Moderately Spicy
Prep time - 5 min
Cook time - 5 min


Idlis - 10
Onion - 1 , chopped finely
Curry leaves - 1 Sprig
Dry red chilli - 2
Mustard - 1 Tsp
Urad dal - 1 Tsp
Hing - 1/2 Tsp
Jeera/Cumin - 1 Tsp
Oil - 1 Tbsp
Salt - as per need.


How do you do it

Crumble the idlis completely using your hand or the food processor with a few quick pulses.Keep aside. Heat oil in a kadai. Add hing,mustard - let it splutter, add jeera, urad dal, let them roast to a brown. Break the red chillies and drop them into the kadai along with curry leaves. Toss in the chopped onions now and saute till they become translucent. Add the crumbled idli , little salt [ remember idlis already have salt in them, so be cautious] and wrap well with the tempering.Stir well for a couple of minutes and you are done.

Sprinkle some idli podi / gun powder on top while serving. Yum! :)


Print this Post

Continue Reading >>

Wednesday, May 16, 2012

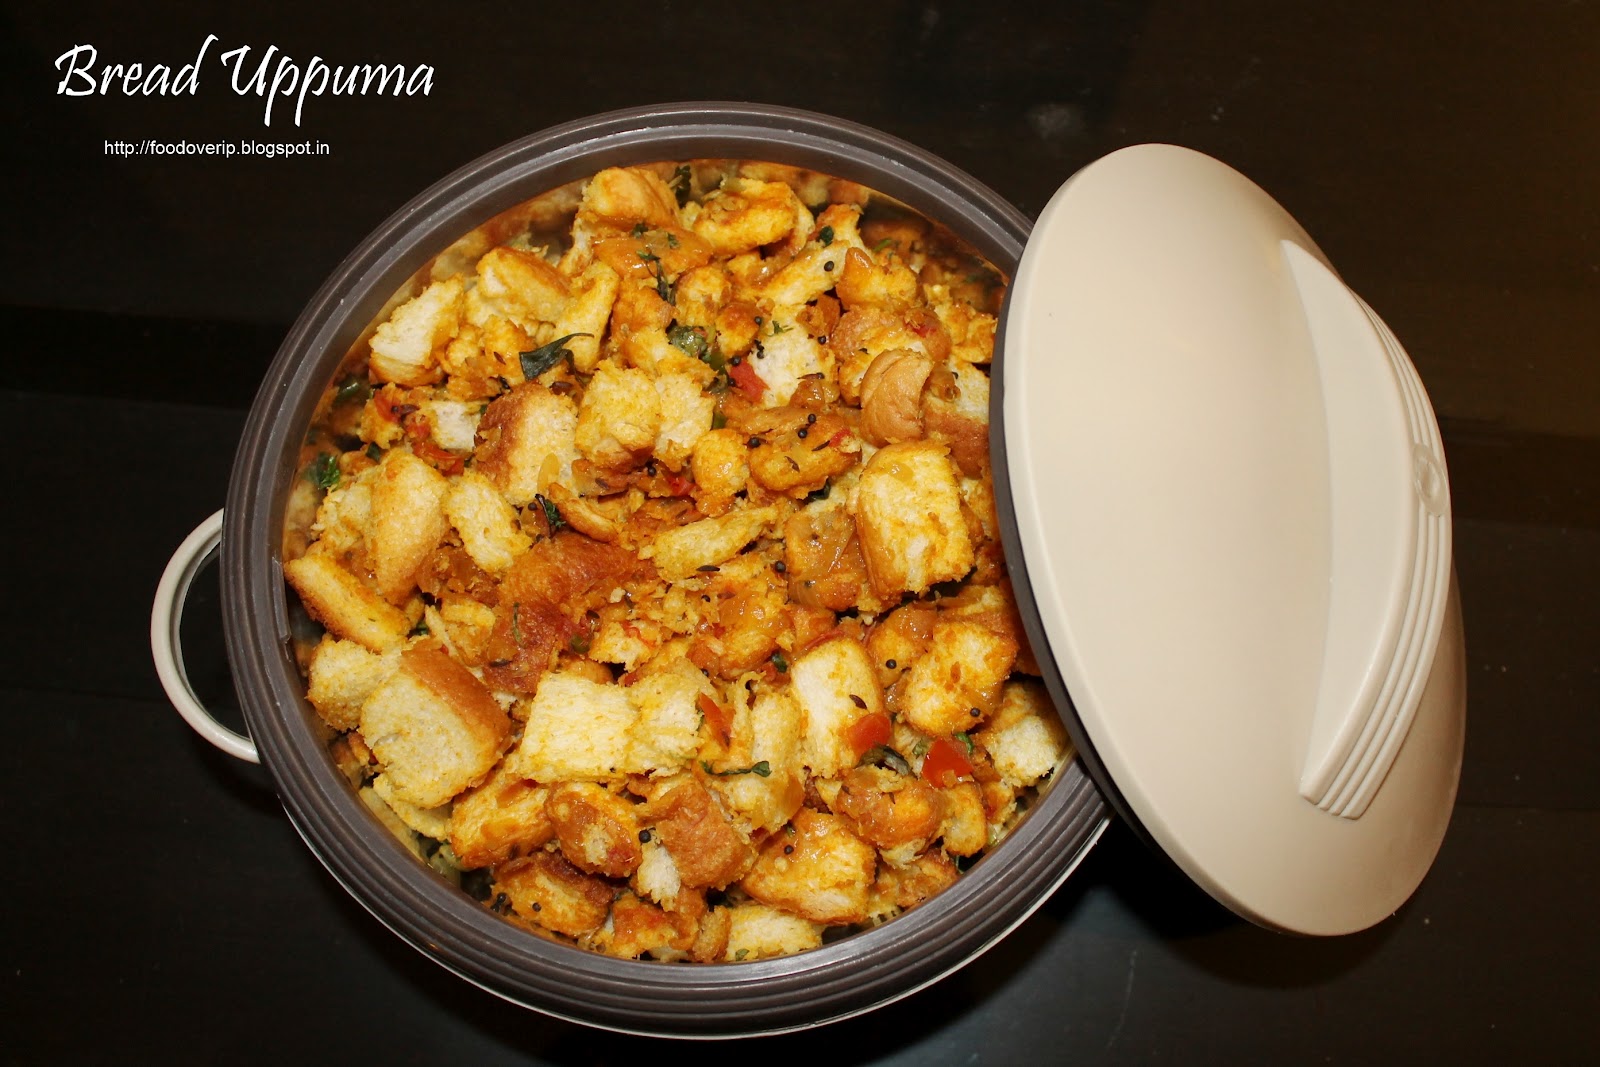
Bread Upma

I had a packet of bread that had to be finished or it would get expired by then. So ended up making bread upma for dinner :). Easy one this is , ideal for breakfast though :).

Bread Upma


Ingredients

Serves - 2
Spice Level - Moderately Spicy


Bread slices - 10, cut into small squares
Onion - 2 Large , chopped finely
Tomato - 1 + 1/2, chopped
Green chilli - 4, chopped finely
curry leaves - 2 sprig
Ginger-garlic paste - 1 Tsp
Curry/chilli powder - 2 Tbspn
Turmeric - 1/2 Tspn
Salt - as per taste

Oil - 2 Tbspn
Mustard - 1 Tspn
Jeera - 1 Tspn


Method

Heat oil in a kadai. Add in mustard, let it splutter, add jeera - let it roast. Add curry leaves, chopped onion, green chilli, ginger-garlic paste and saute well until onions turn a shade of glossy pink. Add in tomato pieces, salt, and turmeric and saute it till the tomato pieces are cooked mad mashed well.Add the chilli powder now, and saute till the raw smell of powder vanishes. Add about 2 Tbs of water to the masala mix and  stir well. Add in the bread pieces now and mix well with the masala. Make sure all the bread pieces are wrapped well with the spices.Taste and see if more salt is required and add accordingly.Mix in the chopped coriander leaves, saute for a couple of more minutes. Switch off flame.

Serve this bread upma with a glass of orange juice for breakfast or as an evening snack. :)


Print this Post

Continue Reading >>
Related Posts Plugin for WordPress, Blogger...

A la carte!

Along with idli/dosai (13) Along with rice (32) Along with rotis (21) asparagus (1) baby potatoes (4) bajji (1) baking (9) banana (1) basil (1) basmati (2) beans (1) beetroot (5) bhindi (3) biryani (1) Black eyed beans (2) blueberry (1) bok choy (1) bottle gourd (1) bread (3) breakfast (4) brinjal (4) brocolli (1) buttermilk (1) butternut-squash (1) cabbage (2) cakes (7) carrot (1) carrots (3) cashews (1) cauliflower (8) cheescake (2) chettinadu (24) chettinadu delicacy (23) Chicken (7) chilli (1) Chineese (3) chinese (1) chocolate (1) chole (2) chutney (6) coconut (5) coconut milk (1) coriander (4) corn (1) cow-peas (1) cream-cheese (2) curry leaves (1) dal (3) dates (1) desserts (14) diwali 2013 (1) dosai (1) drink (1) drumstick (2) dry field bean (1) Easy (44) egg (3) fenugreek (1) fish (1) Food and Travel review (1) garlic (9) ginger (1) gobi (1) green gram (1) How To (5) Indian Flat Breads (4) indian sweets (3) International (5) ivy gourd (2) jeera (3) kootu (1) kovakkai (1) lemon (3) lentils (11) lobia (1) malai (1) mango (2) masoor dal (1) Methi (2) mint (2) mix veg (9) mochai (1) moong dal (4) mushroom (10) mutton (1) non-veg (2) onion (2) orange (1) paneer (11) parathas (1) pasta (2) peas (7) pepper (1) pickles (1) plantain (1) poriyal (1) potato (14) potatoes (2) quinoa (1) Rajma (1) rasam (1) rice flour (1) rosemary (2) shallots (1) snack (18) soup (7) soy chunks (1) spinach (6) stir-fry (1) strawberry (1) sweet potatoes (1) tamarind (5) tomato (7) toor dal (1) val bean (1) Variety Rice (13) walnut (1) wheat (2) yoghurt (1) yuuum!! (1) zucchini (2)

Latest on Food Over IP

Copyrights

All rights reserved @2012.

Unless otherwise mentioned, the text and images included in FoodOverIP blog belongs to the author. The blog author’s permission is required before any content is reproduced in any form.

  © Blogger templates The Professional Template by Ourblogtemplates.com 2008

Back to TOP  

Blogging tips