First up I am dedicating this post to my family. To the people who would just about do anything to see me happy.
Welcome to my 50th post. :) Yahoo! Finally!. When S started a sample blog for me, he never did think I would go beyond a few posts. But to his surprise and mine, I have taken this seriously and have been dedicating enough time to contribute to this blog and I am loving it :). These days the crockery section in showrooms interest me more than the clothes/accessories section. ;)
I also thank the few food bloggers who visit my page regularly and leave comments.It feels good when fellow bloggers appreciate the work and it is good motivation for me to continue posting.Thanks a ton guys.
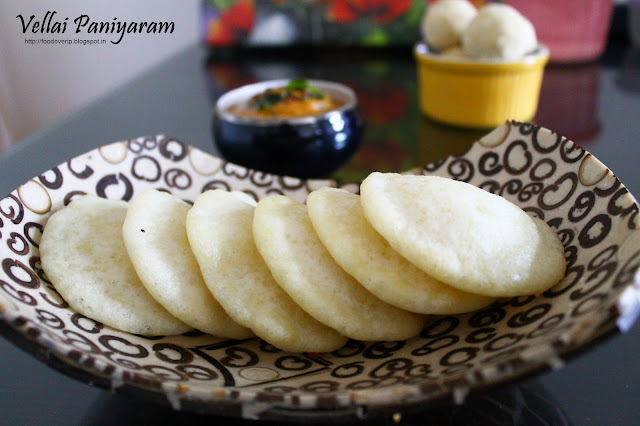
This being my 50th post I wanted it to be something special. So it has to be some kind of paniyaram , which is my absolute favorite. Vellai Paniyaram is a chettinadu delicacy made by deep frying the batter ---made by grinding urad dal and raw rice together. It is served as a savory item to satisfy your 4pm hunger cravings :). You can have this along with milagai chutney, Idli podi or just eat it plain . My mom was staying with me for a good couple of weeks in Mumbai and it was super awesome.So we she made this for S and me in Mumbai.This recipe is a little tricky as you need to make adjustments after seeing how the paniyaram turns out and after a few trails , you will get the right mix for the paniyaram batter.
Vellai paniyaram
Ingredients
Recipe Source - My mom
Serves - Makes about 20 Paniyarams
Prep Time - 2.5 hours
Cook time - 1 hr
Raw Rice - 1 cup [not heaped , measure it flat on the cup]
Urad dal - 1/4 cup or a fistful of dal. [Oru pudi]
Salt - to taste
Oil - for deep frying
For Adjustments
Milk - as per need [max 1/4 cup needed]
Idli Batter - as per need [max 1/3 cup needed]
Method
Soak the rice and dal together in water for 2 hours and not more. Drain the water from the soaked rice-dal and keep aside and use little by little for grinding. Grind the dal and rice together in your mixer to a smooth paste, the consistency of the batter should neither be as thick as idli batter nor as thin as dosa batter. The consistency needs to be in between the two. So while grinding, be careful of the amount of water your are adding.
Add salt to the ground batter and keep aside.
Heat oil in a flat kadai. The temperature of the oil must be medium, so that the paniyaram gets cooked inside as well.Take a small ladle full of batter and drop it into oil. The paniyaram will puff up and come above in a few seconds. Within a minute turn it upside down and allow it to cook for 1 more minute and remove it from oil.Drain on tissue paper.It shouldn't take more than a minute or 2 to get the paniyaram done.The paniyarams will be a little thick in the middle and thin around the edges.
Now taste the paniyaram. The correct texture of these paniyarams are such that they are slightly thick in the middle. If you feel that it is too thick, then add about 2 tbsp of milk, on the other hand if you feel that it is not soft enough then add 4-5 tbsp of idli batter. After making the adjustments, try making the paniyarams again. Repeat the process until you reach the correct thickness and softness.
With the above measurements of rice and dal, we had to add milk + idli batter 3 times.So make the paniyaram one by one, taste it, add milk [2 Tbsp] and idli batter [4-5 Tbsp] each at a time, and stop when you think the density and softness of the paniyaram is apt. Then you can continue making the rest of the paniyarams with the proper batter.
Serve warm with
milagai chutney
Notes
1. Recipes of idli batter and dosa batter will soon be up. :)
2. If you are worried batter might become runny after addition of milk only since you feel the paniyaram is thick, then add idli batter to correct the consistency. With the above measurements i had to add idli batter and milk , 3 times, so my batter was of the right consistency.
3. Do not add more than 1/4 cup urad dal. If you add more urad dal, the paniyarams will drink oil and you may have to add rice flour to correct it.
Print this Post
Continue Reading >>




 Posts
Posts

